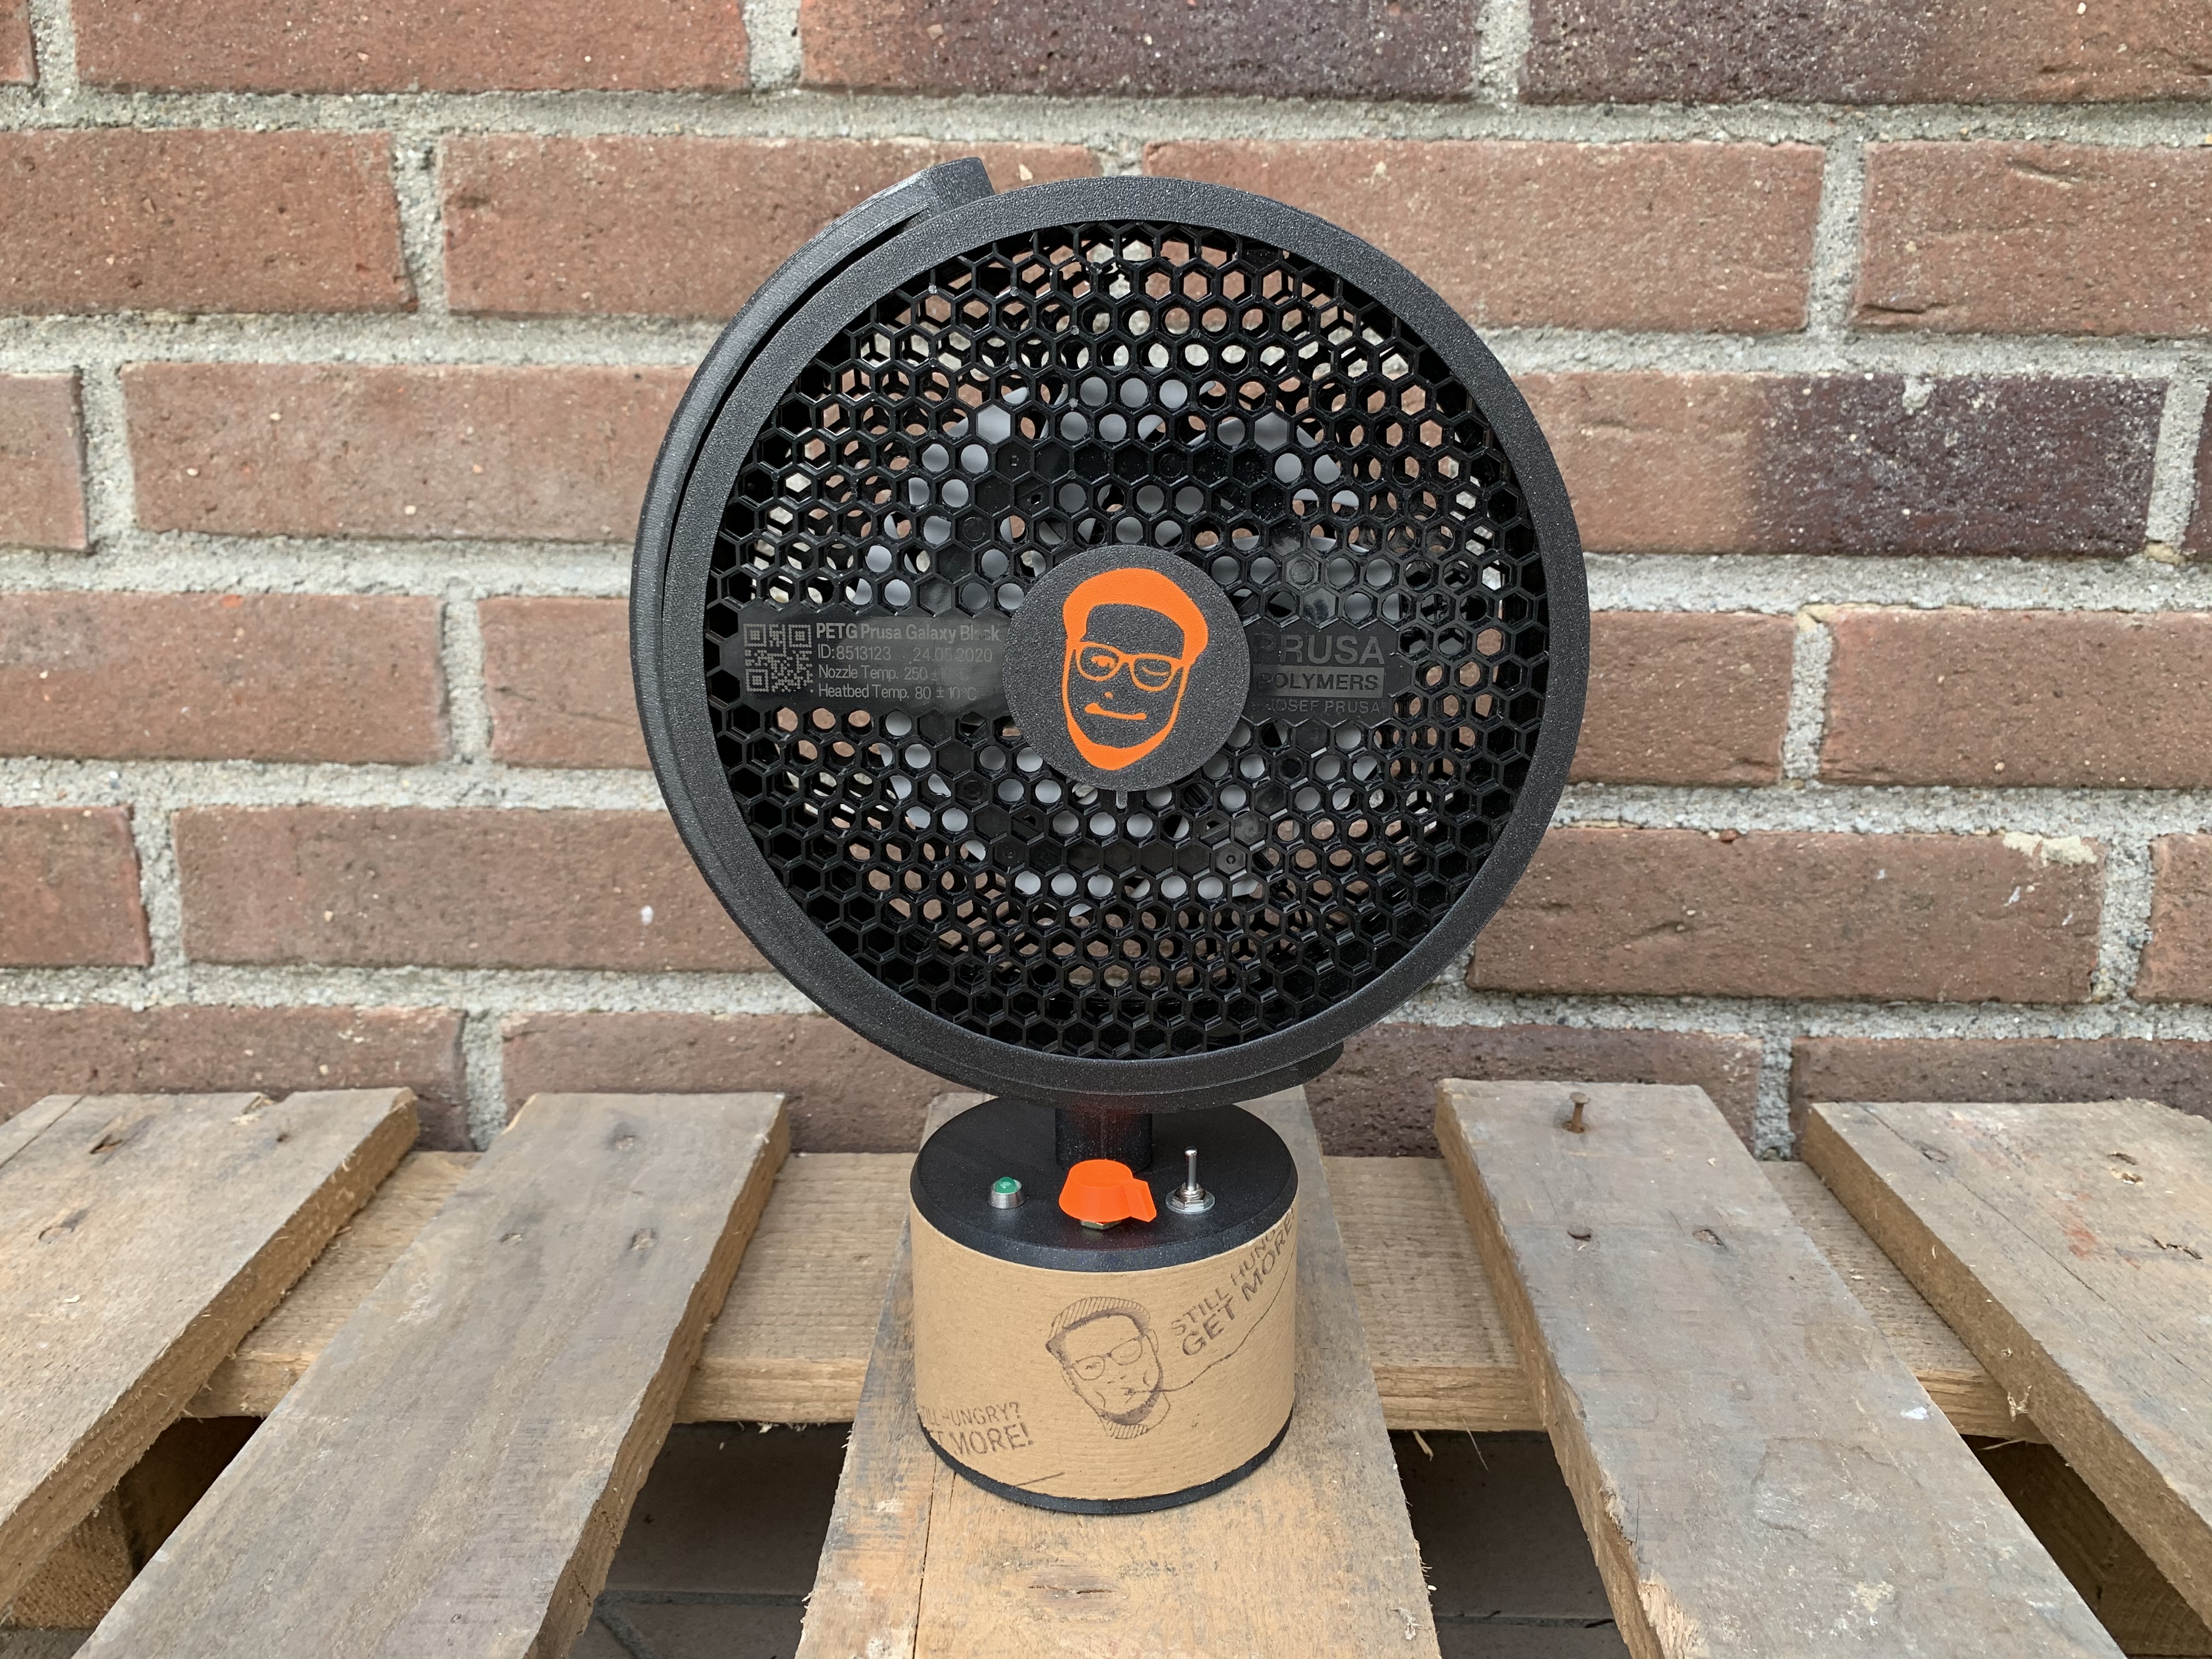
PRUSAVENT - Upcycled Desk Cooling Fan
prusaprinters
<p>Keep yourself cool in summer with the help of <i>PRUSAVENT</i>!</p><p>The next heatwave is coming, you'd better be prepared! <i>PRUSAVENT</i> is an upcycled Desk Cooling Fan which reuses all parts of an empty Prusament spool. Oh, you're also having a 140mm computer case fan laying around? Let's build a <i>PRUSAVENT</i> then!</p><p> </p><h3>Video</h3><figure class="media"><oembed url="https://www.youtube.com/embed/dAJV8f-aCGs"></oembed></figure><h3><br>Materials you'll need</h3><ul><li>Empty Prusament spool</li><li>140mm Computer Case Fan (with high air flow rate m³/hr - the higher the better)</li><li>Toggle Flip Switch [Buy at <a href="https://www.reichelt.de/kippschalter-10a-125vac-2x-ein-ein-ms-168-p13142.html?&nbc=1">Reichelt DE</a>]</li><li>Potentiometer for Fan Speed Control</li><li>DC PWM Speed Controller* [Buy at <a href="https://www.aliexpress.com/item/32983495011.html">AliExpress</a>]</li><li>LED Installation Socket [Buy at <a href="https://www.reichelt.de/einbaufassung-fuer-5-mm-leds-innenreflektor-chrom-ebf-i-5-p7294.html?&nbc=1">Reichelt DE</a>]</li><li>LED 5mm with Resistor [Buy at <a href="https://www.reichelt.de/leds-5-mm-c3019.html?&nbc=1">Reichelt DE</a>]</li><li>DC Jack [Buy at <a href="https://www.reichelt.de/einbaubuchse-aussen-5-7-mm-innen-2-1-mm-dc-ebu-072881-p202903.html?&nbc=1">Reichelt DE</a>]</li><li>Power Supply with DC Plug [Buy at <a href="https://www.amazon.de/dp/B07KZFB3GY/">Amazon DE</a> | <a href="https://www.amazon.com/dp/B07VQHYGRD/">Amazon US</a>]</li><li>2 Pcs. M3x18mm Bolts</li><li>6 Pcs. M3x10mm Lens Head Bolts</li><li>8 Pcs. M3 Washer</li><li>Glue (I've used 2K Epoxy Adhesive)</li></ul><p>* I highly recommend using a pwm speed controller instead of a potentiometer. By setting the potentiometer to the lowest value (max. resistance) it will produce a lot of heat inside the cardboard barrel. It will even likely kill the potentiometer after some time. Thanks to Josef Prusa and Mikolas Zuza for pointing this out!</p><p> </p><h3>How to build it</h3><p><strong>Step 1:</strong> Disassemble the Prusament spool, cut off the outer ring (the one which was holding the cardboard barrel) of the spool side. Drill out all tiny hexagons with a 6mm drill to maximize airflow. The picture below shows a before-after comparison, you'll need to do it with both sides of the spool.</p><figure class="image"><img src="https://media.printables.com/media/prints/36521/rich_content/32afbc5c-5e49-472c-8705-cedcdd5e8214/step1.jpg#%7B%22uuid%22%3A%22905336e2-1c8d-4c85-ba9c-ef873be1b3bf%22%2C%22w%22%3A872%2C%22h%22%3A654%7D"></figure><p><strong>Step 2:</strong> Cut off the fan housing like shown in the picture. You won't need it and it will save weight. Keep the arm with the cable inside at max. length, it will protect the cable from the fan blades.</p><figure class="image"><img src="https://media.printables.com/media/prints/36521/rich_content/c08dcaed-08c6-431e-adbe-2c97c5234b1b/step2.jpg#%7B%22uuid%22%3A%22802ba56f-e65b-43c7-8277-d660404314b4%22%2C%22w%22%3A872%2C%22h%22%3A654%7D"></figure><p><strong>Step 3:</strong> Place the front guard cover inside a Prusament spool side and glue the fan to the back.</p><figure class="image"><img src="https://media.printables.com/media/prints/36521/rich_content/8fcea4b0-0d71-424c-9c18-80608ed90b2c/step3.jpg#%7B%22uuid%22%3A%2211a24071-8c86-47dc-90a4-5d38ab83be27%22%2C%22w%22%3A872%2C%22h%22%3A654%7D"></figure><p><strong>Step 4:</strong> Place the back guard cover inside the other Prusament spool side and attach it with the clamp ring and two M3x10mm bolts. You should use lens head bolts since there is not much space inside the casing. If you don't have lens head bolts glue the back guard cover to the spool and ignore the clamp ring.</p><figure class="image"><img src="https://media.printables.com/media/prints/36521/rich_content/05c02e9b-a6c3-4aa5-bb23-6c610179c9ca/step4.jpg#%7B%22uuid%22%3A%22206b130c-e847-45ef-a775-ba2a043fb49f%22%2C%22w%22%3A872%2C%22h%22%3A654%7D"></figure><p><strong>Step 5:</strong> Glue both Prusament spool sides into the casings.</p><figure class="image"><img src="https://media.printables.com/media/prints/36521/rich_content/4aed1fae-f93b-492b-ba99-bd8d096bd131/step5.jpg#%7B%22uuid%22%3A%22a3a39dc7-d215-49f1-ae3b-ef3a6de74774%22%2C%22w%22%3A872%2C%22h%22%3A654%7D"></figure><p><strong>Step 6:</strong> Solder the electronic components like shown in the pictures and install them in the top part of the base. Attach the arm to the base with two M3x18mm bolts.</p><figure class="image"><img src="https://media.printables.com/media/prints/36521/rich_content/2bb13408-2a3b-4db3-ac98-9cdefa06db3b/step6.jpg#%7B%22uuid%22%3A%22f3f0a150-87d7-49e7-a49e-a08bd5927c7e%22%2C%22w%22%3A872%2C%22h%22%3A953%7D"></figure><figure class="image"><img src="https://media.printables.com/media/prints/36521/rich_content/29b56e5b-8b60-4b48-b246-10d060821ec2/step6b.jpg#%7B%22uuid%22%3A%2251ae1cbd-27ea-46e4-b69a-968a83045344%22%2C%22w%22%3A872%2C%22h%22%3A654%7D"></figure><figure class="image"><img src="https://media.printables.com/media/prints/36521/rich_content/920cb3ef-30c8-4672-97d3-0a73121f335b/step6c.jpg#%7B%22uuid%22%3A%225aa26d49-9f4b-408c-9c10-40c265747322%22%2C%22w%22%3A654%2C%22h%22%3A872%7D"></figure><p><strong>Step 7:</strong> Make a cutout for the DC jack in the cardboard barrel and install the DC jack to the bottom part of the base.</p><figure class="image"><img src="https://media.printables.com/media/prints/36521/rich_content/ad0fe645-d26a-40b9-a65e-95c5064494b9/step7.jpg#%7B%22uuid%22%3A%22435a4d84-0431-42db-8953-e357812bd6ec%22%2C%22w%22%3A872%2C%22h%22%3A654%7D"></figure><p><strong>Step 8:</strong> Attach the front fan casing to the arm by bending the arm slightly. Guide the fan cable through the arm into the base, connect the fan to the electronic components.</p><figure class="image"><img src="https://media.printables.com/media/prints/36521/rich_content/e03d7150-ae82-4093-a944-8685a2a4c38d/step8.jpg#%7B%22uuid%22%3A%220bef3f90-2c1f-47a7-992a-226fbb9084bb%22%2C%22w%22%3A872%2C%22h%22%3A654%7D"></figure><p><strong>Step 9:</strong> Place the back fan casing on the front fan casing and attach it with four M3x10mm bolts. You may have to redrill the holes, depends on the orientation of the spool inside the casing.</p><figure class="image"><img src="https://media.printables.com/media/prints/36521/rich_content/942afdfd-a5f6-4358-a1a5-c5b5d1e858a6/step9.jpg#%7B%22uuid%22%3A%225cbd43fd-f0ec-4fdc-8ab6-e5f16c678f1e%22%2C%22w%22%3A872%2C%22h%22%3A654%7D"></figure><p><strong>Step 10:</strong> Assemble the knob (feels familiar, right?) and you have just finished your build! :)</p><figure class="image"><img src="https://media.printables.com/media/prints/36521/rich_content/fa84ba6c-73a5-4872-92da-e0365950d636/step10.jpg#%7B%22uuid%22%3A%222a10d3ab-d2e9-4789-b862-ff65083cecb6%22%2C%22w%22%3A872%2C%22h%22%3A654%7D"></figure><p> </p><h3>Modification Ideas</h3><ul><li>Place a battery or a small power bank inside the base and convert it into a portable fan</li><li>Use an Arduino or a Raspberry Pi to control the fan</li></ul><p> </p><h3>Updates</h3><ul><li><strong>2020-08-20</strong> Updated the list of materials.</li></ul><h3> </h3><h3>Print instructions</h3><p>G-code files provided are sliced for a MK3S and Prusament PETG. The parts in the photos above are printed with <a href="https://shop.prusa3d.com/de/prusament/1006-prusament-petg-prusa-galaxy-black-1kg.html">Prusament PETG Galaxy Black</a>.</p><p><i>Guard_Cover_Front_MULTICOLOR_0.2mm_PETG_MK3S_1h11m.gcode</i> will print a dual color front cover without the need of a MMU. Start printing with the color of the inlay, there will be three manual filament changes during the print (in the first three layers).</p><p>If you don't want a dual color front cover use <i>Guard_Cover_Front_SINGLECOLOR_0.2mm_PETG_MK3S_1h4m.gcode</i> instead.</p><p>I've used the following print settings (0.20mm QUALITY):</p><figure class="table"><table><tbody><tr><th>Part</th><th>Top/ Bottom Layers</th><th>Perimeters</th><th>Infill</th><th>Supports</th></tr><tr><th>PRUSAVENT_Guard_Cover_Front.stl</th><th>5/4</th><th>2</th><th>15%</th><th>No</th></tr><tr><th>PRUSAVENT_Guard_Cover_Back.stl</th><th>5/4</th><th>2</th><th>15%</th><th>No</th></tr><tr><th>PRUSAVENT_Guard_Cover_Clamp_ Ring.stl</th><th>5/4</th><th>2</th><th>15%</th><th>No</th></tr><tr><th>PRUSAVENT_Guard_Casing_Front.stl</th><th>5/4</th><th>2</th><th>15%</th><th>No</th></tr><tr><th>PRUSAVENT_Guard_Casing_Back.stl</th><th>5/4</th><th>2</th><th>15%</th><th>No</th></tr><tr><th>PRUSAVENT_Arm.stl</th><th>5/4</th><th>4</th><th>25%</th><th>Yes, build plate only</th></tr><tr><th>PRUSAVENT_Base_Top.stl</th><th>5/4</th><th>2</th><th>15%</th><th>No</th></tr><tr><th>PRUSAVENT_Base_Bottom.stl</th><th>5/4</th><th>2</th><th>15%</th><th>No</th></tr><tr><th>PRUSAVENT_LCD_Knob.stl</th><th>5/4</th><th>2</th><th>15%</th><th>No</th></tr></tbody></table></figure>
With this file you will be able to print PRUSAVENT - Upcycled Desk Cooling Fan with your 3D printer. Click on the button and save the file on your computer to work, edit or customize your design. You can also find more 3D designs for printers on PRUSAVENT - Upcycled Desk Cooling Fan.