PRUSAi3 LCD COVER ASSY "MK3S STYLE" FOR REPRAP DISCOUNT FULL GRAPHIC SMART CONTROLLER
prusaprinters
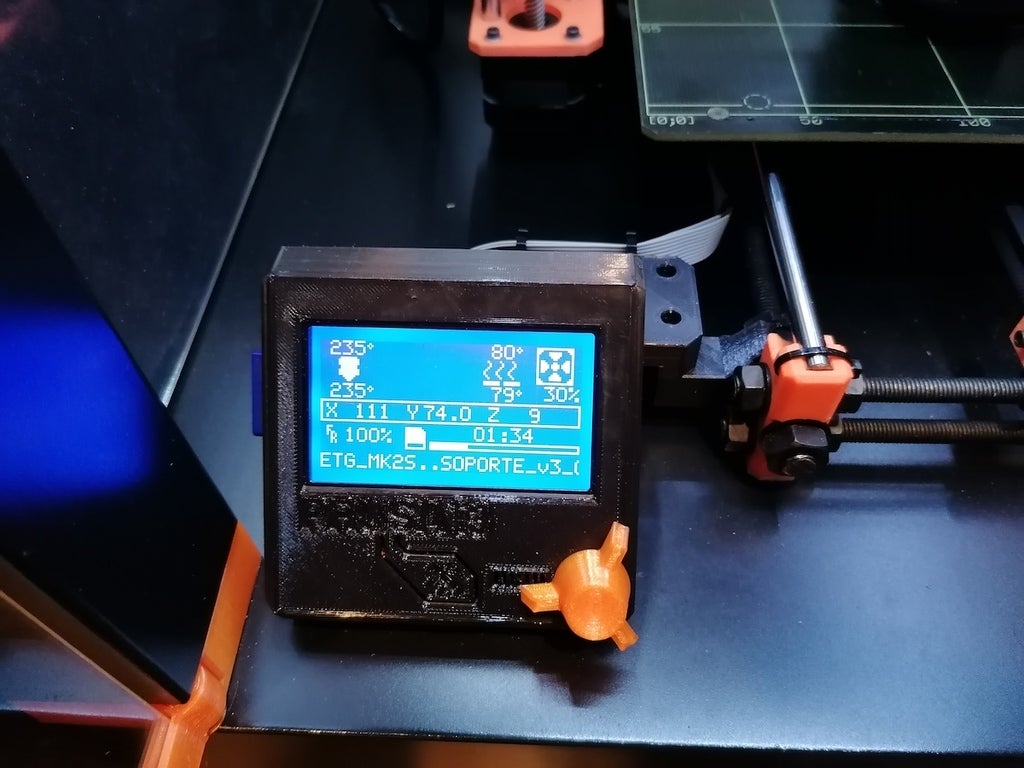
<p>I never found a proper cover for my RepRap Discount Full Graphic LCD controller to finish my Prusa i3 DIY. While waiting for my new Prusa Mini+ I decided to make my own version of the Original Prusa MK3S LCD Cover. I have my printer inside an "Ikea Lack" enclosure so putting the LCD in the front position was not an option. I have moved the controller to the left side of the printer.</p> <p>I have modified the original parts for MK3S LCD Cover, MK3S Supports and MK2S Knob (modified SCAD files included). I have also created a complete new bracket to fit the LCD Assy to the MK2S Y-Axis design of my printer (also SCAD file is included).</p> <p>The design uses some original prusa MK2S parts as well (6xLCD-Cable-Clip and 1xPSU-Y Part).</p> <p>Thanks to Prusa Research for open source design of Original Parts!!!</p> <h3>Print instructions</h3><p><p class="detail-setting Printing Settings"><strong>Printing Settings </strong></p> <p><p class="detail-setting Rafts"><strong>Rafts: </strong> <div><p>No</p></div></div></p> <p><p class="detail-setting supports"><strong>Supports: </strong> <div><p>No</p></div></div></p> <p><p class="detail-setting Resolution"><strong>Resolution: </strong> <div><p>0.2 </p></div></div></p> <p><p class="detail-setting infill"><strong>Infill: </strong> <div><p>15%</p></div></div></p> <p><p class="detail-setting Filament:"><strong>Filament: </strong> <div><p>Black, Translucid Orange </p></div></div></p> <p><br/> <p class="detail-setting notes"><strong>Notes: </strong></p> <p></p><div><p>ASSEMBLY INTRUCTIONS:<br/></p> <p>You will also need:<br/> 6 x M3x10 screws<br/> 4 x M3 square nuts<br/> 2 x M3x25 screws<br/> 2 x M3 nuts</p> <p>0.- Fit PSU-Y Part on Front-Left Y-Corner of the MK2S Y-Axis (you have to dissasembly part of Y-Axis for this. Follow assembly nstructions available at www.prusa3d.com for this). I reccomend to fit the 2 x M3 nuts now below the part as later might be difficult.</p> <p>1.- Remove embeded supports for clip and sd opening printed with the LCD cover .</p> <p>2.- Fit supports LCD supports A&B on LCD controller (same as for MK2S-MK3S cover)</p> <p>3.- Fit assembly on LCD cover and fix with 2 x M3x10 screws.(same as for MK2S-MK3S cover)</p> <p>4.- Fit 4 x M3 square nuts on LCD supports and fix LCD Assy Bracket with 4 x M3x10 screws</p> <p>5.- Connect and route lcd cable connectors on bracket as indicated (Use 2 x LCD-Cable-Clips on bracket)</p> <p>6.- Fix LCD Assy Bracket to PSU-Y Part with.</p> <p>7.- Route LCD cable along the M10 rod to your control board using the original LCD-Cable-Clips. I used 4 clips here).</p> <p>8.- Fit Knob to controller.</p> <p>9.- You are finish! Enjoy!</p> <p>10.- Any comment, question or doubt please ask!</p> <p>Note: If you have added any kind of felt, foam or dumper to the Y-Corners of your Y-Axis you will need to add the same thickness (i.e same felt) to the LCD supports.</p> <h3>Post-Printing</h3> <p>Remove embeded supports for clip and sd opening printed with the LCD cover .</p></div></p></p></p></p></p></p></p></p>
With this file you will be able to print PRUSAi3 LCD COVER ASSY "MK3S STYLE" FOR REPRAP DISCOUNT FULL GRAPHIC SMART CONTROLLER with your 3D printer. Click on the button and save the file on your computer to work, edit or customize your design. You can also find more 3D designs for printers on PRUSAi3 LCD COVER ASSY "MK3S STYLE" FOR REPRAP DISCOUNT FULL GRAPHIC SMART CONTROLLER.