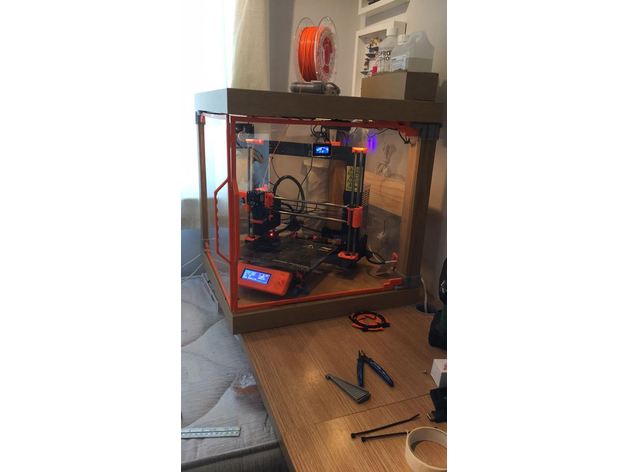
Prusa3d I3 Lack Enclosure
thingiverse
This is a hinged top enclosure that features two opening doors. Standard-sized table legs have been utilized but each component raises the height by 30mm, providing additional clearance for the printer's top. A variety of parts are included, and most should be relatively easy to assemble; however, feel free to ask if you need clarification. The design has been updated on February 26, 207, to include larger gapped corners with 3mm gaps suitable for glass instead of the original 2.5mm gaps. These modifications are marked as "_3mm" at the end of each file name. Print Settings: Printer: Prusa3d I3 Mk2 Rafts: No Supports: No Resolution: .2 Infill: 25% Custom Section: Printing - Assembly - General This design utilizes only three of the four legs that come with an IKEA Lack table. To assemble, you will need two tables and just three legs from one. You can certainly modify the design to your liking and raise it using the other legs if desired. Each leg consists of three parts: a leg base, a leg top, and a top plate that secures to the lid. The left and right lower legs feature a hole for a bearing with an outer diameter of 16mm and an inner hole of 5mm. The door hinges are designed to fit snugly within this middle hole of the bearing. A screw can be passed through the 2mm polycarbonate to secure it, or glue can be used if preferred. The door frames are simply clip-on edges that enhance the appearance of the polycarbonate. The door handles consist of two parts and were printed using ABS; acetone was applied to weld them together afterwards. The filament feed channel is somewhat flimsy when printed but is designed to fit together through the table top, featuring a small lip for easy gluing in place. The cable grommets print as a snug fit and can be screwed together or left clipped; they won't budge but have been made to allow screwing if necessary. The cable clips are identical in dimensions to the door frames and were used on top of the polycarbonate on the sides. They were also placed between the frame edges to manage cables, keeping the inside tidy.
With this file you will be able to print Prusa3d I3 Lack Enclosure with your 3D printer. Click on the button and save the file on your computer to work, edit or customize your design. You can also find more 3D designs for printers on Prusa3d I3 Lack Enclosure.
