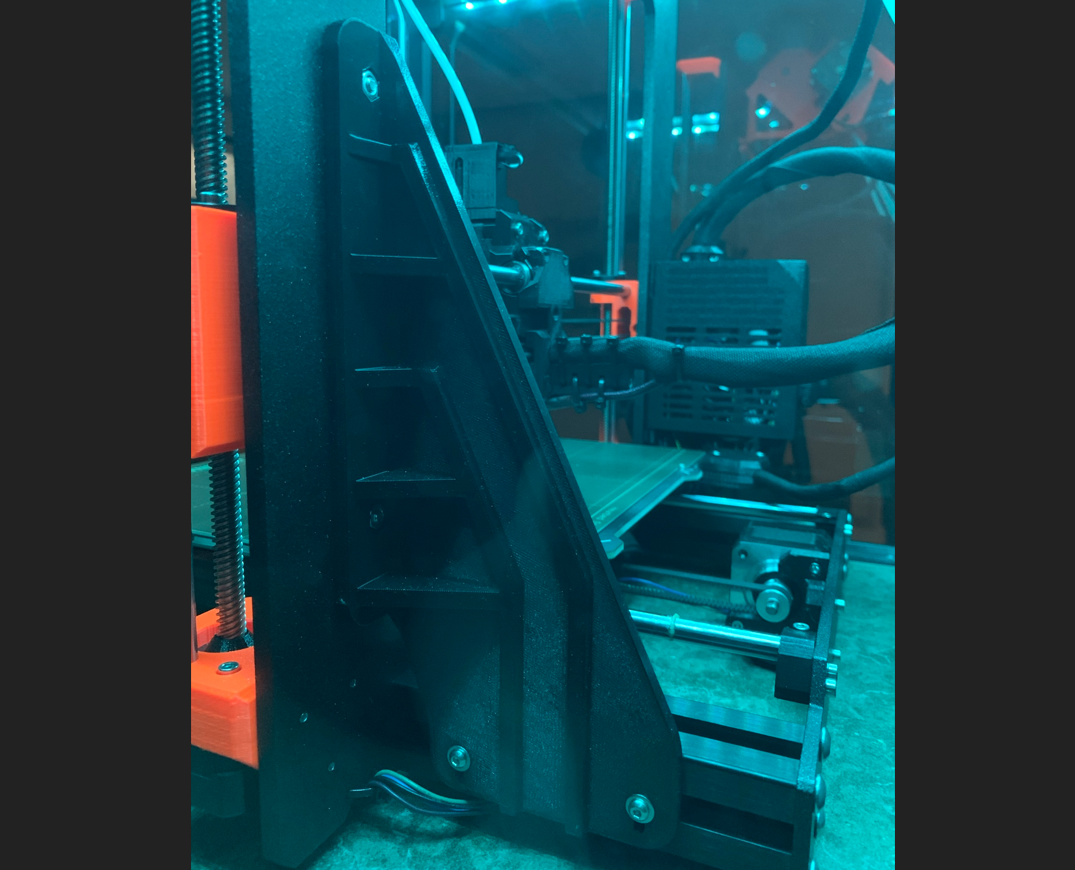
Prusa Mk3s PSU reinforced Bracket
prusaprinters
<p>Replacing the black PSU is easy.</p><h4>Installation of the bracket:</h4><h5>Parts you need:</h5><p>2x … M4 nuts</p><p>2x … M4x12mm screws</p><p>2x … M3 washers</p><p>2x … M3x10mm screws</p><p> </p><figure class="image image-style-align-left image_resized" style="width:50%;"><img src="https://media.prusaprinters.org/media/prints/75418/rich_content/bccf0766-cb5d-4093-9684-5f8e4c39e7dd/foto1.png#%7B%22uuid%22%3A%229a77fce3-ef3b-4a8b-90d6-b7f9bba32732%22%2C%22w%22%3A737%2C%22h%22%3A673%7D"></figure><p> </p><p>At first you have to insert 2 M4 nuts into the two hex holes on the vertical side of the bracket.</p><figure class="image image-style-align-left image_resized" style="width:50%;"><img src="https://media.prusaprinters.org/media/prints/75418/rich_content/0f29f497-863a-4785-9b68-9e1cd39e52d2/foto2.png#%7B%22uuid%22%3A%229e00b345-ec2c-4d6f-b68d-8111876aacaa%22%2C%22w%22%3A889%2C%22h%22%3A637%7D"></figure><p> </p><p> </p><p> </p><p> </p><p> </p><p> </p><p> </p><p> </p><p> </p><p> </p><p> </p><p> </p><p> </p><p> </p><p> </p><p>Secure the bracket to the frame with two M4x12mm screws. Finally secure the bottom part with two M3x10mm screws (don´t forget to use the two M3 washers).</p><p>Then the replacement should look like the following picture:</p><figure class="image image_resized" style="width:50%;"><img src="https://media.prusaprinters.org/media/prints/75418/rich_content/e030678e-b59c-4353-b903-d0c1d7c0a024/img_3012.jpeg#%7B%22uuid%22%3A%22000d6899-7330-42d7-8593-506766a6d3aa%22%2C%22w%22%3A1536%2C%22h%22%3A2048%7D"></figure><p>Have fun with this part!</p><h4>Print settings i used:</h4><p>PETG</p><p>0.4 nozzle</p><p>0.2 layer height</p><p>40% infill</p><p>wall line count 4</p>
With this file you will be able to print Prusa Mk3s PSU reinforced Bracket with your 3D printer. Click on the button and save the file on your computer to work, edit or customize your design. You can also find more 3D designs for printers on Prusa Mk3s PSU reinforced Bracket.
