Prusa MK3S Extruder Cooler - With Filament cooler!
thingiverse
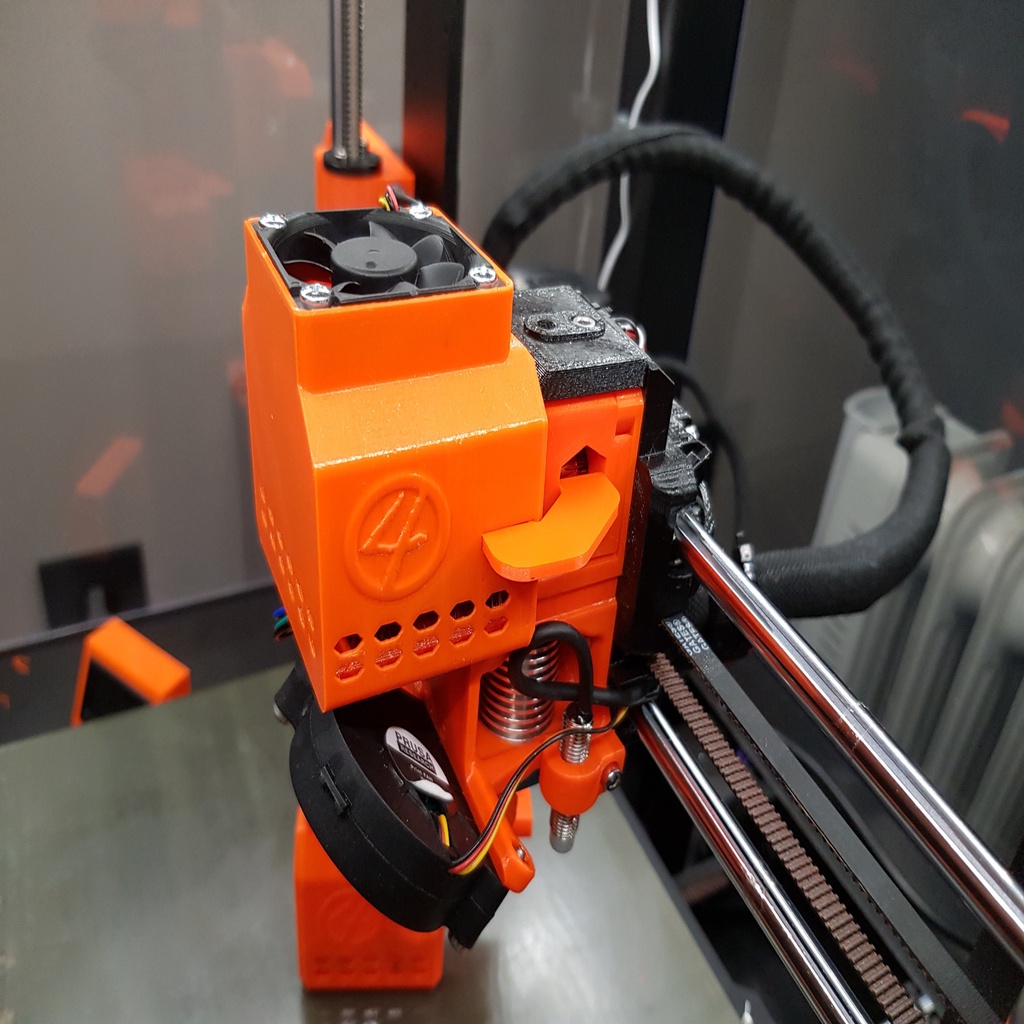
UPDATE!!! V3 is Here! Many have been asking for the MMU2S version of my cooler. This new version will fit all versions with normal Prusa steppers, requiring no adjustments to the extruder. Simply grab the new files and get started! I've also added a Filament cooler for the MMU2S, which is 2 mm shorter than the original. For those who don't like to slice, I've prepared a good working G-code for PETG. The 3FM file is included so you can edit it to your own settings. Happy printing! Hi, This upgrade was designed to cool the extruder motor, filament, and gears inside the body. It adds only 20 grams of filament and up to 10 grams from the Noctua fan. What You Need: 1x - 40x40x10 5V fan (Any brand will do; I chose a Noctua like those used for heat sinks.) 4x - Sockethead screw M3 x 10 (Maybe not needed.) Let's Assemble This! I've added some pictures to help if you get lost. Those who built their Prusa themselves will have an easy time with this. 1. Remove the old filament sensor cover by taking out the sockethead M3 on top and discarding the plate. 2. Clean up the part as desired, then slide it over the extrusion motor, being careful not to damage the wires. When in place, the holes on the filament sensor cover will align with the filament & screw hole. 3. Place the fan in the top socket (be careful with the cable!), set it to blow inward, and use the 4x M3x10 socketheads to carefully secure the fan. The fan fits snugly, so you can leave the screws out if desired. Then, place the wire behind the cable mount on the back of the cooler. 4. Loosen the heatsink fan (Noctua cooler on the side) to clear a path for the new cable, then feed it through and reassemble the Noctua fan. Be careful not to pinch any cables! 5. On the back of your printer, snap all 5 binders on the cable guide and loosen the 4 screws holding the cover plate in place. Remove the cover for the rail where all cables enter. Be gentle with the hot-end thermalcouples, as they are fragile. 6. Push the fan connector through the hole with other cables, then manage them together. Put back the cover plate to secure the cables. 7. Guide the fan cable through the sleeve and connect it to the EINSY board. If your cable is too short, extend it with a small cable and mark the red and black wires so they don't get swapped. 8. Inside the EINSY cover, examine your connector. If you have a 3-pin connector, cut off the yellow one (speed controller) and make the connector small enough to fit into the red and black connector in the port shown on the picture. 9. Ensure you don't mix up the 5V with the null cable. If you turn on the printer, it might damage the fan. These fans can't handle current from the other direction. Refer to my photos for guidance on which connector to use and what color goes where. The NULL (black) is at the top. 10. Switch on the printer to test if the fan spins. If not, shut it off immediately! Check all previous steps and try again. If the fan blows air out the top, turn it around. 11. Simply insert the filament cooler on the side (gently) and start printing.
With this file you will be able to print Prusa MK3S Extruder Cooler - With Filament cooler! with your 3D printer. Click on the button and save the file on your computer to work, edit or customize your design. You can also find more 3D designs for printers on Prusa MK3S Extruder Cooler - With Filament cooler!.