Prusa MK3s/2.5s/MMU2s Mosquito Hotend Extruder
prusaprinters
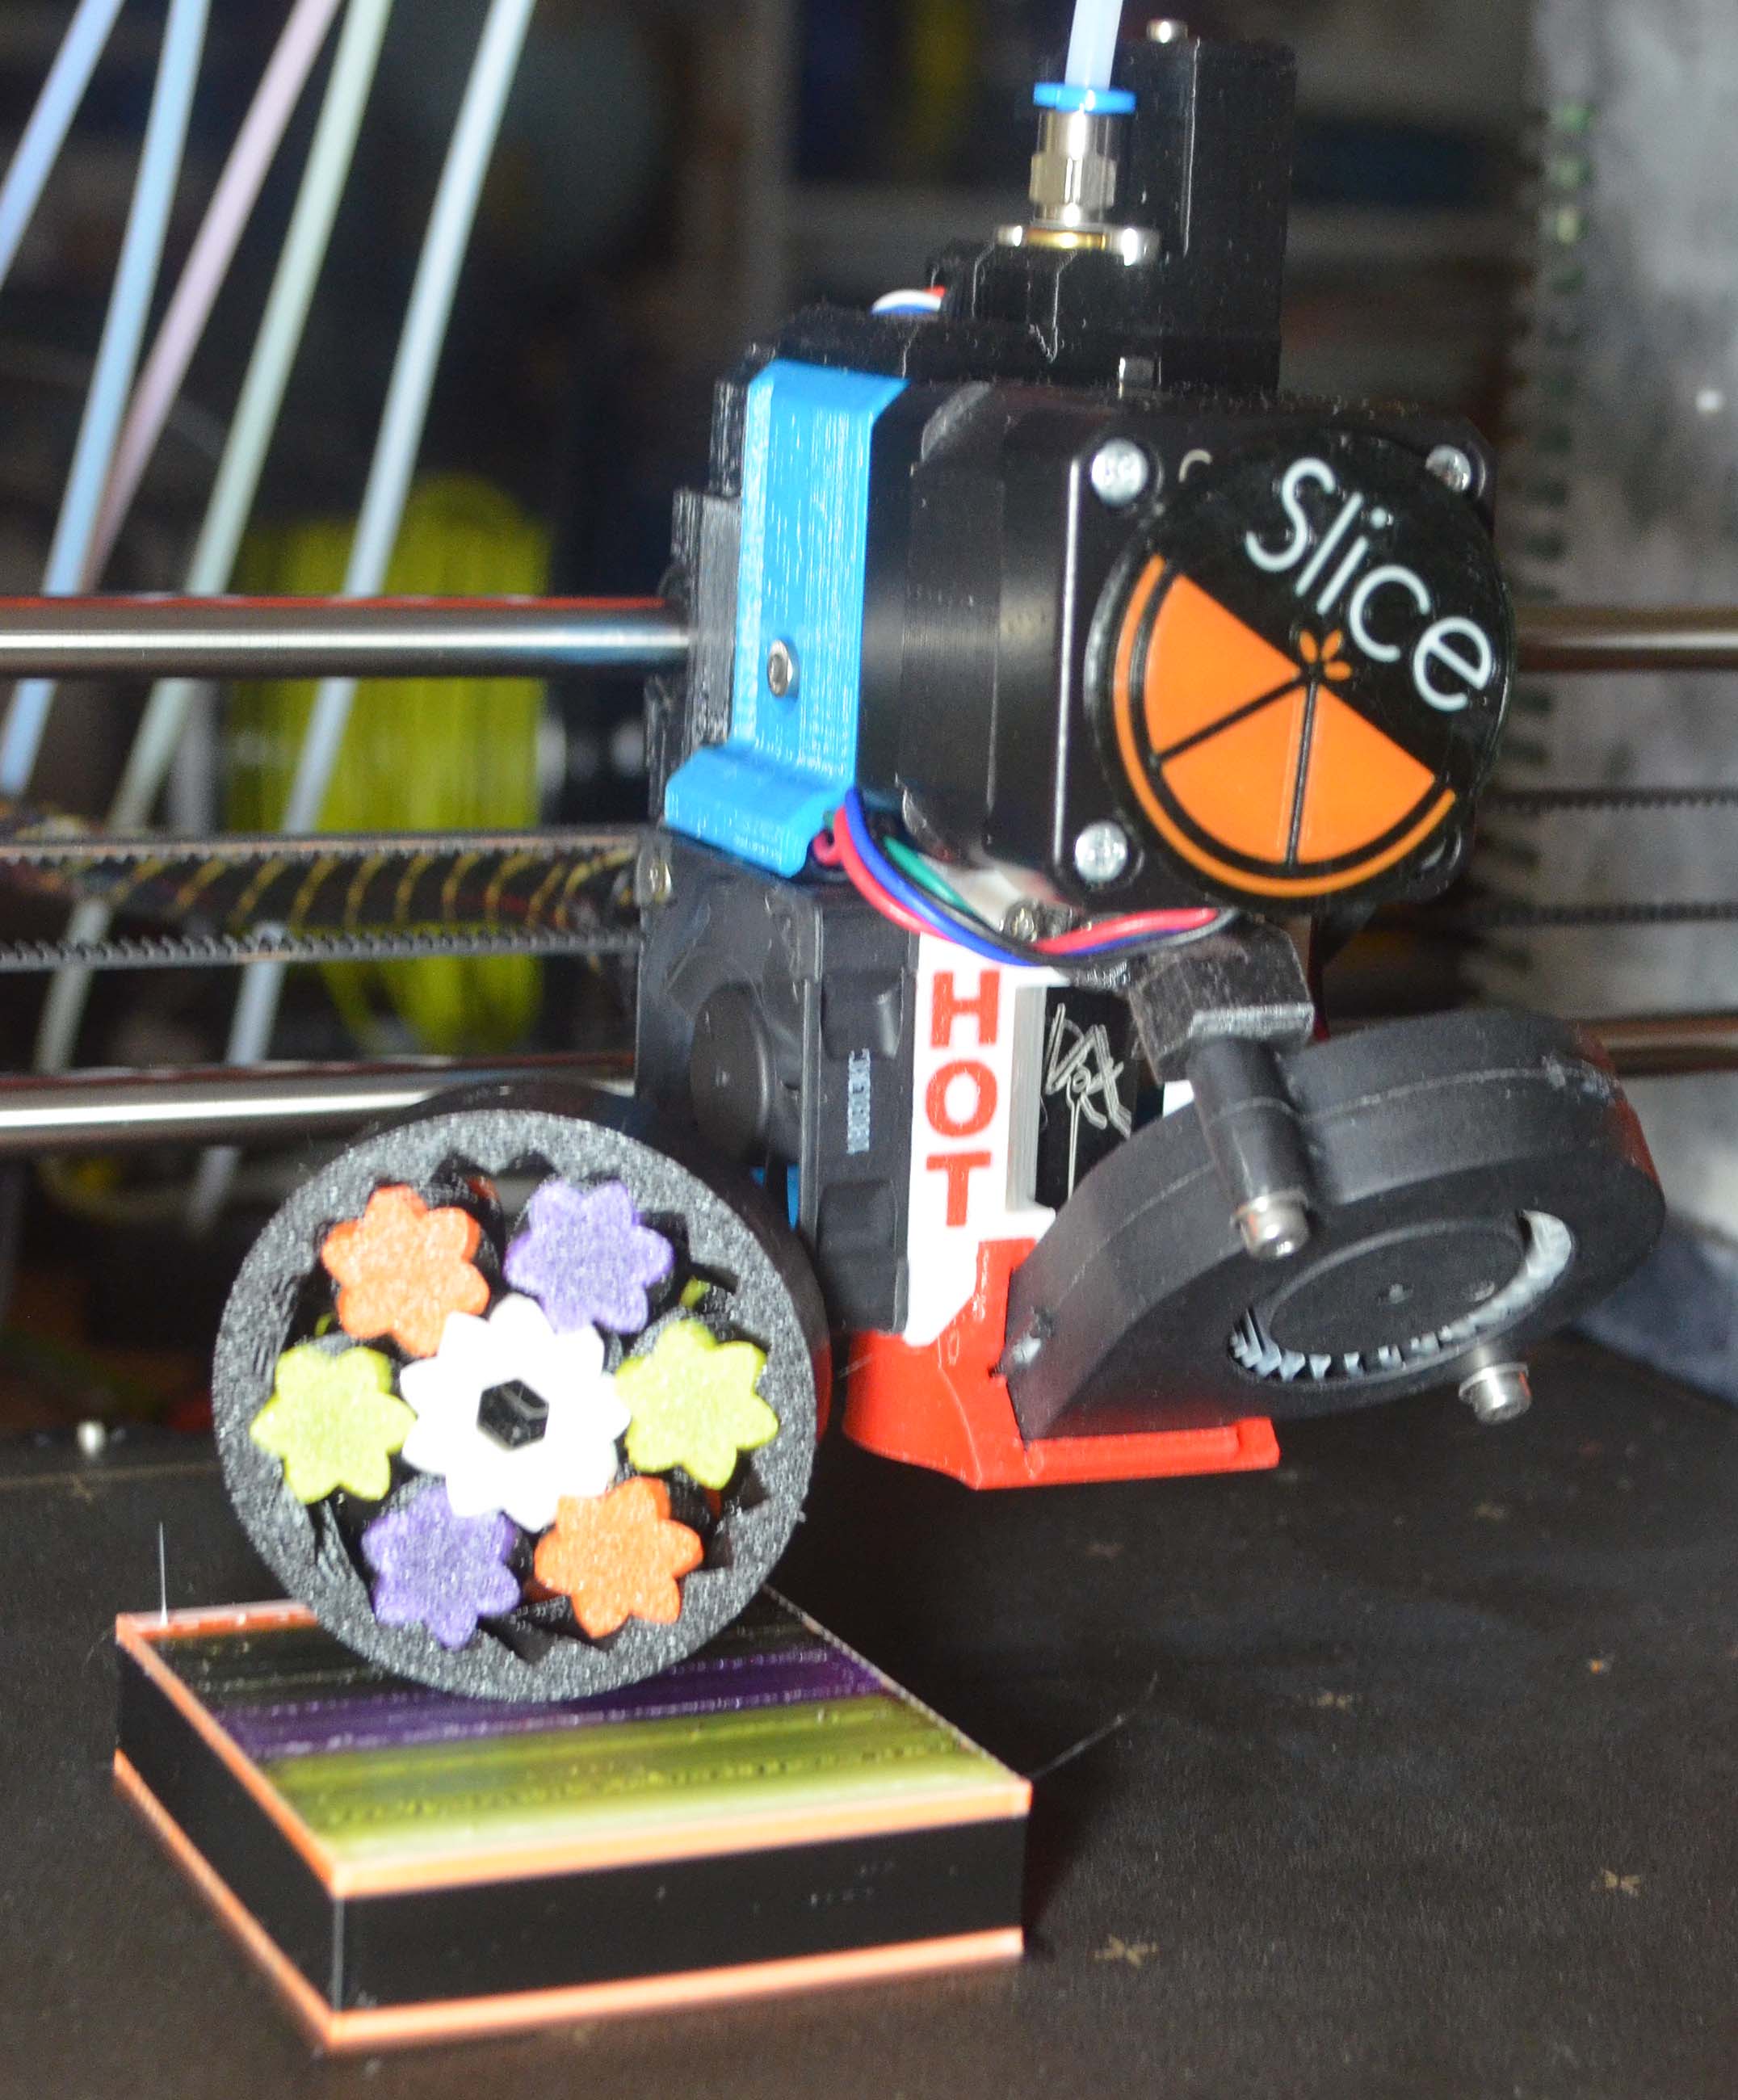
<p>This allows you to replace the stock E3Dv6 hotend on a stock Prusa MK3s/2.5s with Slice Engineering’s Mosquito hotend. This installation uses the existing mounts and 3mm hardware found on the Prusa. You will need to provide a short (approximately 40mm) piece of PTFE tubing to complete the install. It has been tested in the following configurations:</p> <pre><code>MK2.5s MK3s MK2.5s w/MMU2s MK3s w/MMU2s </code></pre> <h3>Print instructions</h3><p>EXTRUDER BODY!!! There are two versions of the extruder body. One that uses the stock 40mm cooling fan and one that will allow you to use the 25mm Mosquito cooling fan. The 25mm version has indented mounting screws and requires two 8mm screws vs. standard 10mm.</p> <p>PART FAN NOZZLE - Prusa has been reducing the gap of their nozzles with each iteration to understandably optimize for E3D heat block. It is now too narrow for the Mosquito. I had to split, then widen the part, so you will have to print this new one as well as the extruder cover as it has an indent required for proper alignment. I printed it in PETG and have been printing in PETG (250c) without any issues. Remember to remove the print support before installing!</p> <p>EXTRUDER COVER - There are two verions, one blank and one with the indented word 'HOT'. If you have an MMU2 then you can use the provided letters to print with the cover to produce a cover like that in the picture above.</p> <p>This thing replaces the stock E3Dv6 hotend on a stock Prusa MK2.5s or MK3s with Slice Engineering’s Mosquito hotend.This installation uses the existing mounts and 3mm hardware found on the Prusa. You will need to provide a short (approximately 40mm) piece of PTFE tubing to complete the install.</p> <p>It is highly recommended that you use a new thermistor and heater cartridge. The existing ones in the E3Dv6 hotend have been bent 90 degrees and lay alongside the heat block which can make them brittle over time. The Mosquito has the cables coming out straight as they were manufactured and they do not touch nor run along the heat block.</p> <p>In the 'old' design the PTFE tube was kept in position merely by friction. It could, and did, shift up/down especially when I tested with MMU2. In this design the PTFE is set against an internal beveled collar in the extruder body. Note in the pictures that you will probably have to bevel the tube to securely fit into the Mosquito indent before cutting the top flush with the collar. Check your filament path at each step to 'feel' for any snags.</p> <p>You need to 'punch out' the membrane in the Mosquito T-mount holes. They are there just to ensure a smooth overhang and are only one layer thick.</p> <p>You will need to rotate parts to print correctly. They are in virtual assembly orientation now but I will align to print bed once parts are final.</p> <p>DO NOT FORGET to use the official Prusa documents to make sure you put in all capture nuts, especially for the 45 degree fan mount and the nozzle, BEFORE any assembly. The three Noctua fan mount screws just thread into the plastic.</p> <p>MK2.5s w/MMU2s Video at: <a href="https://youtu.be/qnwGs-ysGOQ">https://youtu.be/qnwGs-ysGOQ</a></p> <p>Printed using PETG - 0.2 mm layer - 20% Infill</p>
With this file you will be able to print Prusa MK3s/2.5s/MMU2s Mosquito Hotend Extruder with your 3D printer. Click on the button and save the file on your computer to work, edit or customize your design. You can also find more 3D designs for printers on Prusa MK3s/2.5s/MMU2s Mosquito Hotend Extruder.