Prusa MK3 Y Rod Holder
prusaprinters
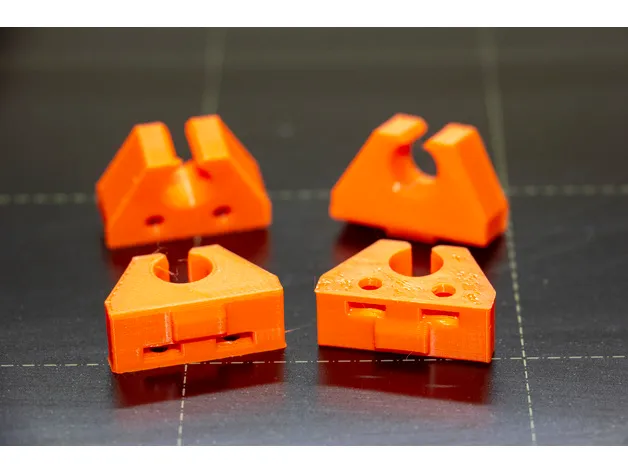
SummaryFile updated 2019-11-23This is a Y-Rod holder for the Prusa i3 MK3 that removes the need for zip ties. I originally tried one with a fully enclosed circle, but ended up cracking them during installation. This version leaves a gap at top for expansion when inserting rod, yet provides a tight secure lock on the rod.Don't forget to recalibrate first layer height after installation!Print SettingsPrinter brand:PrusaPrinter:i3 MK3Rafts:NoSupports:NoResolution:.2mmInfill:20%Filament brand:PrusaFilament color:OrangeFilament material:PETNotes:To install, do one piece at a time. When replacing the front pieces, slide the heatbed all the way to the back, and vice-versa when replacing the back pieces. Cut the zip tie off one of the supports, and then remove the two screws holding it to the frame to release it. Remove the square nuts from the old piece (may have to destroy it to get them out), and insert into the new piece. Position in the correct orientation and insert the end of the rod into the holder. Stage the holder in position (you may have to support the nuts with your fingers or a temporary piece of tape to keep them from falling out), and secure to the frame with the two screws. Repeat for all 4 supports. Upon completion, perform a first layer calibration.
With this file you will be able to print Prusa MK3 Y Rod Holder with your 3D printer. Click on the button and save the file on your computer to work, edit or customize your design. You can also find more 3D designs for printers on Prusa MK3 Y Rod Holder.