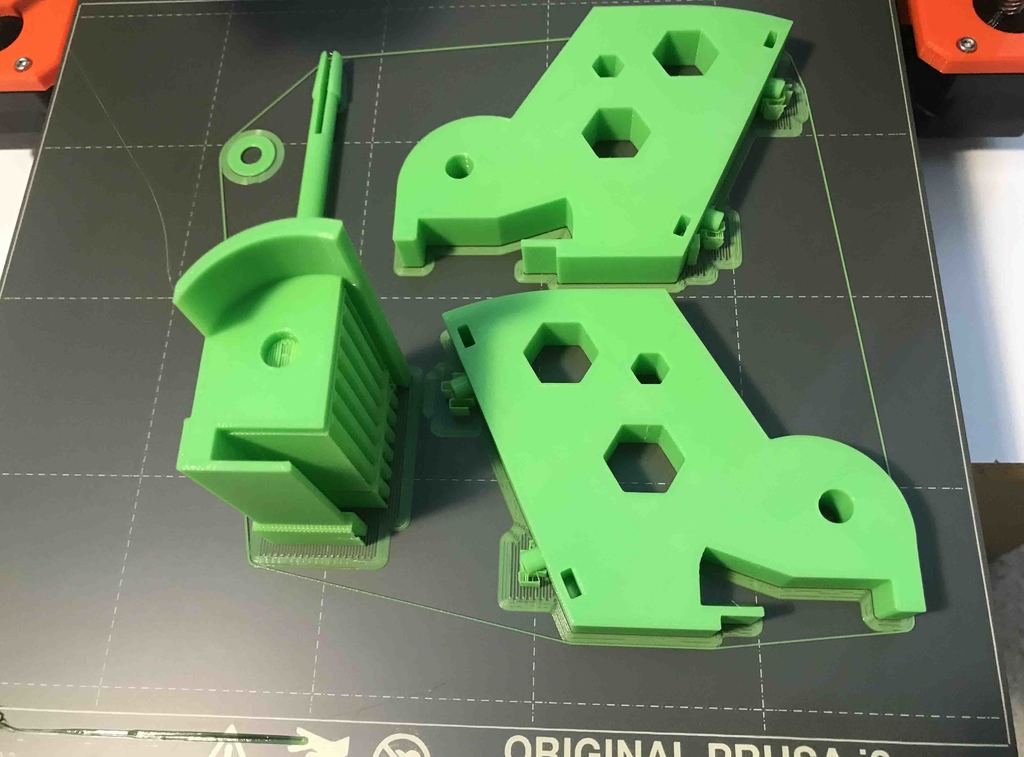
Prusa MK3+ Platform Brackets with options for angle-width-safety clip
prusaprinters
<p>MK3 MK3s top rail bracket that can be created with an angled deck.</p> <p>I created this from adjustments to the bracket made by " NothingSpectacular" <a href="https://www.thingiverse.com/thing:2758411">https://www.thingiverse.com/thing:2758411</a><br/> who modified the bracket to work with Aero3D's adjustable spool bracket <a href="https://www.thingiverse.com/thing:2362427">https://www.thingiverse.com/thing:2362427</a></p> <p>This bracket has nothing to do with that adjustable spool bracket project although at an angle of 0 it will print what should be a normal bracket of the width you specify.</p> <p>I modified the bracket to have the mounting platform be at an angle.<br/> This was to test mounting a FiBo Box on the top rail <a href="https://www.thingiverse.com/thing:4702315">https://www.thingiverse.com/thing:4702315</a></p> <p>The experiment was conducted by clipping the FiBo Box into a platform (printed at 23 degrees).<br/> <a href="https://www.thingiverse.com/thing:4779615">https://www.thingiverse.com/thing:4779615</a></p> <p>Angling the box was necessary to try to position its center of gravity closer to centered over the rail.</p> <p>While running prints was successful, the boxes elevated center of gravity is so high above the rail that operational vibrations of the printer can cause the box to flex your Z axis rail... So I won't be using it as a full time solution, but it was a fun experiment. If you do play with it keep in mind the power supply side of the rail has the most support against flexing.</p> <p>I did the bracket and routine to build it so the SCAD is included in case you find some use.</p> <p>Things this routine can do:<br/> 1) print the deck at an angle above a horizontal plain.<br/> 2) Print a normal or angled bracket that is of a width you want controlled by bracketthickness =<br/> 3) Apply a bottom clamp to the brackets preventing it from coming off the top rail</p> <p>The bolt holes are for m3 bolts using the thin M3 nuts (DIN 562 style)</p> <p>I am posting a sample 15 degree platform. You could theoretically print 0 to even 90 (vertical).</p> <p>In the SCAD file you will find for basic users there are 3 variables you can set to change the attributes of the platform. F5 to preview... F6 to render... STL button to export.</p> <p>The original brackets were modified to not interfere with xyz calibration. While I have visually checked clearance I have not run a calibration with mine installed. So be sure to run clearance testing.</p> <p>As always use caution in suspending large heavy objects above your printer.</p> <h3> Print Settings</h3> <p><strong>Printer Brand:</strong></p> <p>Prusa</p> <p><p class="detail-setting printer"><strong>Printer: </strong> <div><p>I3 MK3S</p></div><strong>Resolution:</strong></p> <p>.2</p> <p><p class="detail-setting infill"><strong>Infill: </strong> <div><p>20</p></div><br/> <strong>Filament:</strong><br/> gst3d PLA Apple Green <br/> <p class="detail-setting notes"><strong>Notes: </strong> </p><div><p>The pin is designed to print on the flat side.</p> The safety bracket should be printed on its end to resist layer splitting under pressure.</div></p> </p></p> Category: 3D Printer Accessories
With this file you will be able to print Prusa MK3+ Platform Brackets with options for angle-width-safety clip with your 3D printer. Click on the button and save the file on your computer to work, edit or customize your design. You can also find more 3D designs for printers on Prusa MK3+ Platform Brackets with options for angle-width-safety clip.
