Prusa MK3 Convertible Print Enclosure
prusaprinters
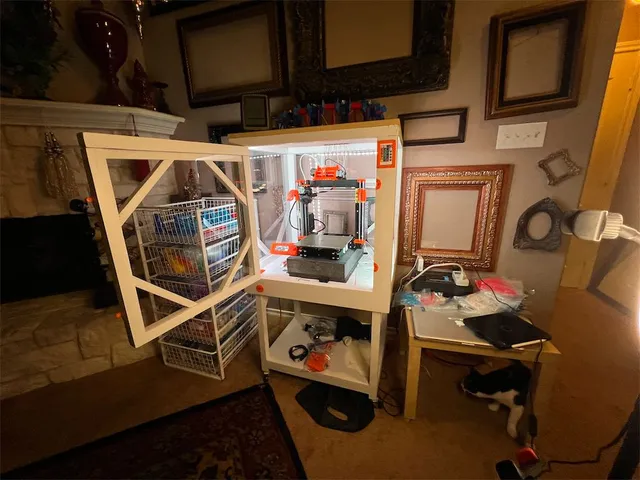
This project was my very first 3D Printing project ever. I built the MK3S from a kit on the kitchen table and my wife wanted her table back. I wanted to have a convertible cabinet that I could remove the plexiglass panels from, which made for a very complex design. It has top mounted support for the MMU2 with custom gravity rewinders arranged in a semicircle to keep the PTFE path from each spool to the back of the MMU as short and uniform as possible. The total filament path length is 18“ from the auto rewinder to the PC4 inputs to the back of the MMU, and has a continuous gradual curve which eliminates binding. The Auto Rewinders are on top in a semi circle to keep each PTFE path identical in length and curvature. I couldn’t find a rewinder narrow enough to be able to fit all 5 that close together so I took EA-69’s concept and redesigned it from scratch to shave an inch and a half off the widths. So I printed the whistle and the prusa logo plate just to make sure it worked, printed a few test parts to check mechanical tolerances, and then started printing all the various parts for the cabinet while I was doing all the woodworking stuff. This was truly a trial by fire. The wood parts for the cabinet are all from 2x4’s cut down to 1 ½” frame members with dado cut slots for the plexiglass panels to slide in with additional bracing to keep the frame rigid when the panels are removed.I created the entire project in Rhino, then exported all the various parts to 3MF files for Prusa Slicer. These are the actual Project files with the print settings in place (like the pause prints for the embedded magnets on the latches).Parts include Magnetic Door Latches / LED Lighting Controls / Cable Pathways / Mounting Clips / Internal Locater Pins and Receivers for the Removable Panels / Threaded Caster Inserts, the top PTFE passthrough Plate and threaded bushing fittings.Also includes various drill Jigs to precisely locate the holes for the Locater Pins and Receivers in the Frame, Caster Insert Drill Jig, Door Latch Hole Drill Jig, and a router Jig for the PTFE Passthrough plate.The attached files are the actual PrusaSlicer project files, so the print settings are already stored. Most are 0.4 mm nozzle / 0.2 Layer Hieghts. My profile for CC3D’s Orange PETG is in the 3MF’s.This is a complicated project with a lot literally of moving parts. The PDF file gives a walkthrough on the parts and photos showing what they all do. Even if you aren’t replicating the cabinet, the latches (and it’s mountign drill jig), and the lighting parts will work with most cabinet designs. If you want to do the full build, let me know and I can get you the Rhino file (It’s a few hundred MB) and a wood parts list. You’ll need a table saw and fence (for cutting down the 2x4 stock for the Large frame pieces and the smaller brace parts, and a dado blade to cut the channels for the plexiglas. The top is MDF, and the floor and lower shelf are ¾” plywood.Outside of that, the only non printed parts are a piano hinge for the door, optional casters from Home Depot, and optional lighting, I used fairly cheap Commerical Electric set from Home Depot as well for that. The PDF in the files section gives you a photo walkthrough of all the parts and how this all goes together. It’s a lot easier to understand when you can see this stuff in context, as there are a LOT of parts and jigs.
With this file you will be able to print Prusa MK3 Convertible Print Enclosure with your 3D printer. Click on the button and save the file on your computer to work, edit or customize your design. You can also find more 3D designs for printers on Prusa MK3 Convertible Print Enclosure.