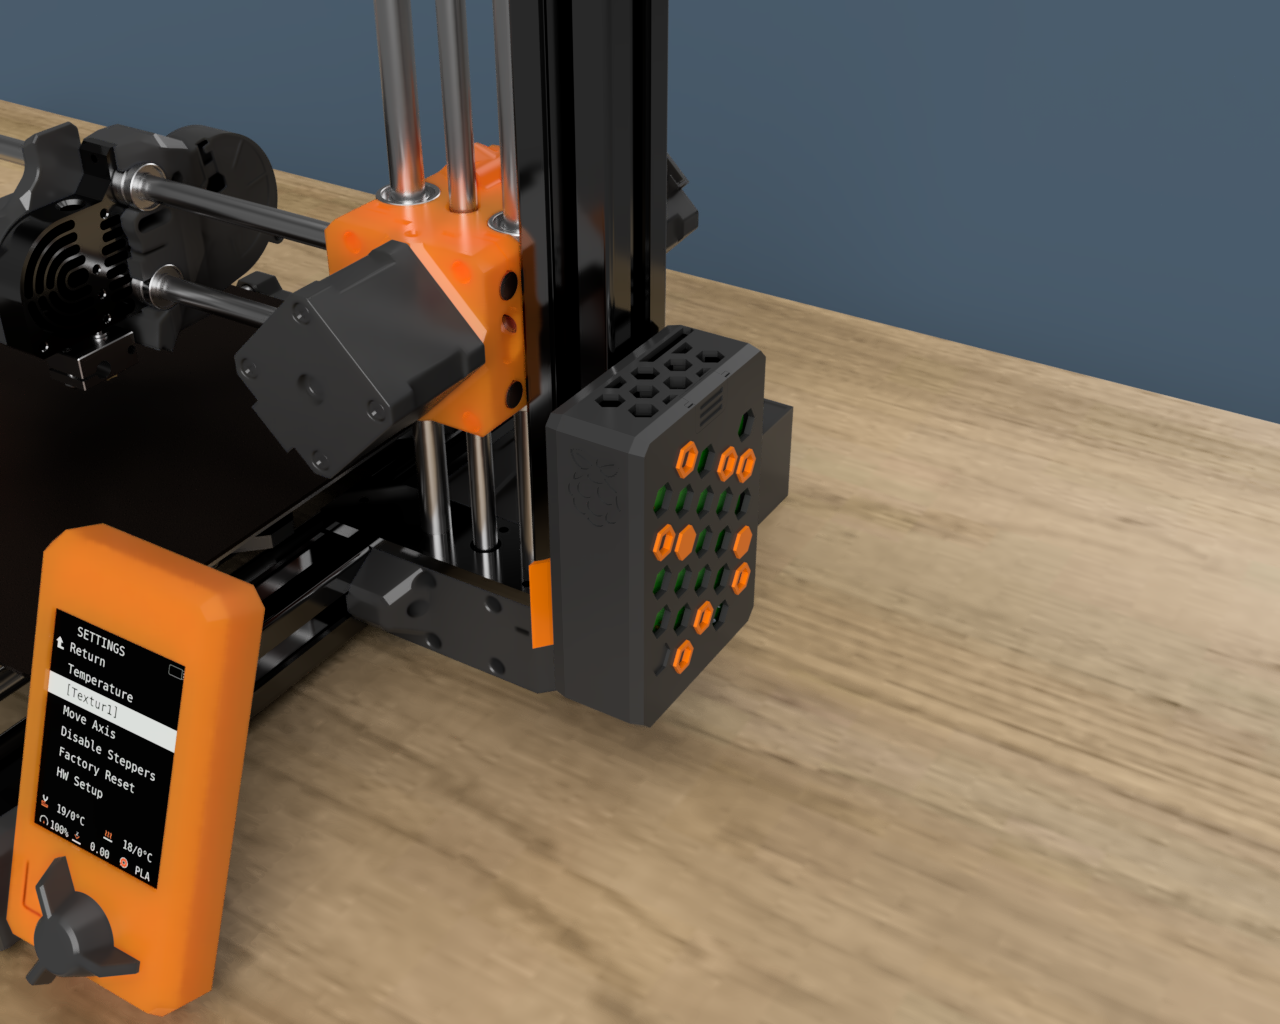
PRUSA MINI Raspberry Pi 4 B case and mount
prusaprinters
<h3>Designed for Prusa MINI/MINI+</h3><h4>Main features</h4><ul><li>Easy to attach and detach from 30x30 aluminum extrusion of the MINI's z axis, no screws are necessary!</li><li>Easy access to the Pi's SD card, no more disassembly required!</li><li>In case you are also using a PiCam module, a dedicated version featuring a hole for the flat cable is provided.</li><li>The Pi case is divided in two halfs to insert the Pi easily and match perfectly with each other: attached via zero-gap Snap-fit joints.</li></ul><p>If you like this design, please consider buying me a coffee to support me in the creation of many other useful designs as a sign of gratitude for the huge amount of time and effort. Thank you very much and happy printing!</p><h4>Updates</h4><p><strong>13/02/2022: </strong>Redisegned<strong> T-Slot-Clip </strong>so that the PTFE tube does not interfere with the cables on the side of the Raspberry Pi (see picture below).</p><figure class="image image_resized" style="width:50%;"><img src="https://media.prusaprinters.org/media/prints/118058/rich_content/cf86fb66-6c3f-4a71-a535-123ceffa4771/update13-02-22.png#%7B%22uuid%22%3A%2237d8be55-3009-4107-9593-342f0b68c883%22%2C%22w%22%3A1280%2C%22h%22%3A1024%7D"></figure><h4>Printing</h4><ul><li>Layer height: <strong>0.2 </strong>mm;</li><li>Material: <strong>PETG</strong> (recommended), <strong>PLA</strong>;</li><li>Supports: Only for the <strong>MicroSD-cover </strong>overhangs;</li><li>Orientation: the models are already in the proper orientation.</li></ul><figure class="table"><table><tbody><tr><td style="background-color:#fa683118;border-color:#fa6831;border-style:outset;">In the <strong>Lower-case</strong> there's a 0.2 mm thick bridge to prevent the corners of SD card slot from falling making too difficult the insertion of the <strong>MicroSD-cover </strong>(see picture below). Once print finishes, just cut it out as if it were a support.</td></tr></tbody></table></figure><figure class="image image-style-align-center image_resized" style="width:75%;"><img src="https://media.prusaprinters.org/media/prints/118058/rich_content/982e744f-bd49-43cf-aa77-94482315fd25/bridge.png#%7B%22uuid%22%3A%2288cea965-1a22-4093-91be-40fe2f769fd0%22%2C%22w%22%3A2021%2C%22h%22%3A1137%7D"></figure><h4> </h4><h4>Assembly</h4><ol><li>Attach the <strong>T-Slot-clip</strong> to the alluminum extrusion;<img class="image_resized" style="width:50%;" src="https://media.prusaprinters.org/media/prints/118058/rich_content/f3c5d4ba-e373-4289-ad85-a29aa62ccb99/clip.png#%7B%22uuid%22%3A%2258a6a47f-8628-40ae-a9ea-a8a7d7f56c0a%22%2C%22w%22%3A2126%2C%22h%22%3A1711%7D"></li><li>Insert the Pi into the <strong>Lower-case</strong> and secure it with four <strong>M2.5x4 mm screws</strong>;<img class="image_resized" style="width:50%;" src="https://media.prusaprinters.org/media/prints/118058/rich_content/f59f5543-6d7d-431c-98cc-e6060debb562/pi.png#%7B%22uuid%22%3A%2232a72cca-c93b-46ad-8712-25ed78cb20bc%22%2C%22w%22%3A2007%2C%22h%22%3A1604%7D"></li><li>Slide the <strong>Upper-case</strong> into the <strong>T-slot-clip</strong>; <img class="image_resized" style="width:50%;" src="https://media.prusaprinters.org/media/prints/118058/rich_content/46428c32-9129-4f46-aa93-93b98a1f4edf/upper-case.png#%7B%22uuid%22%3A%222eca992f-a5b5-4a26-8861-8115a4eafe0c%22%2C%22w%22%3A2007%2C%22h%22%3A1617%7D"></li><li>Take the <strong>Lower-case</strong> with your Pi attached and join it to the <strong>Upper-case</strong> by simply pressing them together; <img class="image_resized" style="width:50%;" src="https://media.prusaprinters.org/media/prints/118058/rich_content/30cf6d89-4cc8-40f6-a814-9cfa45ed0ed8/uplow.png#%7B%22uuid%22%3A%22ba14be9c-de93-4216-8476-0b64d0692a4b%22%2C%22w%22%3A2005%2C%22h%22%3A1610%7D"></li><li>Insert the <strong>MicroSD-cover</strong> into it's slot in the <strong>Lower-case</strong>;<img class="image_resized" style="width:50%;" src="https://media.prusaprinters.org/media/prints/118058/rich_content/9dcc02d7-f39f-49fc-8523-0dfd49a6f871/microsd-cover.png#%7B%22uuid%22%3A%2213669242-8498-4f5d-aa56-d0529871302e%22%2C%22w%22%3A2007%2C%22h%22%3A1606%7D"></li><li>Insert the <strong>Hexagon </strong>or <strong>Hexagon-hole</strong> into their slots on the <strong>Lower-case</strong> in wichever pattern you like (you might need to glue them to the <strong>Lower-case</strong> depending on your printer accuracy); <img class="image_resized" style="width:50%;" src="https://media.prusaprinters.org/media/prints/118058/rich_content/745f5a6f-babd-4c5a-8e43-16731ec3f991/hexagons.png#%7B%22uuid%22%3A%225fc34bbd-a58a-4940-b539-e755a5dadf26%22%2C%22w%22%3A2005%2C%22h%22%3A1610%7D"></li><li>Now you're good to go ;-) <img class="image_resized" style="width:50%;" src="https://media.prusaprinters.org/media/prints/118058/rich_content/8582c1db-dca8-4042-a257-b85be0699071/complete.png#%7B%22uuid%22%3A%2238f1282c-4086-47e9-8138-8e09527eb892%22%2C%22w%22%3A1280%2C%22h%22%3A1024%7D"></li></ol><p>If you are looking for a <strong>universal RaspberryPi4/Octoprint case</strong> I suggest you to give a look at this design too: <a href="https://www.prusaprinters.org/it/prints/44108-raspberry-pi-4boctoprint-honeycomb-case">Raspberry Pi 4B/Octoprint Honeycomb case da JayCee09 | Scarica il modello STL gratuito | PrusaPrinters</a></p><h4>Pro tips</h4><ul><li><strong>PETG </strong>can cause a little bit of strings, to remove them you may just use a wind-proof lighter and they will disappear magically ;-) </li></ul>
With this file you will be able to print PRUSA MINI Raspberry Pi 4 B case and mount with your 3D printer. Click on the button and save the file on your computer to work, edit or customize your design. You can also find more 3D designs for printers on PRUSA MINI Raspberry Pi 4 B case and mount.
