Prusa Mini(+) Mount for Dragon Hotend, With a PC4-M10 Bowden Tube Connector
prusaprinters
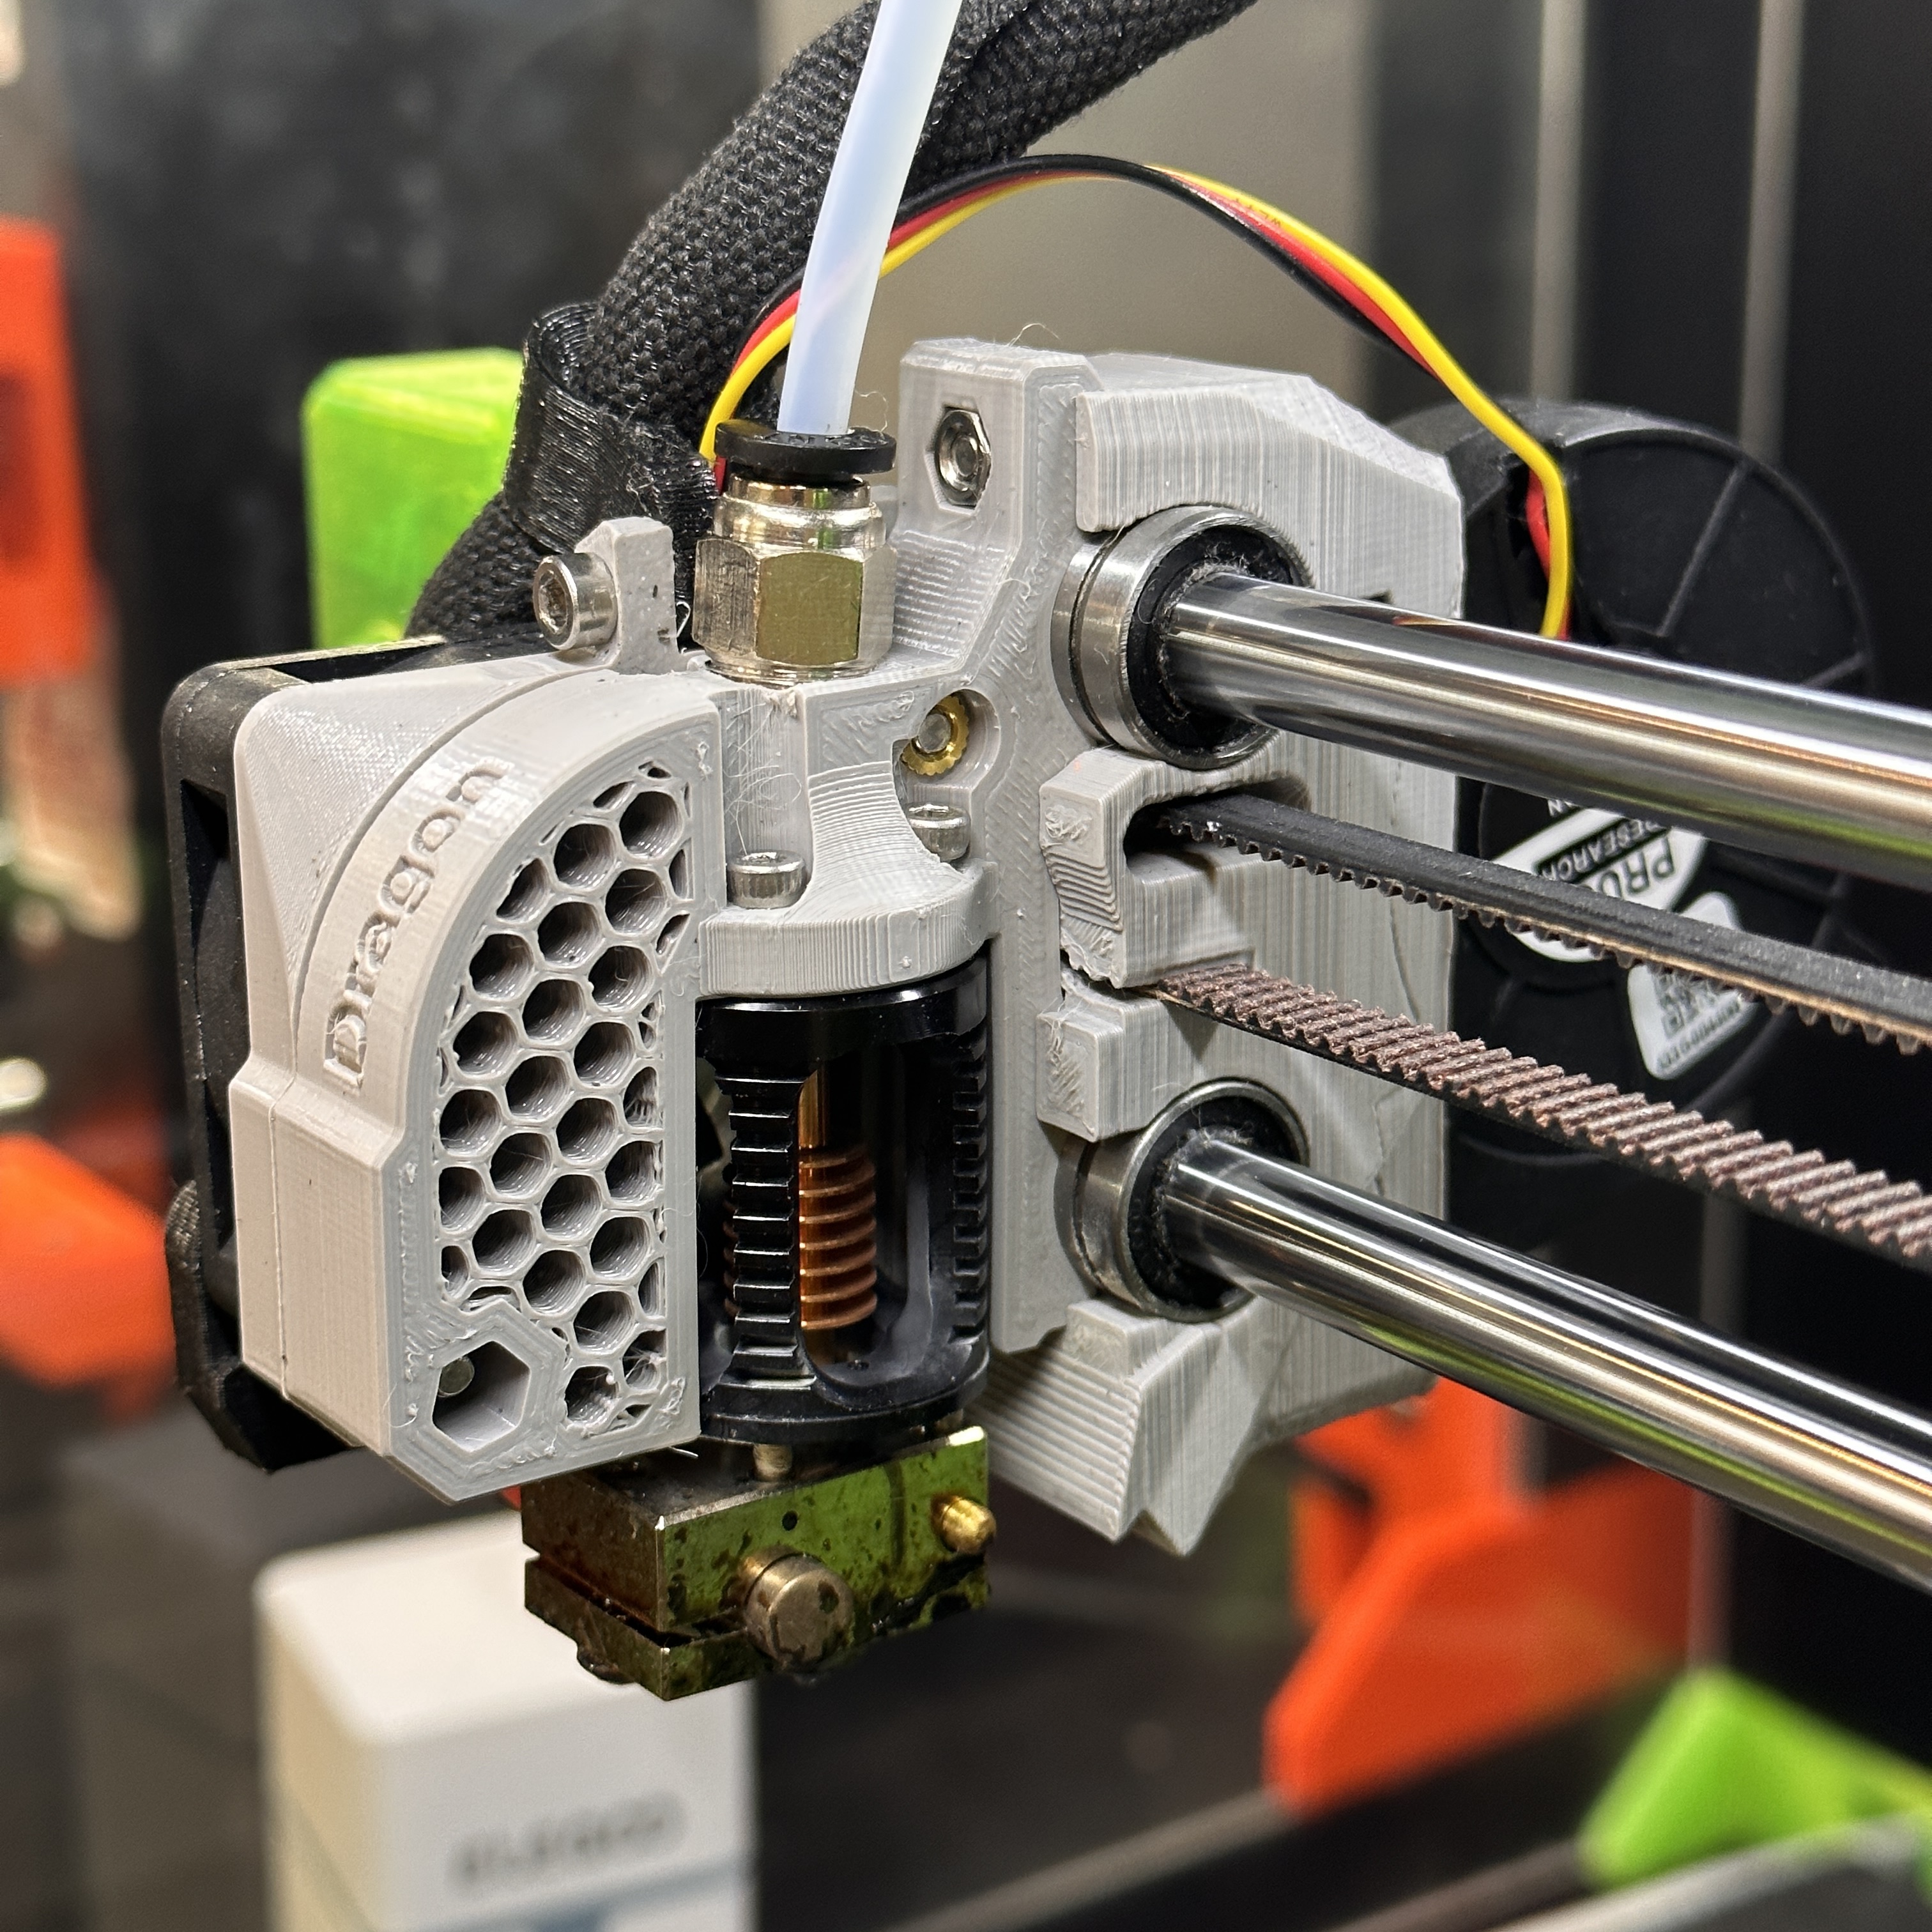
<p>[Corrected length of PFTE tube]</p><p>The Dragon hotend is a great replacement for the standard E3D V6 hotend on the Mini as it allows for easy single-handed nozzle swaps while—unlike the Revo—supports the whole E3D V6 nozzle ecosystem. This is a remix of @sebastian's excellent mount for the Dragon hotend to support push-through PC4-M10 pneumatic connectors.</p><p>The olive-style Bowden tube with its weird connector is, shall we say, suboptimal. There are PC4-M8 connectors available that make removing the Bowden tube much easier but I'm not aware of anyone who has been able to reliably source PC4-M8 connectors that are push-through. That means you still need the small piece of PTFE tube in the top of the hotend (and the extruder).</p><p>I remixed sebastian's mount to replace the PC4-M8 with a thread that allows you to use the more common PC4-M10 pneumatic connectors, which are readily available as push-through, so no need for that small PTFE piece anymore. </p><p>I have created two versions, both derived from v4 of sebastian's design. Thank you for providing the Fusion 360 files!</p><p>One retains the metal inserts used in that design to catch the screws. For the other version, I reverted back to regular hex nuts as I found them easier to use, with one exception: there is not enough space for a nut to hold the upper left fan screw, so one metal insert is required even in the hex nuts version.</p><p>Fusion 360 files included. Warnings and errors in those files are from the original .f3d file used for the remix.</p><h4>Bill of materials</h4><ul><li>1x 295 mm long PTFE tube for 1.75 mm filament (1.95mm ID, 4mm OD), to replace the Mini's stock Bowden tube [sorry, there was a typo—245mm—, which is too short]</li><li>1 PC4-M10 pneumatic connector (e.g., https://amazon.com/gp/product/B01IB81IHG)</li><li>For the brass insert version:<ul><li>4x brass insert M3 x 4 x 5 mm, e.g., https://amazon.com/gp/product/B07MWBJB67</li></ul></li><li>For the hex nut version:<ul><li>1x brass insert M3 x 4 x 5 mm, e.g., https://amazon.com/gp/product/B07MWBJB67 </li><li>3 M3 hex nuts</li></ul></li><li>Screws from the original and the Dragon hotends</li></ul><p>This assumes you have already replaced the olive style PTFE tube with PC4-M8 connectors. If not, you'll need a PC4-M8 connector for the extruder end of the Bowden tube (e.g., https://amazon.com/gp/product/B07QFK7YWP)</p><h4>Printing</h4><p>Use ASA, ABS, PC, Nylon, etc. PETG may work. I used Prusament PC Blend.</p><p>Print the mount and the fan spacer. Check out the .3mf file for orientation and the support recommended for the fan spacer. I printed everything with 0.1mm layer height.</p><p>The .3mf file also contains sebastian's mesh modifier used for optics, I set it to use hex infill (of course!).</p><h4>Assembly</h4><p>Pull up the <a href="https://help.prusa3d.com/guide/how-to-replace-a-heatsink-mini-mini_121780">Prusa Knowledgebase article</a> on removing the heatsink. “Steps” in the following instructions refer to that article. Don't overtighten any of the screws secured with brass inserts.</p><ol><li>Follow Steps 1 through 10 to remove the heatsink.</li><li>Insert the brass inserts by heating them up and carefully pushing them down. Tip: I found it helpful to insert an M3 screw from the other side and screw it in until it's halfway into the insert, to block melting filament get into the insert.</li><li>Using a 10mm wrench, screw the PC4-M10 connector into the Dragon mount. If you screw it in and out a few times, it'll go easier. </li><li>Insert the Dragon hotend into the mount from below. If your Dragon came with an E3D V6 adapter, remove it first.</li><li>Use the four M2 screws to secure the hotend in the mount from above. Don't screw them, in particular the two screws on the fan side, all the way in yet. </li><li>Place the mount against the X-carriage and secure it with the M3x20 screws from the backside of the X-carriage (Step 12). If using the hex design, you'll need two hex nuts.</li><li>Install the print fan (Step 13). If using the hex design, you'll need one hex nut.</li><li>Install the fan spacer (not the original Mini-spacer) and hotend fan (Step 14).</li><li>Tighten the four M2 screws that hold the Dragon hotend.</li><li>Install thermistor, heater element, cable bundle, etc. as per knowledgebase.</li><li>Insert the new PTFE tube into PC4-M10 on the hotend. Push all the way through. Insert other end into extruder.</li><li>Don't forget to redo your Live Z calibration!</li><li>Sebastian recommends doing PID tuning and adjusting the startup gcode in Prusaslicer to move the prime line in a bit. I didn't do any of that and haven't experienced any problems. </li></ol><p> </p><p><strong>If you like what I'm doing…</strong><br><strong> </strong><br>…consider <a href="https://www.buymeacoffee.com/mix579">buying me a coffee</a>.<br><br><img src="https://media.printables.com/media/prints/314457/rich_content/ab81baa0-5163-4aef-9f05-eac77b9f9a8c/image.png#%7B%22uuid%22%3A%22a3134c1b-2006-439d-af49-8af1cda7dc91%22%2C%22w%22%3A170%2C%22h%22%3A37%7D" alt="orange_img.webp"><br> </p><p> </p><p> </p><p> </p><p> </p>
With this file you will be able to print Prusa Mini(+) Mount for Dragon Hotend, With a PC4-M10 Bowden Tube Connector with your 3D printer. Click on the button and save the file on your computer to work, edit or customize your design. You can also find more 3D designs for printers on Prusa Mini(+) Mount for Dragon Hotend, With a PC4-M10 Bowden Tube Connector.