Prusa Mini / Mini+ Dragon Hotend Mount
prusaprinters
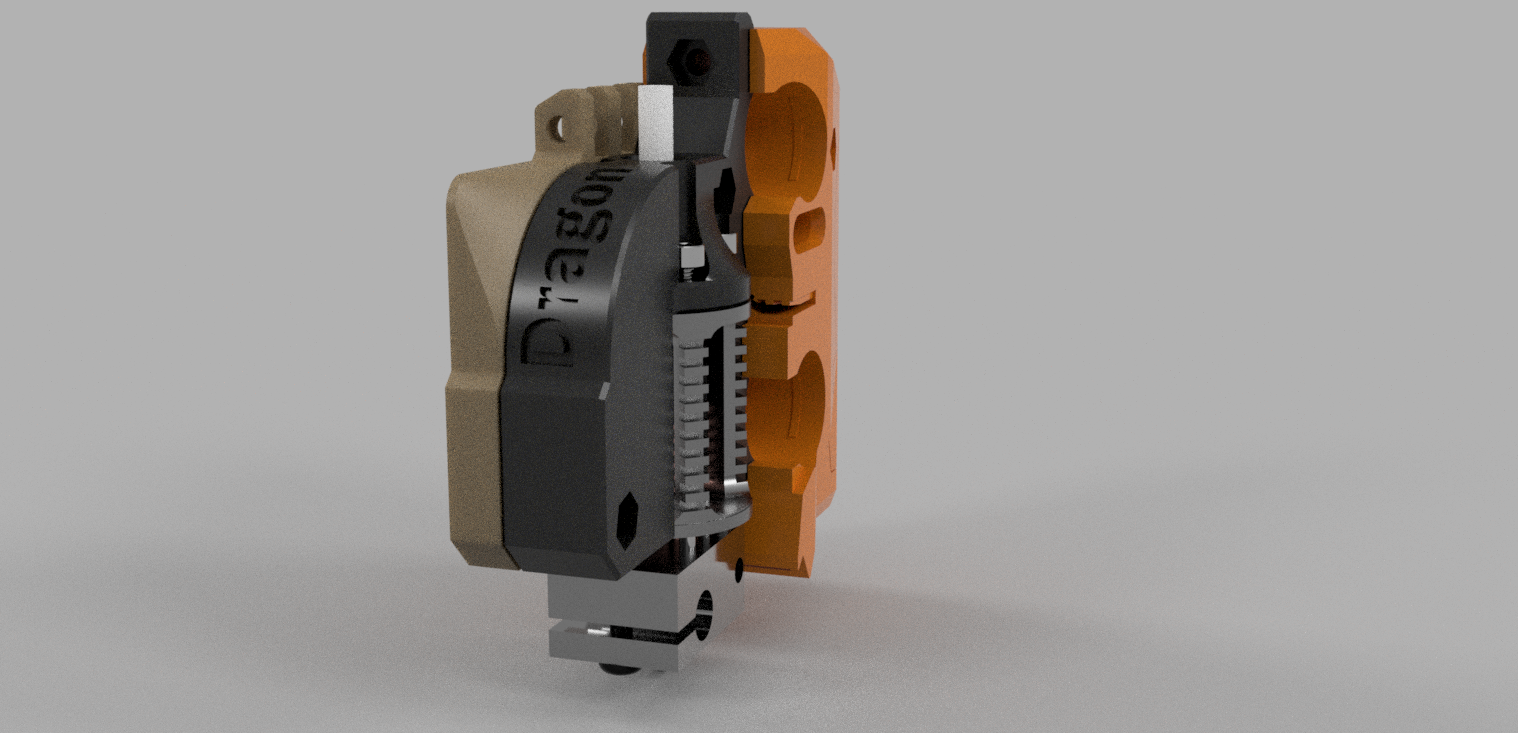
<p>Update V4:</p><p>First of all sorry for now answering any comments and not updating sooner, I have new parts and have been tested for a couple of month now and they work fine. The main change is that I moved from Captive nuts to metal insert improving much the install experience plus modifying other tolerances and thickness. I'm using M3 X D5.0 X L4.0 </p><p>Link: https://es.aliexpress.com/item/4000232858343.html?spm=a2g0s.9042311.0.0.274263c0sqE5MU</p><p>They work great and they don't fall when installing, just be careful not to overtighten.</p><p> </p><p>Update to V3:</p><p>Moved the hotend closer to original position, only a offset of 0.625mm in the way, V1 was 6.625mm. add </p><p>Other changes for better mounting and looks ;)</p><p>Added a body for using as a modifier if you want to show some infill (in red on the pictures)</p><p>Use gcode M301 P24 I2.14 D67.2 before heating to set PID for Dragon (tuned with 12 cycles at 215c with silicon sock)</p><p>Use gcode M206 Y-0.625 for Dragon offset, place right after mesh bed leveling.</p><p> </p><p>Print the mount flat on the side that faces the fan and the fan spacer flat on the side that faces the mount as per pictures (add support only to arc on fan spacer)</p><p>Tested and working fine</p><p>3mf, .step and .f3d added.</p><p>___________________________________________________________</p><p>My current start gcode for v3 and v4:</p><p> </p><p>G90 ; use absolute coordinates<br>M83 ; extruder relative mode<br>M301 P24 I2.14 D67.2<br>M104 S170 ; set extruder temp for bed leveling<br>M140 S[first_layer_bed_temperature] ; set bed temp<br>M109 R170 ; wait for bed leveling temp<br>M190 S[first_layer_bed_temperature] ; wait for bed temp<br>G28 ; home all without mesh bed level<br>G29 ; mesh bed leveling <br>M206 Y-0.625 ; Drangon offset<br>M104 S[first_layer_temperature] ; set extruder temp<br>G92 E0.0<br>G1 Y-2.0 X179 F2400<br>G1 Z3 F720<br>M109 S[first_layer_temperature] ; wait for extruder temp</p><p>; intro line<br>G1 X170 F1000<br>G1 Z0.2 F720<br>G1 X110.0 E8.0 F900<br>G1 X40.0 E10.0 F700<br>G92 E0.0</p><p>M221 S95 ; set flow</p><p>_____________________________________________________________________</p><p>Original post:</p><p>Mount for the Dragon hotend remixed from the mosquito mount, I haven't test on the machine but I did mount the hotend on a test PLA print and it works very well.</p><p>Make sure to <strong>add the right back screw before mounting the fan spacer</strong> or it wont go in later.</p><p>Tighten the fan before fully tightening the top 4 screws.</p><p>it uses the standard x carriage</p><p>Print both on ABS, PC, Nylon, ASA or other temp resistant filament, personally I will use CF-ABS.</p><p> </p>
With this file you will be able to print Prusa Mini / Mini+ Dragon Hotend Mount with your 3D printer. Click on the button and save the file on your computer to work, edit or customize your design. You can also find more 3D designs for printers on Prusa Mini / Mini+ Dragon Hotend Mount.