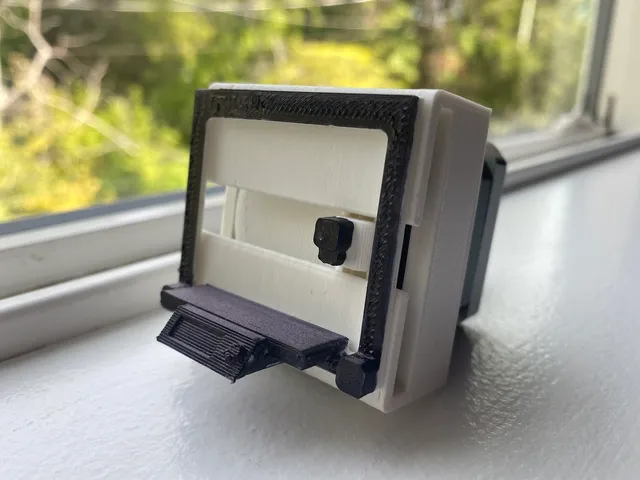
Prusa Micro - Tiny 3D Printer as a motor visualizer
prusaprinters
Introduction: But why?Lets be honest- recursion is fun. That's why I created the Prusa Micro! Its a tiny model roughly based off of the Prusa Mk3s that “prints” along with your printer!While rotational movement as an indicator is fun, I thought it would make for a fun challenge to create something that converts the rotational motion of the stepper motor to some sort of linear motion. As a result, this indicator was created as I love myself a little recursion. Now, I don't personally own a Prusa printer as when I was shopping around for a printer I wanted to get something on a hardcore budget. As a result, I don't 100% know if this will fit or work with a Prusa Mk3s or Mini. However, if you do end up printing this, please let me know if it works! Now for the assembly instructions.Step One: Attach the wheel to the stepperFirst off, you want to grab your stepper. Don't worry, you don't need to remove it.The wheel is the first thing you'll want to attach. There are two methods for this, but I've only tested the first one.You can hot glue the wheel on - in that case use “Wheel - Adhesive.stl”. I have tested this and it works well! You can use an 8mm magnet - in that case use “Wheel - Magnet.stl”. However, I haven't tested this yet due to:not having a stepper with a flush axle pass through on the back, and not having an 8mm magnet. If you do go through on this method I would really love to hear your thoughts and whether or not it works.Now, you just have to attach the wheel roughly in the center. Doesn't need to be perfect, but should be as close as you can get it. It should look like the photo below at this point. Step Two: Ensure the slider and body actually fitNow, grab the body and slider that you printed. Check to make sure that you can easily slide the slider through the cutout on the body. If it seems a bit sticky, try sanding the track inside of the body and the slider a little bit. Once it slides well enough for your liking, move on to step three. See the photo below to see the body setup at this point.Step Three: Throw it togetherFinally, we're getting to the exciting part- putting it properly together. Just follow these instructions and you should be good to go!Put the slider into the body. Assuming you did step two, it should be painless. Arrange the wheel on the stepper and the location of the slider such that the nub on the wheel can fit inside of the notch in the slider.Now, carefully slide the body onto the stepper. It should be a snug fit, but that's good!Finally, give it a little test rotation. It may be a bit rough to start, but after a bit it should smooth up!Assuming everything went well, it should now look like this (and also move smoothly)!Step Four: Attach the facadeNow to make it look like a mini 3D printer. Admittedly, I don't own orange filament or an orange Sharpie- and so as a result I decided to print the full facade in all black. However, if you do own orange filament, you can set up a filament change just before the bottom face plate if you want to give it a bit of a pop! As far as attaching goes, I simply used some hot glue to adhere the facade to the body. After you do this, take a quick double check to make sure the facade doesn't interfere with the motion of the slider. If it does, just move the facade slightly and re-glue. Assuming that also went well, it should (finally) look like this! Step Four: Enjoy!I really hope you found this somewhat meta visualizer to be as entertaining as it was fun to make! Let me know if there are any changes that I should make.Thanks for reading along,Simon
With this file you will be able to print Prusa Micro - Tiny 3D Printer as a motor visualizer with your 3D printer. Click on the button and save the file on your computer to work, edit or customize your design. You can also find more 3D designs for printers on Prusa Micro - Tiny 3D Printer as a motor visualizer.
