Prusa LCD Knob Drawer / Cabinet Handle
prusaprinters
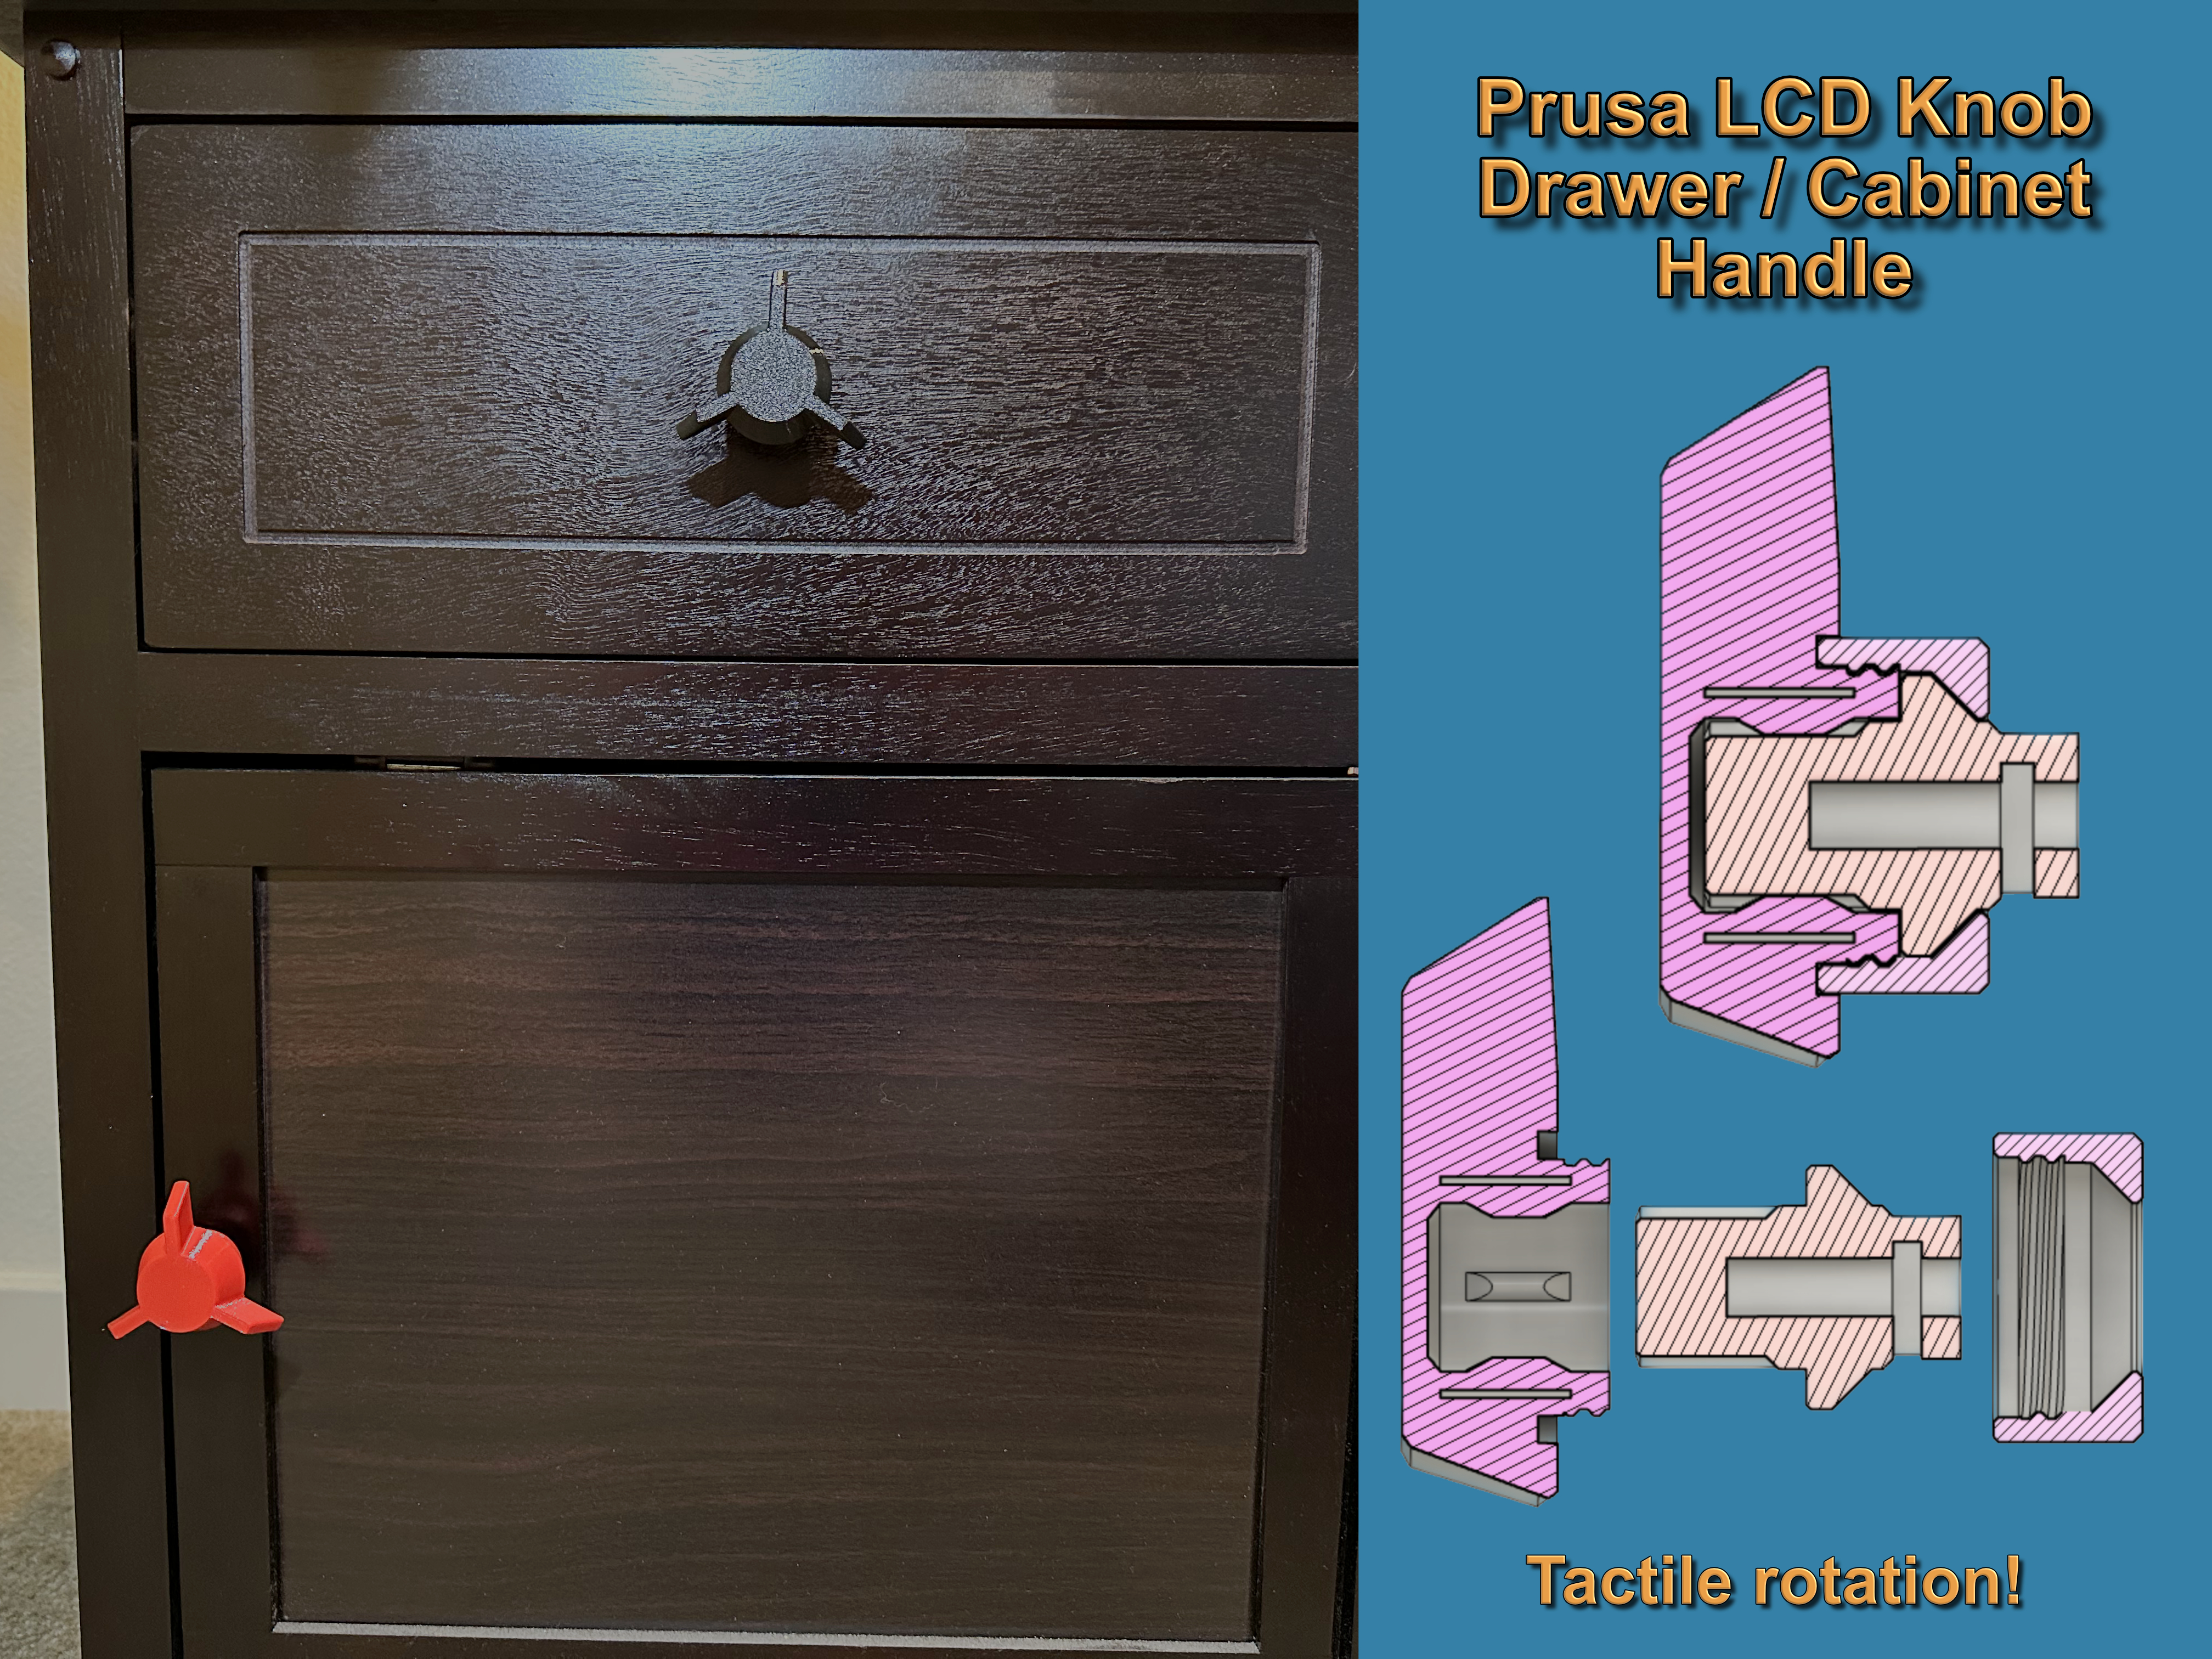
<p>The Prusa LCD Knob Drawer Handle is a scaled up LCD knob from a Prusa printer, modified to be used as a drawer handle/knob. The drawer handle is designed so that the LCD Knob can still be rotated when installed on a drawer or cabinet and provides tactile feedback mimicking the feel of the rotary encoder found on Prusa printers.</p><p>The drawer handle consists of three parts: the LCD Knob, the core, and the retention cap.</p><p>There are two versions: one requires a spring and is much more clicky when rotated while the other does not require a spring and feels more subdued when rotated.</p><p> </p><h4>Printing:</h4><ul><li>If you're using Arachne for perimeter generation, a 0.6mm nozzle works just fine. If you aren't using Arachne, you'll probably get better results with a 0.4mm nozzle.</li><li>0.2-0.3mm layer height.</li><li>3 perimeters.</li><li>25% infill.</li><li>No supports necessary, just be sure to orient each part correctly (no overhangs).</li></ul><p>Thus far I have only tested the model in PETG, so I'm not sure how it will turn out with PLA or other materials.</p><p> </p><h4>Hardware:</h4><ul><li>1x M4 screw with a length approximately 10mm longer than the thickness of your drawer.</li><li>1x M4 washer (optional).</li><li>1x M4 square nut.</li><li>1x 6mm dia. x 10mm long spring (for spring version only). You can substitute a pen spring if you don't have the correct size spring.</li></ul><p> </p><h4>Assembly:</h4><h5>Spring Version</h5><ul><li>Insert the M4 square nut into the nut hole in the core.</li><li>Insert a 6mm dia. x 10mm length spring in the hole in the larger hole in the core. If you do not have this specific size spring, any pen spring should work. You may have to trim the spring to length. The spring pocket is 5mm in length, so ideally you'll want a spring that can compress to just under 5mm.</li><li>Place the spring and core in the LCD knob, spring-side down.</li><li>Slide the retention cap over the core and tighten. You may need to adjust the retention cap (tighten or loosen) to get the right feel when rotating the knob.</li></ul><h5>Non-spring Version</h5><ul><li>Insert the M4 square nut into the nut hole in the core.</li><li>Insert the core into the LCD knob with the screw hole facing out.</li><li>Place the retention ring over the core and tighten onto the LCD knob. Adjust as necessary.</li></ul><p> </p><h4>Installation:</h4><ul><li>Remove your old drawer knob.</li><li>Place the M4 washer on the M4 screw (if you're choosing to use the washer) and pass it through the drawer from the inside and thread it into the square nut in the core of the new drawer knob.</li><li>To secure the new knob to the drawer, hold the core on the flats with an 11mm wrench or a pair of needle nose pliers and tighten the M4 screw until the knob is firmly in place.</li><li>Check that your new LCD Knob Drawer Handle can still rotate.</li><li>Enjoy!</li></ul>
With this file you will be able to print Prusa LCD Knob Drawer / Cabinet Handle with your 3D printer. Click on the button and save the file on your computer to work, edit or customize your design. You can also find more 3D designs for printers on Prusa LCD Knob Drawer / Cabinet Handle.
