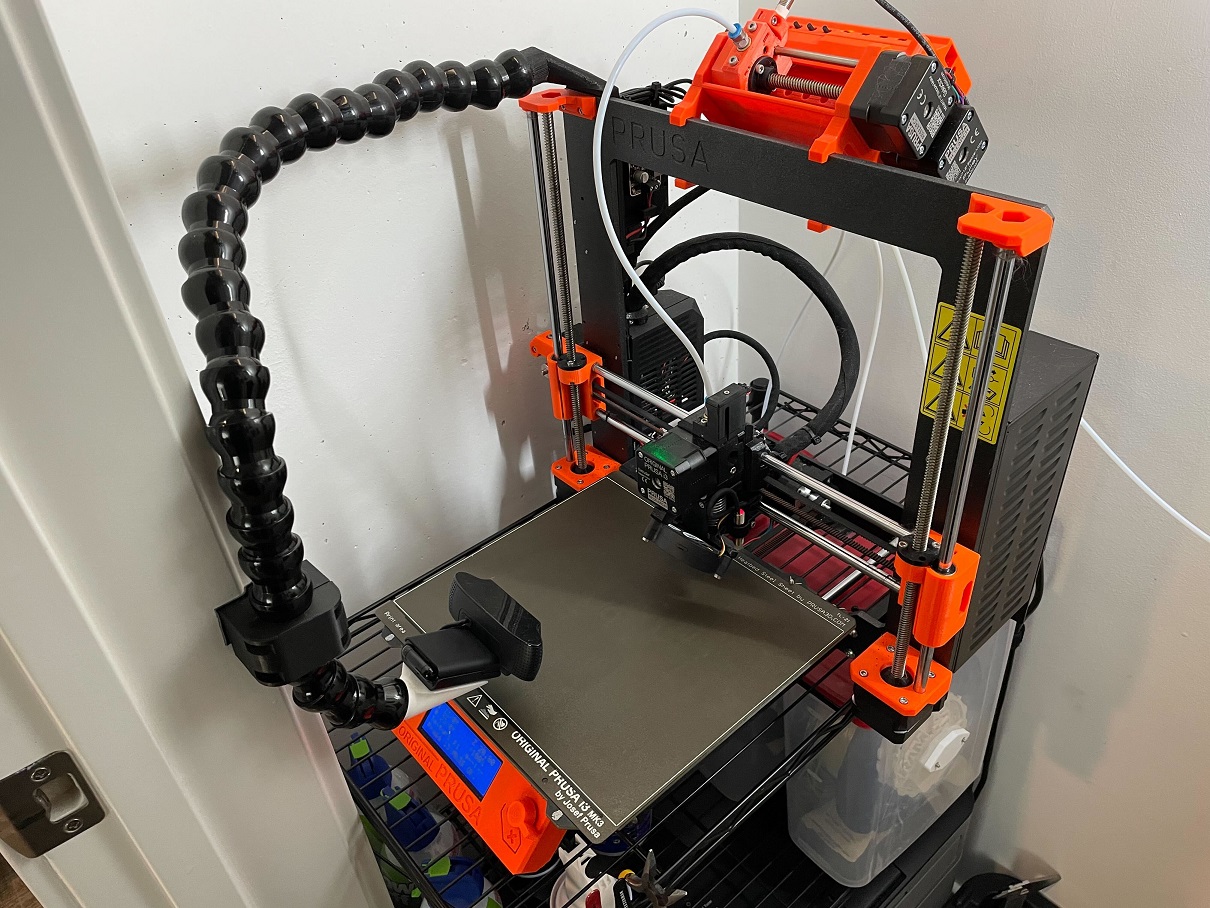
Prusa i3mk3/s octoprint rpi + camera mount
prusaprinters
<p>I couldn't find a raspberry pi holder / octoprint server that i liked, so i designed my own.</p><p>[Project video here](https://www.youtube.com/watch?v=80kXBwF7VbI) (It really helps my channel if you engage with the video, im also more responsive to comments / questions you youtube than I am on thingiverse):</p><p><br>additional materials needed (you probably have some of these already):</p><p>* webcam with 1/4" mount. (I used a Logitech C920): [link](https://www.amazon.com/gp/product/B006JH8T3S)</p><p>* 3A boost/buck converter to power the pi off of the prusa power supply: [link](https://www.amazon.com/gp/product/B078XQ5MWR) **MAKE SURE TO ADJUST THE VOLTAGE BEFORE CONNECTING YOUR PI!!!**</p><p>* loc-line / flexible camera stuff (I bought mine a while back and is no longer listed. You might be able to find it cheaper. I initially went with just one of these, but bought a second and used 1/2 of the second one to add additional length. I currently am using 25 sections of tubing): [link](https://www.amazon.com/Adjustable-Gooseneck-19-Section-Fusion-Session/dp/B09BZ89XKL/)</p><p>* M3 bolts of various sizes, I have this kit: [link](https://www.amazon.com/gp/product/B071KBVZVV)</p><p>* small right angle USB cable for connecting the pi to the prusa control board: [link](https://www.amazon.com/gp/product/B00B5HS7TI)</p><p>* rpi heatsink. Probably unneeded, but looks cool. I also used the bolts from this in the design, so you might have to drill out a hole or widen the nut insert if you want to use bolts from the above kit): [link](https://www.amazon.com/gp/product/B07VWM4J4L)</p><p>* spade connectors to attach the boost/buck board to the prusa PSU: [link](https://www.amazon.com/gp/product/B01B1753K2)</p><p>* headers for making power wire to go from the boost/buck board to the pi: [link](https://www.amazon.com/gp/product/B074HVBTZ4)</p><p>* wire: needed, not gonna link.</p><p>* magnets (only needed if you also print the door brace) [link](https://www.amazon.com/gp/product/B07842PSJD)</p><p>_____________________________________________<br>STEP files are included, but contain some parts that should be hidden, couldn't figure out how to export a single body in fusion 360.<br>_____________________________________________</p><p>useful octoprint settings and such:</p><p>**Octoprint disconnects from wifi and doesn't reconnect**:<br>```<br># edit /etc/wpa_supplicant/wpa_supplicant.conf and add the following before the network={} block:</p><p>ap_scan=1<br>autoscan=periodic:10<br>disable_scan_offload=1<br>```</p><p>**Get camera working in octoprint**<br>```<br># edit /boot/octopi.txt</p><p>set camera="usb"<br>set camera_usb_options="-r 1920x1080 -f 15"</p><p>```</p><p>**Disable camera auto focus / white balance / brightness stuff (needed for clean looking timelapses - go to http(s)://<your-octoprint-server>/webcam/?action=stream to get a full screen webcam view while changing settings**<br>```<br>### install needed utility<br>sudo apt install v4l-utils</p><p>### list settings / current values<br>v4l2-ctl --list-ctrls-menus</p><p>### values that work well for me:</p><p># exposure ( note, exposure_auto=1 is manual, 3 is auto. this is confusing!)<br>v4l2-ctl -c exposure_auto=1<br>v4l2-ctl -c exposure_auto_priority=0<br>v4l2-ctl -c exposure_absolute=600<br>v4l2-ctl -c gain=255</p><p># focus - will take some messing with<br>v4l2-ctl -c focus_auto=0<br>v4l2-ctl -c zoom_absolute=0<br>v4l2-ctl -c focus_absolute=65</p><p># didn't notice a difference with this setting personally<br>v4l2-ctl -c backlight_compensation=0</p><p># color / image settings (don't worry if your camera goes green when you set auto=0, 3000 is a good start, higher is warmer, lower is cooler)<br>v4l2-ctl -c white_balance_temperature_auto=0<br>v4l2-ctl -c white_balance_temperature=3050<br>v4l2-ctl -c sharpness=140<br>v4l2-ctl -c brightness=120<br>v4l2-ctl -c contrast=120<br>v4l2-ctl -c saturation=110<br>```<br> </p>
With this file you will be able to print Prusa i3mk3/s octoprint rpi + camera mount with your 3D printer. Click on the button and save the file on your computer to work, edit or customize your design. You can also find more 3D designs for printers on Prusa i3mk3/s octoprint rpi + camera mount.
