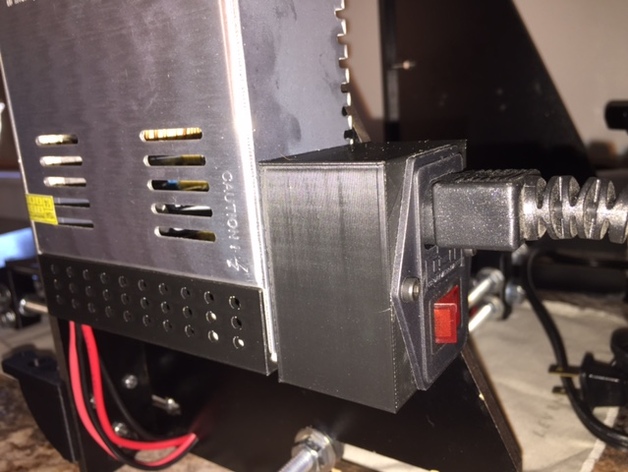
Prusa i3 PSU Cover + Switch
thingiverse
I am upgrading one of my Prusa Mendel printers to use a wooden variant of the Prusa i3 frame. I want to mount a 12V 30A power supply unit (PSU) to the right-side brace of the printer's frame, and I've successfully utilized the convenient 4mm mounts on the bottom of the PSU to achieve this feat. You can view an accompanying photo to verify my mounting setup. However, in order to simplify the printing process while using less plastic, I decided to design a power supply terminal cover and switch mount that is easier to print than its predecessors. Furthermore, since the PSU is mounted flush with the printer's frame, I required a flush-mounted cover so as to avoid employing/making spacers. Consequently, I designed two distinct parts; one covers the terminals while the other houses the inlet module. Notably, I opted for an inlet module that secures itself using screws rather than relying on adhesive or clip-based attachments. To aid users in fabricating this PSU terminal cover and switch mount assembly, I will now provide the necessary components: - 2 M3 x 10mm fasteners (screws) for mounting the power supply terminals - 2 M3 x 10mm fasteners (screws) to secure the inlet module (alternatively, users can utilize 5mm-long M3 screws) - 2 M3 nuts for fastening purposes - A power connector and a switch identical in configuration to this: Inlet Module Fuse Switch Male Power Socket 10A 250V 3 Pin IEC320 Note: In the event that users decide to employ an alternative module, it is essential that they adjust the corresponding design files to accommodate their specific choice. To assemble this setup: 1. Open the attached .scad file and adjust the cover dimensions as needed to suit your specific power supply unit. 2. Print one set of the modified covers according to your preferences (thickness, material, etc.). 3. Organize the electrical wires in a safe manner before securing them into place using appropriate means (wire ties or clamps). 4. For increased precision and minimal complexity, consider initially installing the inlet module with temporary extensions ("pigtails") on each wire before ultimately cutting them to suitable lengths after securing the terminal cover. 5. Review the accompanying .scad file for practical printing tips tailored specifically to your 3D printer model.
With this file you will be able to print Prusa i3 PSU Cover + Switch with your 3D printer. Click on the button and save the file on your computer to work, edit or customize your design. You can also find more 3D designs for printers on Prusa i3 PSU Cover + Switch.
