Prusa i3 MK3 CNC/Plotter Multi-tool Kit
myminifactory
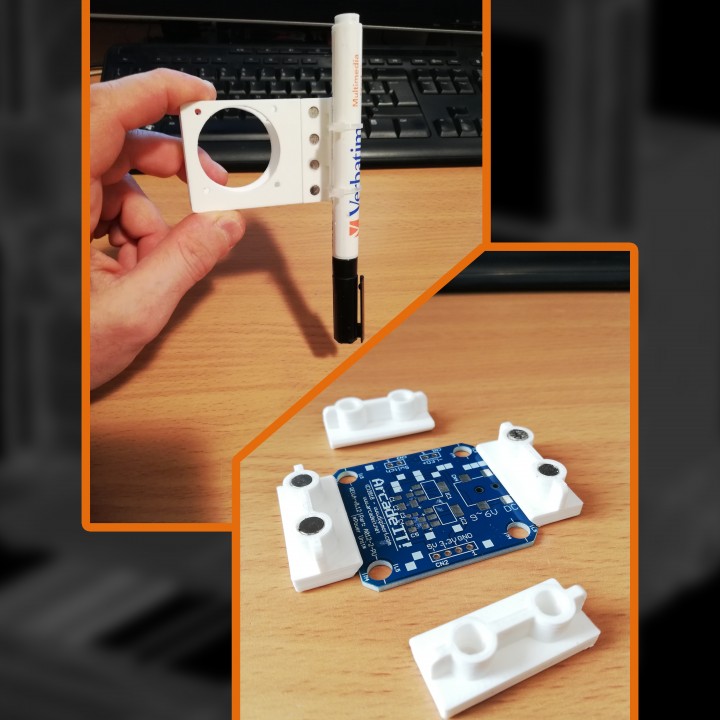
This project is my entry for the design challenge "Pimp My Original Prusa" and it serves as an upgrade tool. The idea was born a month ago when I tried using my small STARTT 3D printer as a pen plotter to draw circuits on a copper board with a marker. Unfortunately, I don't own a Prusa printer, so this could be a great opportunity to develop and share a useful tool for this printer and possibly win one :). The first problem was finding a way to mount something on the body of the extruder without making any changes. So, I studied the 3D model of the printer and downloaded the printable parts to check possible locations. The solution I found is to remove the fan from the extruder and use a special slot where it can be placed and then screwed back onto the extruder. This piece has one side with four holes. These are used to attach the tool holder in two ways. One way is to use standard M4 16mm long screws and hexagonal M4 nuts, and the second is to use neodymium magnets rods on both pieces. 1) I used cylindrical head M4 screws DIN 7985 stainless steel, and hex nuts stainless a2 UNI 5588, as shown in pictures. The nuts are placed in the four slots of the main piece (the fan interface) so they remain still while screwing. 2) I used Neodymium magnets rods instead of the nuts, and in the holes for the screws in the tool holder. For the main part, I used 5mm x 10mm round rod magnets, and for the holder, I used 5mm x 3mm round rod magnets. This video shows where magnets are inserted: Animation of the magnets assembly on YouTube. The use of magnets allows you to plug and unplug multiple tools without unscrewing them every time. These new neodymium magnets are strong enough to keep the tool firmly attached to the body of the extruder: Video demonstration of the strength of neodymium magnets mounted on the Multi-tool. When a permanent marker is mounted on the tool: Video demonstration of the Multi-tool with a permanent marker mounted. If you print several copies of the holder, you can exchange different markers or any other tools needed, of course. To use this printer as a plotter, you can use the software "FlatCAM" that converts Printer Circuits files or SVG vector graphics into gCode that you can use with the printer. You need some setup to set the offset distance (the pen is not in the same position as the extruder) and the height of the tip. There are many videos on YouTube about this subject. Together with the basic tool, there is a special PCB holder that comes really useful to keep the PCB stuck to the magnetic bed of the printer. It's possible to insert the same neodymium magnetic rods inside the holes so it will stay still on the bed while the tool draws on the PCB. I am sure this will be handy for many people, and let your creativity tell you more different uses for this tool.
With this file you will be able to print Prusa i3 MK3 CNC/Plotter Multi-tool Kit with your 3D printer. Click on the button and save the file on your computer to work, edit or customize your design. You can also find more 3D designs for printers on Prusa i3 MK3 CNC/Plotter Multi-tool Kit.
