Prusa I3 Mk2 Y motor spacer
pinshape
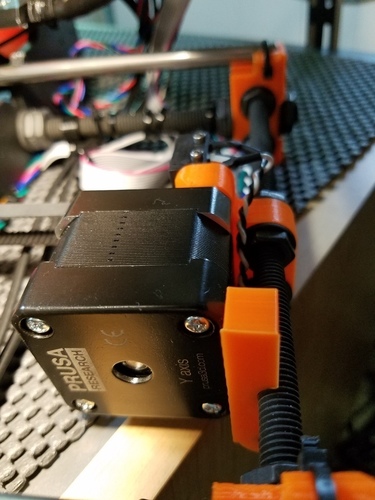
If you have a Prusa i3 Mk2 and the Y axis movements are rough or noisy, check the Y motor position. When you look down at it, the motor should be parallel to the threaded rods. If it's not - the rear end of the motor is closer to the rods - that's because the Y motor holder has a weakness. The motor is mounted on one edge only (unlike the X motor that is mounted by three screws, the Y motor only has two). The force exerted by the belt onto the pulley is off-axis and may bend the Y motor holder or even crack it (mine has a hairline crack in the corner below the Y endstop). A simple solution to this problem without taking apart the Y axis is to add support to the rear end of the Y motor. This Y motor spacer clips onto the threaded rods and keeps the Y motor parallel to the rods. To install it, insert a screwdriver between the motor and the rods and carefully push the motor away from the rods (don't pinch or cut the motor cables, and don't bend the Y holder in the other direction). Then slide the spacer along the rods under the motor (not too far, the cable must not get pinched between the motor and the spacer) and let go of the motor; it will hold the spacer in place. Printer Brand: Prusa Printer: Prusa Mk2 Rafts: No Supports: No Resolution: 0.2mm Infill: 30% honeycomb or cubic
With this file you will be able to print Prusa I3 Mk2 Y motor spacer with your 3D printer. Click on the button and save the file on your computer to work, edit or customize your design. You can also find more 3D designs for printers on Prusa I3 Mk2 Y motor spacer.