Prusa I3 MK2 Pi Mount - Add-on LED Bar
prusaprinters
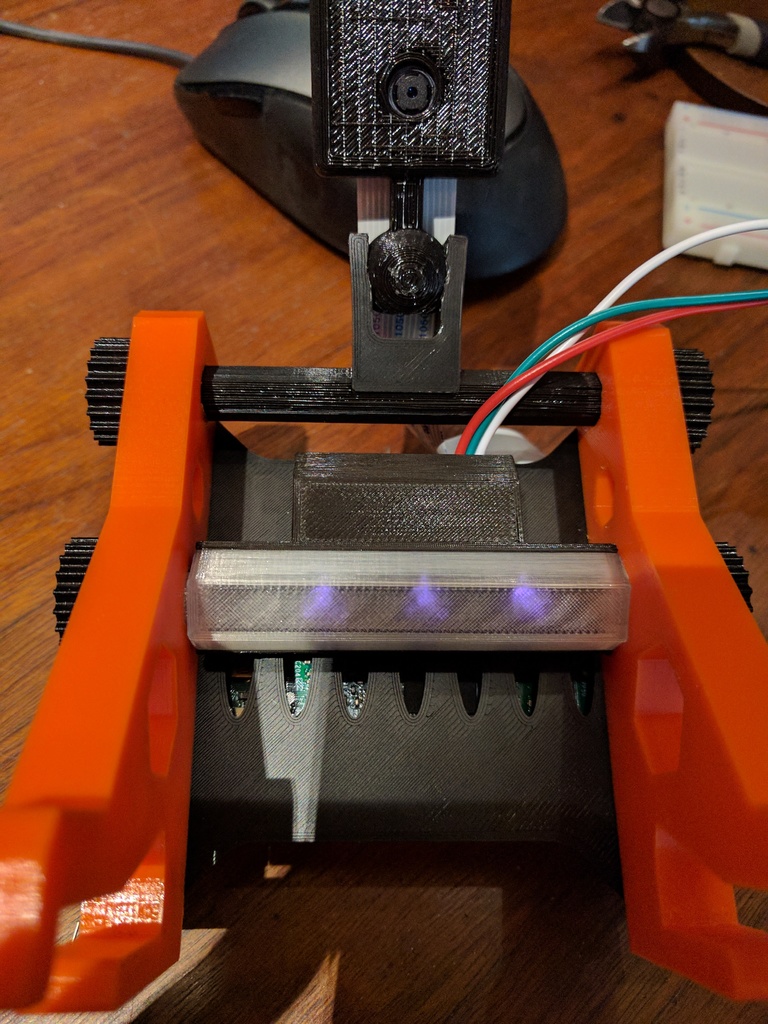
<p>This is an add-on part for my Raspberry Pi mount for the Prusa i3 MK2:</p> <p><a href="https://www.thingiverse.com/thing:2267652">http://www.thingiverse.com/thing:2267652</a></p> <p>It adds another accessory bar under the mount (the first being the mount for the Pi Camera v2.1) that can be used to mount some high-output LEDs for illuminating the build platform.</p> <p>The setup consists of a bottom and top of the "rod" that holds the LEDs. The top is meant to be printed with clear/transparent PLA or whatever appropriate clear material you have. The bottom, in my case, is printed black to match the printer. A flat panel with three 5mm holes mounts the LEDs with room for the wiring below them.</p> <p>If you are using external power for your LEDs (connecting them to their own power source), you should print the mk-led-holder-bottom.stl version. This has room for wiring the LEDs and running power and ground to them. Any resistors or other controls would be associated with your power supply.</p> <p>Alternately, if you're looking for powering the LEDs with the Pi, and controlling them via the Octoprint Enclosure plugin (so they turn on/off with printing), there's a second version with a small space behind the LEDs sufficient to hold the two resistors and transistor needed to safely power them. It also has a wider opening that will fit the three wires (power/ground/trigger) you need. A circuit diagram is included with the files. That said, the circuit is specific to the LEDs I used, so make sure you understand the resistor sizing and transistor requirements for the ones you use. Its a tight fit, but there's room for everything.</p> <p>As with the camera mount, there are two nuts to secure the rod in place. (Although this one will self-center because the rod itself is wider.)</p> <p>For my specific setup, I'm using three high-output Infrared LEDs from Adafruit (<a href="https://www.adafruit.com/product/387">https://www.adafruit.com/product/387</a>) because I have a No-IR Pi camera, and want to be able to record at night without the extra light. So they look very dim in the color photo above, but are screamin' bright in IR. I experimented with some white LEDs, and I believe that sufficient illumination would be provided by them, as well, for the standard camera.</p> <h3>Print Settings</h3> <p><strong>Printer Brand:</strong></p> <p>Prusa</p> <p><strong>Printer:</strong></p> <p>Prusa Mk2</p> <p><strong>Rafts:</strong></p> <p>Doesn't Matter</p> <p><strong>Supports:</strong></p> <p>Yes</p> <p><strong>Resolution:</strong></p> <p>.15mm</p> <p><strong>Infill:</strong></p> <p>20%</p> <p><strong>Notes:</strong></p> <p>The parts all have varying requirements for printing. You probably want to use a fairly low resolution for the "clear" cover for the LEDs -- it will be more transparent. That said, a higher resolution may give you a diffuser effect, so you may want to experiment.</p> <p>The LED holder bottom can be tricky to print because its at a weird angle. Make sure your slicer generates appropriate supports. I found the default in the Prusa Slic3r was being over-optimistic about how much overhang will work without supports, and had to adjust it to ensure the bottom lip is supported during printing.</p> Category: 3D Printer Accessories
With this file you will be able to print Prusa I3 MK2 Pi Mount - Add-on LED Bar with your 3D printer. Click on the button and save the file on your computer to work, edit or customize your design. You can also find more 3D designs for printers on Prusa I3 MK2 Pi Mount - Add-on LED Bar.
