Prusa i3 MK2 & MK3 Y Chassis Bearing Straps & Integrated Bushings
thingiverse
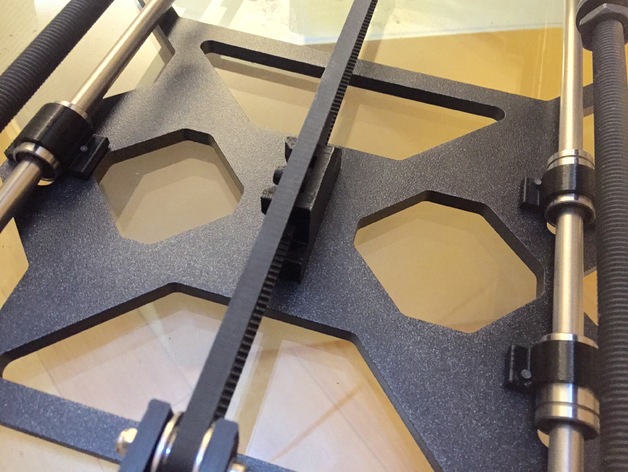
2018aug19 Update - I can now confirm that using three rights of the integrated bushing version works perfectly to replace the original bearings and u-bolts on the MK3, effectively eliminating almost all noise present with the original bearings:) Enjoy! -=dave 2017nov18 Big Update - What's even better than ensuring your bearings are secured with rigid straps instead of zip-ties? Making them one-piece printed and bolted in, of course. I have been testing various printed bearings over the course of the last year and am finally ready to release what I'm quite confident is the best Y axis bearing upgrade you can perform on your MK2, MK2S, or (most likely) MK3. Video of them in action: https://youtu.be/RJopBbkPseA The v1.0.2 straps are still there for use with original bearings. If printing integrated bearing version, you must print in PLA. PETG, ABS, and HIPS have been tested and shown to be inferior or not work at all. Nylon has not been tested. Note: if they don't come out the perfect ID for the 8mm rod for you, you owe it to yourself to make necessary adjustments with the OpenSCAD Customizer or download/compile yourself. If you want average tolerances, stick with stock bushings and my straps. If you are looking for perfection (and quiet printing), put the effort in to hand-fit the integrated bushing version. Post-Printing // model: Prusa i3 MK3 Y Chassis Bearing Straps // This replaces the zip ties that tend to stretch and can reduce accuracy over time. Optionally, also replace the entire strap and bearing with a 1-piece printed version that has been tested extensively across multiple users and show to both improve print accuracy over the stock zip-ties of the MK3, and reduces printer noise over using Prusa LM8UU linear bearings included in both the MK2 and MK2S. // author: fiveangle@gmail.com // date: 2017nov18 // notes: Big thanks to @nicw who performed extensive empirical and objective testing, and wrote original installation steps below. // - Print 2x "left" and 1x "right". Use 6x M3x10mm button-head or socket-head screws to secure. If using the integrated bearing version, use this procedure for the best experience: // - Drill rinse rods with isopropyl alcohol // - Mount both left bushings snug but not tight to bed carriage // - Use drill + rods through both left side bushings. Keep spinning rod until the bracket itself slides down by gravity alone (slight angle). Okay to have some stiction, but shouldn't take a lot of force to move. Keep the rods moist with isopropyl alcohol to ensure PLA bearing surfaces are not melted due to friction during the process. You want the bearings to stretch/wear, but not melt. // - Tighten the bearings on the left rod evenly while moving rod through both bearings to ensure they are in perfect alignment with each other. // - Do the same wear-in procedure with the single right bearing without mounting to bed (you will align right bearing parallel to left rod after bed installation). // - Mount the right bearing snug but not tight to the bed carriage // - Mount bed carriage with rods on Prusa, adjust width and skew of threaded rods until the right rod is perfectly parallel to the left. When parallel, the bed moves without belt connected smoothly the entire length of the bed (bearings will stick at either end or in the middle if rods are not parallel to each other). // - Begin to tighten the mounting screws for the right bracket. This should result in the bed sticking again at some point(s) of it's travel. Continue to adjust the threaded rods until the bed moves smoothly and consistently the entire range of motion. This will be the most tedious part of the installation due to threaded rods changing alignment after tightening [Protop: this process also just happens to be the best method to align the Y axis smooth rods, even if you intend to replace the integrated bearings with standard ones after alignment, since linear bearings will dig into rods instead of sticking if not parallel]. // - Slide bed all the way forward away from end-stop switch. Then tighten down fully, keeping bracket there for reinforcement. // - Check that the stiction isn't too great. There should be NO stiction if you could theoretically push with equal force on both sides. // - Attach belt attachment bracket to bed. // - Double-check your y-axis belt angles. // - Print like nobody's watching.
With this file you will be able to print Prusa i3 MK2 & MK3 Y Chassis Bearing Straps & Integrated Bushings with your 3D printer. Click on the button and save the file on your computer to work, edit or customize your design. You can also find more 3D designs for printers on Prusa i3 MK2 & MK3 Y Chassis Bearing Straps & Integrated Bushings.
