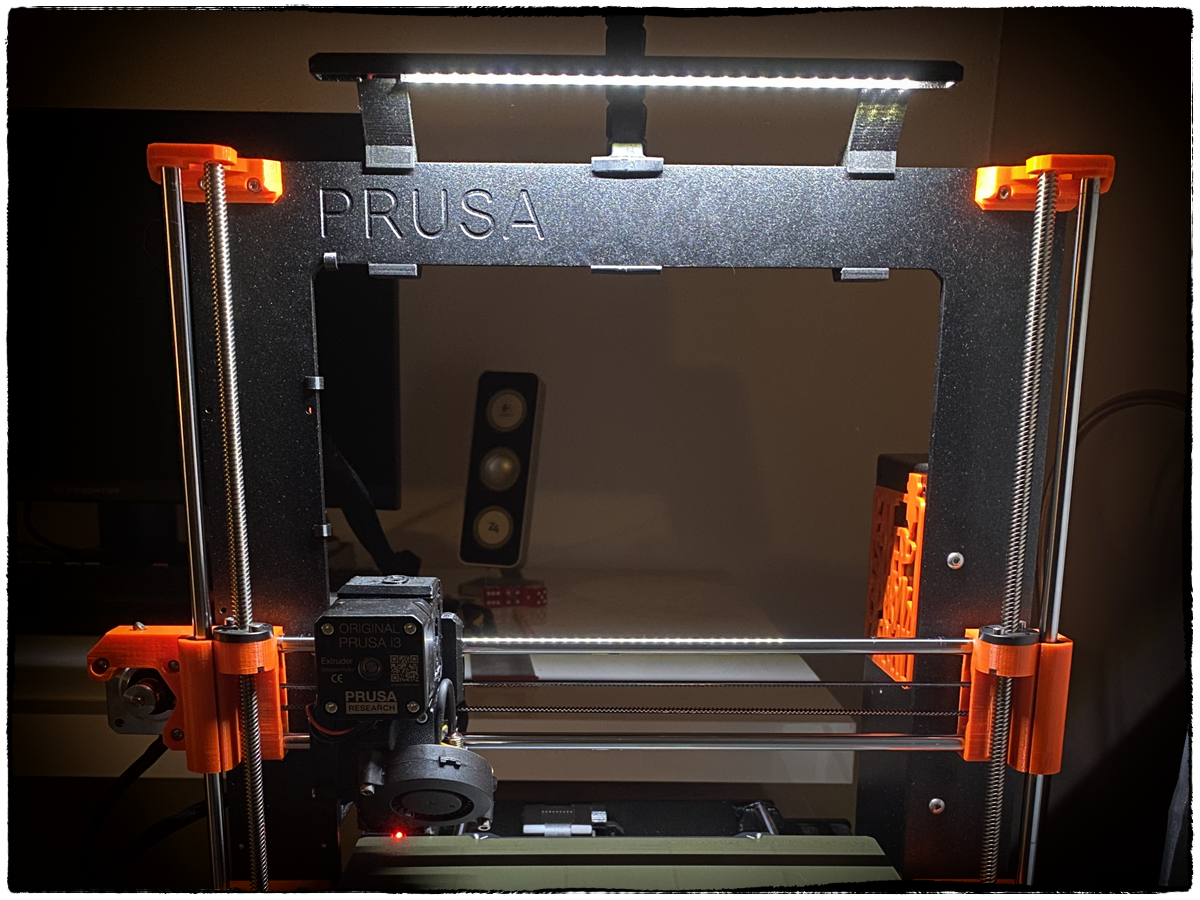
Prusa i3 LED Lightbar with Filament Guide MK2 / MK3 / MK3S - Single Piece
prusaprinters
<p><img alt="Buddy" height="97%" src="https://i.ibb.co/Xp3qt0q/h2.png" width="97%"/></p> <p>Here is my design of a Lightbar for the Prusa MK2* & MK3(s).</p> <p><strong>Features:</strong></p> <ul> <li>LED's directly powered by the printer</li> <li>Wiring running inside the mount</li> <li>Integrated filament guides for both spool sides</li> <li>On/Off switch</li> <li>Directly wired to the Einsy board</li> </ul> <p><strong>Hardware needed:</strong></p> <ul> <li>Wires</li> <li>Switch (10x15mm, standard size, like <a href="https://www.aliexpress.com/item/32921026422.html?spm=a2g0o.productlist.0.0.1c5313ce9bHl4M&algo_pvid=6a672913-6609-4980-9225-2778fcda0396&algo_expid=6a672913-6609-4980-9225-2778fcda0396-35&btsid=f061563d-0e5d-4e64-9179-2874cbf4c177&ws_ab_test=searchweb0_0,searchweb201602_6,searchweb201603_55">this</a>)</li> <li>Soldering tools</li> <li>24V LED Strip - up to 10mm thick like the 5050</li> </ul> <p><strong>Installation guide:</strong></p> <ol> <li>Cut LED strip to the proper length (up to 21cm)</li> <li>Solder wires to the strip and push them through the cable channel</li> <li>Solder positive wire to the switch and solder another one on the other side of the switch. The negative wire can be pushed all the way through the LED Mount.</li> <li>Connect wires to Einsy Board as shown <a href="https://d17kynu4zpq5hy.cloudfront.net/igi/prusa3d/esi141KxVvPKUWXE.huge">here</a></li> </ol> <p><strong>Changelog:</strong></p> <ul> <li>08/05/2020: Changed some parts of the model for easier FDM printing and better removal of the supports</li> <li>09/15/2020: The filament guide is a bit wider now</li> </ul> <p><a href="https://www.prusaprinters.org/prints/16681-mk3-mk3s-cable-clip">Here</a> are additional cable clips you might also want to print to hide the wires behind the frame.</p> <p>I recommend to use the .gcode or .3mf file as this is already correctly orientated and sliced. If not, take care to not have supports inside the mount.<br/> <img alt="Buddy" height="20" src="https://i.ibb.co/x8GpHH6/attention.png" width="20"/> Also carefully remove the supports around the filament guide!</p> <p><em>If you like this file or need some adjustments feel free to leave a comment. A rating or tip is also welcome and may check out my other designs!</em></p> <p><img alt="Buddy" height="50" src="https://i.ibb.co/Q9Bz4RX/logo-small.png" width="50"/></p> <p><br/><br/> <br/></p> <p><h6 style="text-align: center;"><em>*If you are using this on the MK2 make sure to buy 12V LED strips and wires needs to be connected differently (directly to the PSU)</em></h6></p> <h3>Print instructions</h3><p>I recommend to use the .3mf or .gcode file.<br/> Printed with PETG, you might also get away with PLA.<br/> Take care not to have supports inside the model (use support blockers).<br/> Also be careful when removing the supports around the filament guides.</p>
With this file you will be able to print Prusa i3 LED Lightbar with Filament Guide MK2 / MK3 / MK3S - Single Piece with your 3D printer. Click on the button and save the file on your computer to work, edit or customize your design. You can also find more 3D designs for printers on Prusa i3 LED Lightbar with Filament Guide MK2 / MK3 / MK3S - Single Piece.
