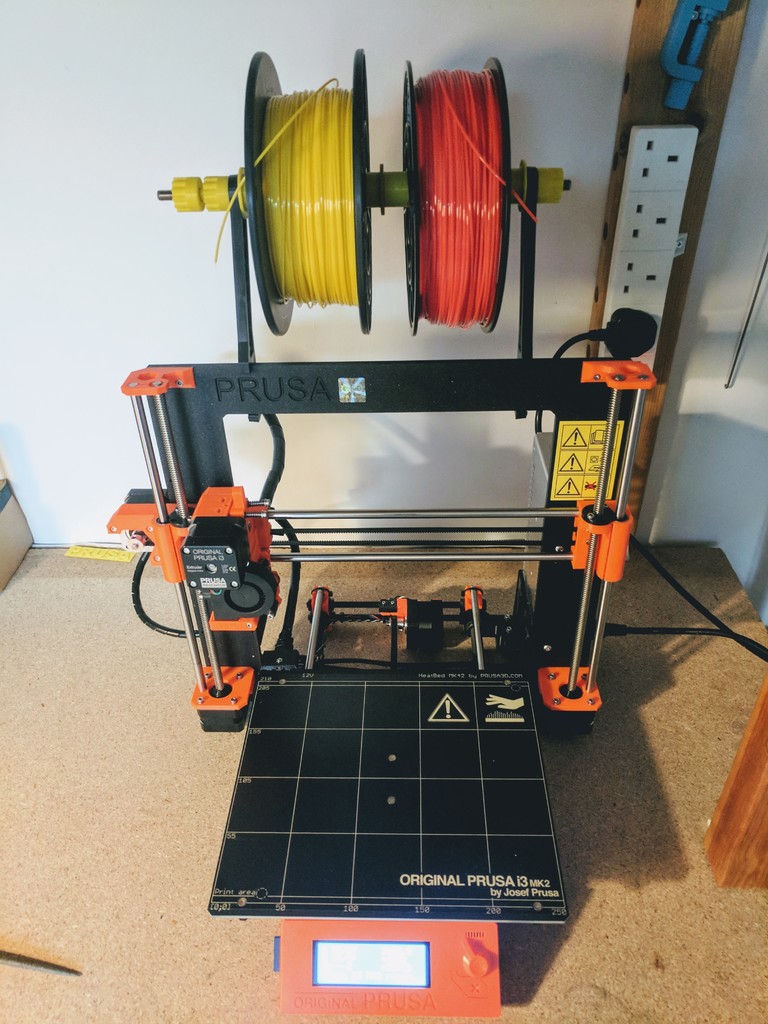
Prusa i3 Dual/Single Spool Upgrade
thingiverse
While the factory Prusa i3 MK2 spool holders are a decent design and pretty robust, the way they hold onto the spool is less than sufficient, leaving me feeling uncertain that 1kg of filament wouldn't crash down onto my print bed mid-print. To address this concern, I wanted to keep the original spool holders but utilize them in a more effective way to provide security and allow for two spools at once, which is helpful when keeping a "Draft" filament and a "Production" filament together on my machine, making swaps quicker and easier. You can use this design to create either an upgraded dual spool holder or optionally a single spool holder. When using it as a single holder, one side of the spool has a flange while the other does not, resulting in a less visually appealing appearance. If there's sufficient demand, I'll upload a single spool with flanges on both ends to improve its aesthetic appeal (this may require two pieces to minimize support complications). Printed in PLA, the spool tubes are smooth enough to allow for easy rotation of the filament roll, though I might upgrade it to roller bearings at some point. However, I generally consider this an overkill since the feeder has more than enough power to pull the roll without any issues. To make this design, you will need: 2 x Original Prusa i3 Mk2 filament holder spools. 1 x M8 threaded bar - 300mm for dual spool, 180mm for single. 3 x M8 plain nuts (13mm). Printed parts: 1 or 2 x Spool tubes. 1 x Spacer (only if using two spools). 3 x Nut holders. Print the parts as orientated but use supports for the spacer and nut holder, then smooth out any contact areas to achieve a nice finish. I used Slic3r to generate my GCode, so results with other slicers may vary in terms of ease of support removal. Once printed, take the threaded bar and 2 x M8 nuts and wind them together to drive the captive nut into the nut holder, then repeat for the remaining two nut holders. Assembly order from left to right for single spool: M8 Bar / Nut Holder + Nut Holder (wound together as a lock) / Prusa Upright / Spool Tube / Prusa Upright / Nut Holder Assembly order from left to right for dual spool: M8 Bar / Nut Holder + Nut Holder (wound together as a lock) / Prusa Upright / Spool Tube / Spacer / Spool Tube / Prusa Upright / Nut Holder Optionally, the spacer can be glued in place on one or both holders, or allowed to rotate freely, though this makes loading the filament more challenging for dual spools. I find it easier to build it up off the machine and then attach it with the filament attached, all ready to go. This quick Sunday afternoon redesign aims to help secure someone's filament!
With this file you will be able to print Prusa i3 Dual/Single Spool Upgrade with your 3D printer. Click on the button and save the file on your computer to work, edit or customize your design. You can also find more 3D designs for printers on Prusa i3 Dual/Single Spool Upgrade.
