"Prusa-ganizer" Prusament Organizer
prusaprinters
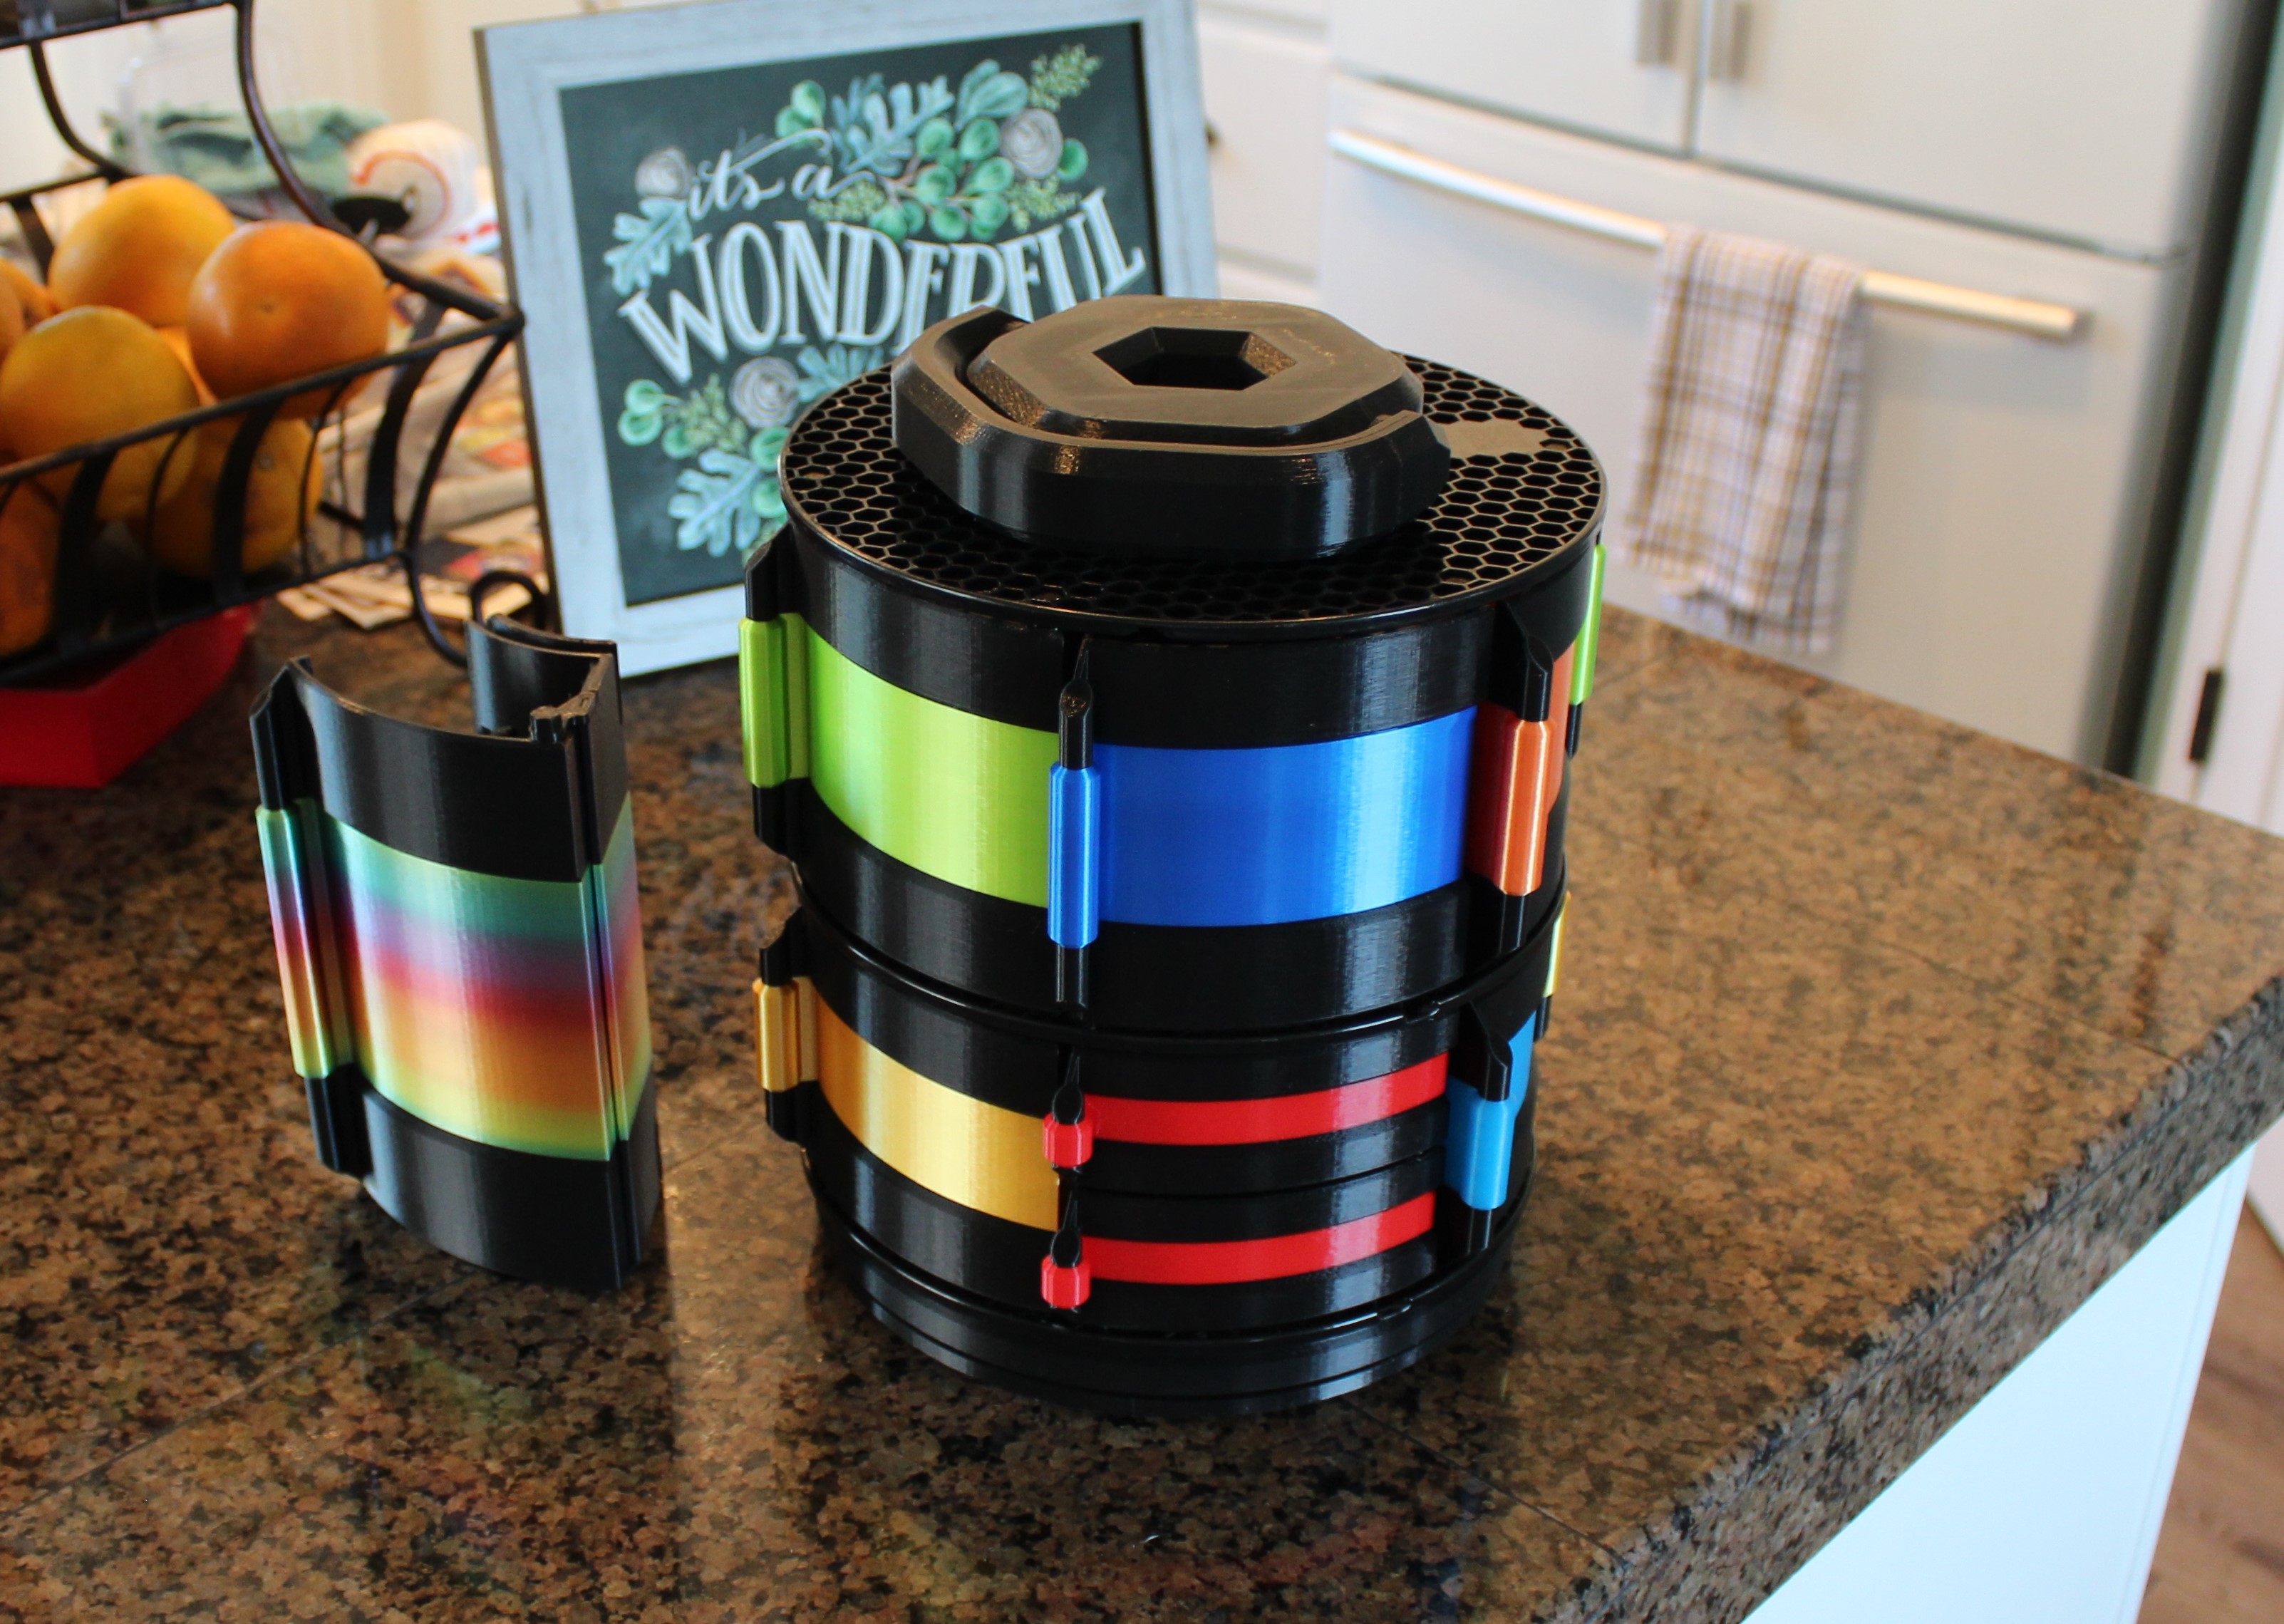
<p>Organizer carousel with 6 hinged bins per level. Multiple levels of various height bins are possible. Holds everything from pens and picks, to screws, paint bottles, superglue, and tools. Doors are secured nicely with magnets. Portable as well with a beefy print-in-place handle.</p> <p>Must use Prusament spool flanges because the hinges are locked into the hexagon pattern. Non-Prusament spools won't work.</p> <h3>Print instructions</h3><p>Supplies Needed:</p> <ul> <li>2 Prusament Flanges (+1 every extra layer) (1 Spool yields 2 Flanges)</li> <li>6 Skateboard (608) Bearings</li> <li>12 8x3 mm Magnets (+12 more for every extra layer you build)</li> <li>Superglue to secure the magnets</li> </ul> <p>Sheet Content:<br/> Sheet 1 = 78mm, 95mm, and 160mm Top Screw, Handle, and Track<br/> Sheet 2 = Base, Top Hinge x6, Bottom Hinge x6, and Bearing Clip x6<br/> Sheet 3 = 78mm, 95mm, and 160mm Extension and Middle Hinge x6<br/> Sheet 4 = 78mm Bracket x2 and 78mm Bin x2<br/> Sheet 5 = 95mm Bracket x2 and 95mm Bin x2<br/> Sheet 6 = 160mm Bracket x2 and 160mm Bin x2<br/> Sheet 7 = 36mm Bracket, 36mm Bin x2 and 36mm Hinge</p> <p>Printing Instructions:</p> <p>No supports are needed on any sheet.</p> <p>Overview: Sheet 1 and 2 contain everything you need to build the first level of bins, except the bins. Sheet 3 contains the extension kit. The rest of the sheets contain two bins and brackets of each size.</p> <p>Instructions: Print Sheet 1 and 2 in Prusament Jet Black. Be sure Sheet 1 is configured to print the correct length screw. By default it's set for the 78mm bins.<br/> Print Sheet 4, 5, 6, or 7 x3. Each sheet is two bins and brackets of various height. The bins have two color changes. Start with Jet Black, then switch to your favorite color, then finish with Jet Black again.</p> <p>I've also included gcode for a 50% mini-bin I printed multiple times as a color-sampler. It's not necessary that you print it, but if you're undecided on what color you want to use it's handy.</p> <p>The Handle is printed in place with the screw. Break it free and work it a bit. A squirt of WD-40 (Silicone), then play with it a little more. Wipe her off and she'll feel like she was machined.</p> <p>Assembly instructions:</p> <p>Please review the attached picture with the 4 types of hinges labeled.</p> <p>Install the magnets by first putting a drop of glue in the back of a bin recess.<br/> Set an 8x3 magnet in the recess.<br/> Assemble a bracket with a bin and put a Top Hinge or a Middle Hinge on top to clip them together. (Use a Top Hinge only if this is going to be the very top level of your organizer)<br/> Put a drop of glue in the magnet hole of the bracket.<br/> Drop in a magnet. It will automatically find it's polarity with the magnet on the bin.<br/> Set these sub-assemblies aside until you've printed 6 bins.</p> <p>The 36mm Bins are double stacked next to or instead of a 78mm Bin. Use the 36mm Hinge that it prints with between the bins.</p> <p>When you're done with each bin assembly it's a very good idea to check the bottom hinge hole for boogers. Ream it out just a bit before you attempt to assemble everything. I snapped a couple posts because I didn't check that.</p> <p>Disassemble your empty Prusament spool. One spool yields two flanges.</p> <ol> <li>Lay one flange down with inner brim facing up, and the notch in the inner brim pointing toward you. Locate the hexagon hole that's out to the right at 90 DEGREES, and DOWN ONE HEX. Insert a Bottom Hinge here from the back (w/ post up), and another one every 60 degrees. See attached picture with these hole locations circled in red. The Bottom Hinge looks like a hexagon with a post coming out the top.</li> <li>Place the bracket and bin assembly so that it straddles the inner rim and the bottom hinge 6x.</li> <li>On top of each bin assembly should be a Top Hinge or a Middle Hinge. The two look identical except the Middle Hinge has a post coming out the top. Use Middle if you are building upward with more levels, and use the Top Hinge on the very top level.</li> <li>Place the other Prusament Flange on top of the assembly (facing down if you're building 1 layer, facing up if you're building more layers). Align the inner notch exactly the same as the bottom notch. </li> <li>Press together firmly. The top hinges should press into the hexagon holes. [Return to Step 2 if you're building more layers]</li> <li>Put the screw and handle in through the top (with extensions on if necessary) and turn the entire assembly over. Make sure all the Bottom Hinges are still in place.</li> <li>Put the bearings on the posts of the round Base (Sheet 2) and secure them with the included clips (Sheet 2). No superglue is required. </li> <li>Spin the Base onto the bottom of the assembly with the bearings freely spinning.</li> <li>Lay down the track and place the organizer on top.</li> <li>Go back to Prusaprinters.org and rate this design 5 stars and please share pictures of your carousel. Cheers!</li> </ol>
With this file you will be able to print "Prusa-ganizer" Prusament Organizer with your 3D printer. Click on the button and save the file on your computer to work, edit or customize your design. You can also find more 3D designs for printers on "Prusa-ganizer" Prusament Organizer.