Prusa Enclosure Heatbed Cable Cover
prusaprinters
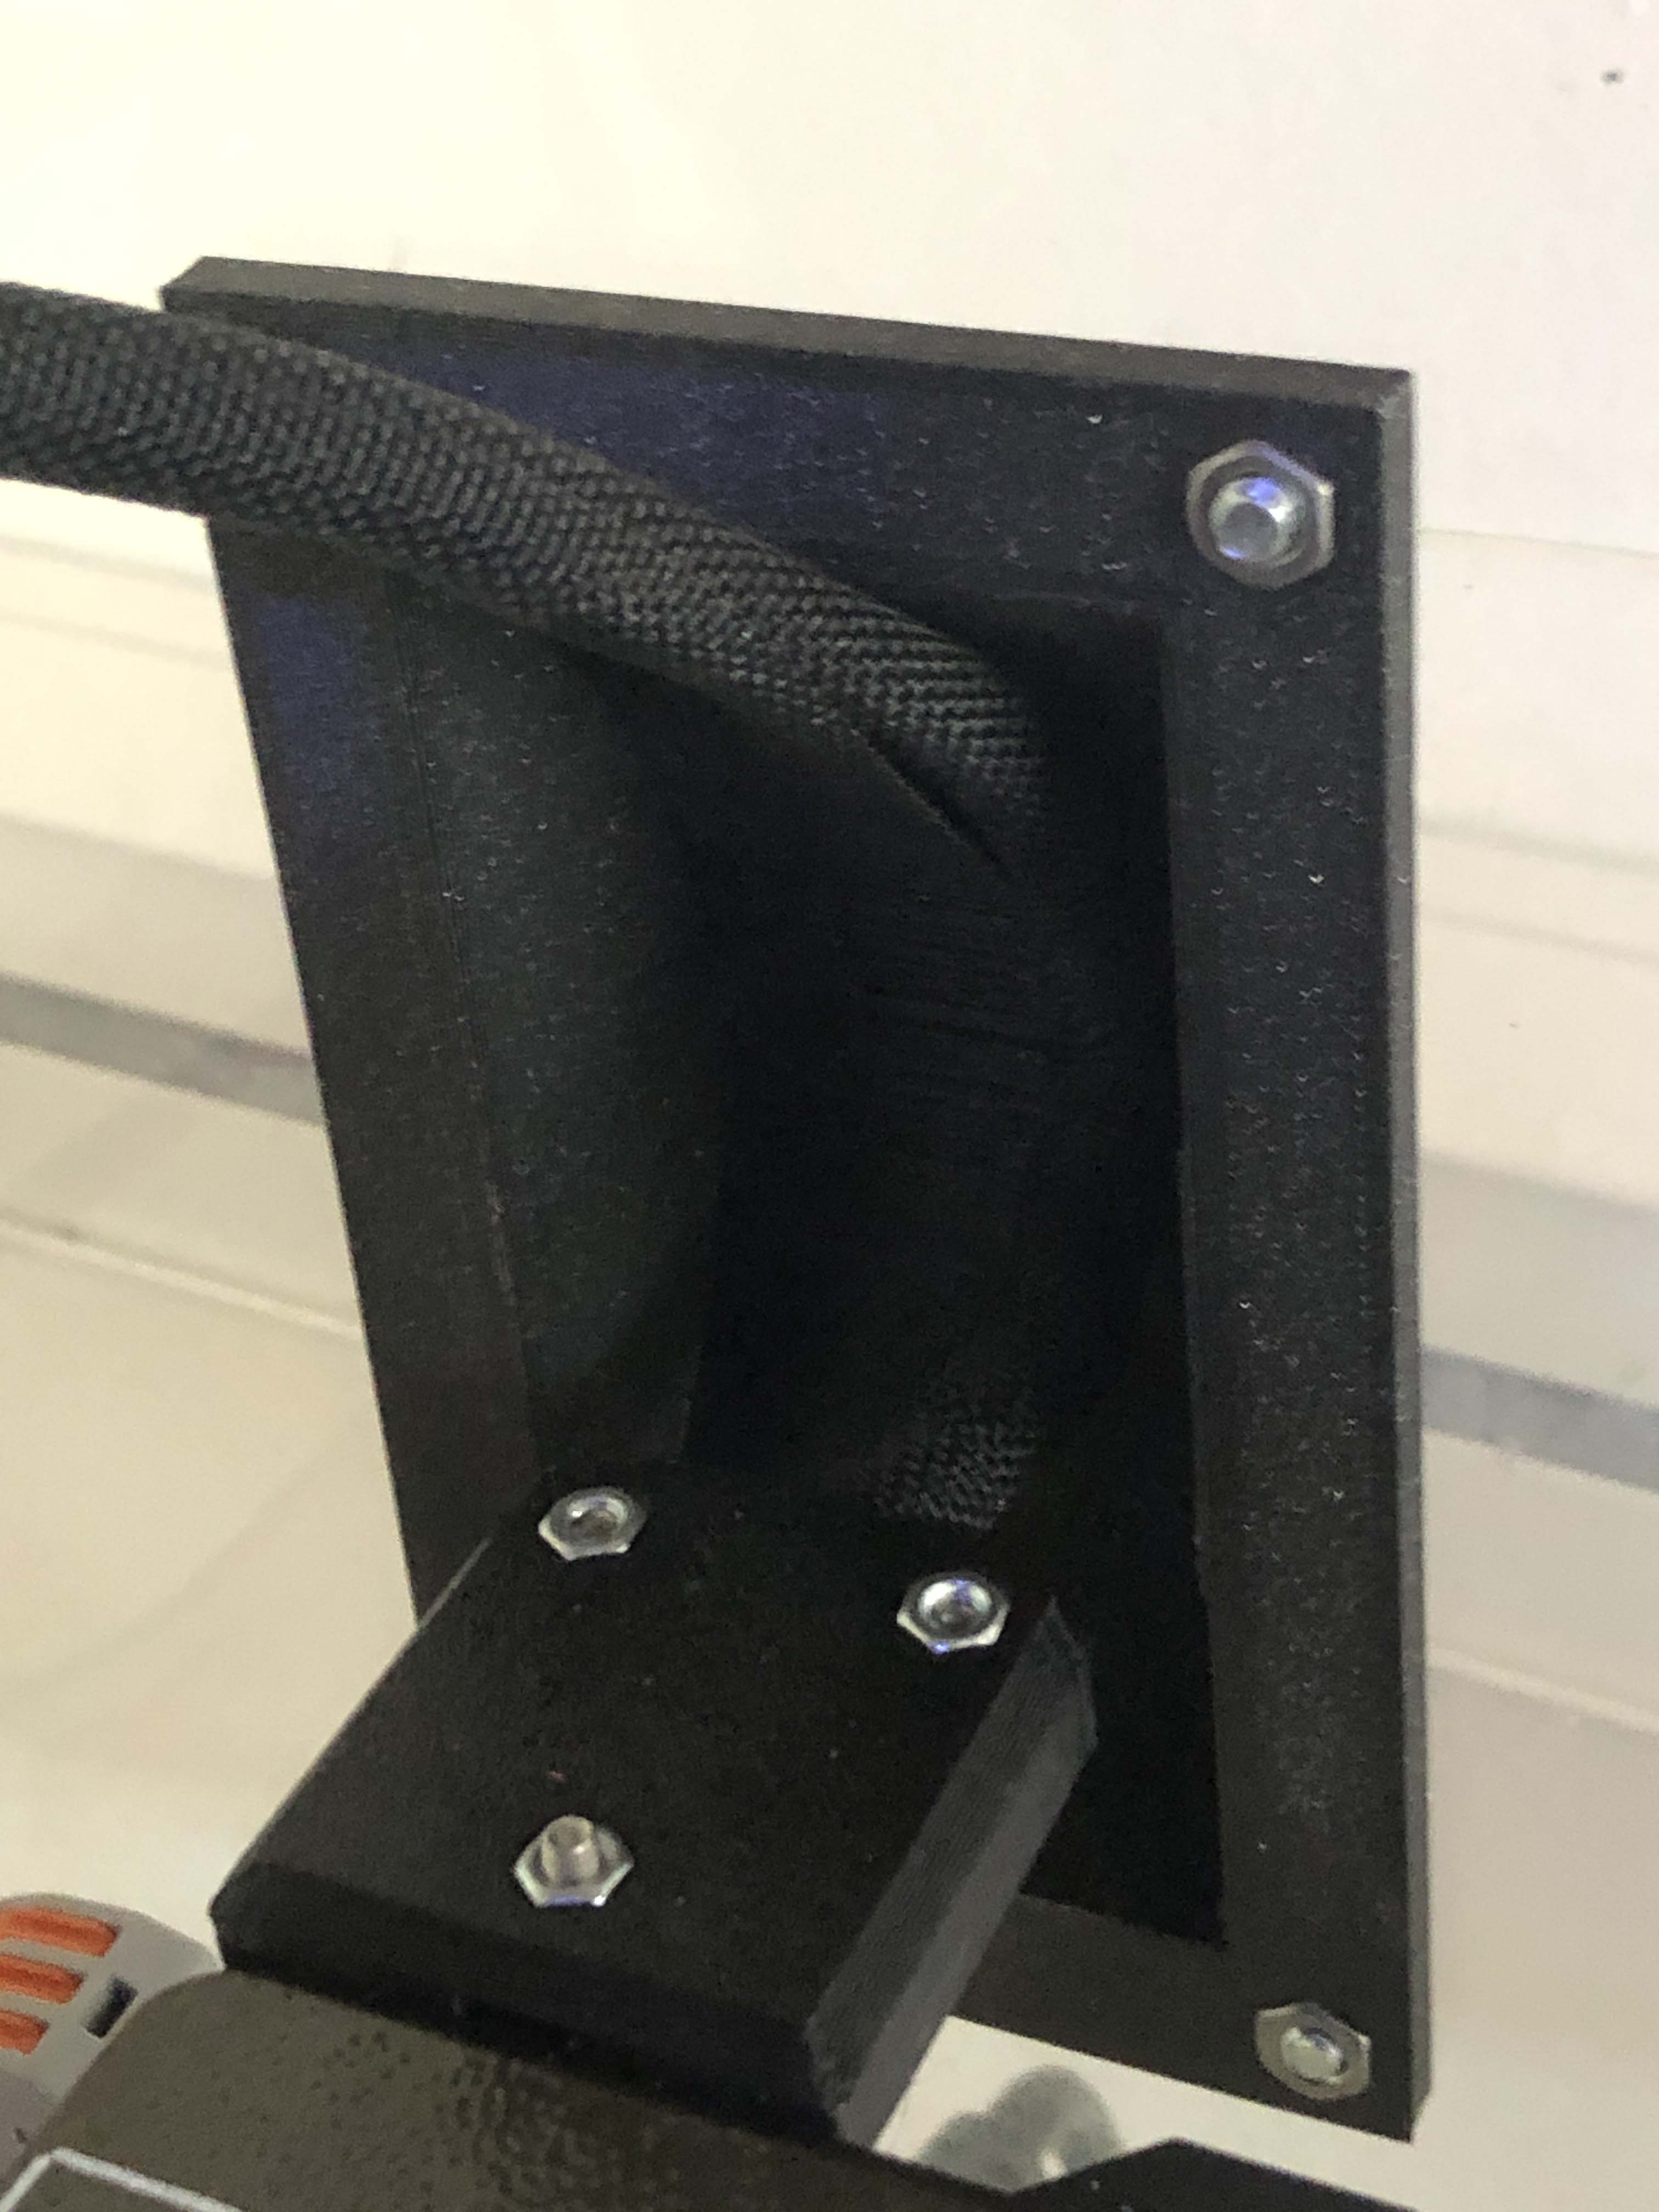
<p>After an extended use of the Prusa i3 MK3 60 degree heatbed cable cover, my thermistor cable weared out and I had to replace it. I loved the original heatbed cover and wanted to stick with it after the replacement.</p> <p>I had to use the enclosure after installing the original heatbed cable cover, therefore I designed a flanged cable cover to be mounted on a cutout in the acrylic sheets. The holes for the screws and nuts are for standard M4 scews and M4 nuts. The flanged design allows for a tolerance in the form of the cutout so you dont have to be very precise when cutting out the acrylic sheet.</p> <p>This way I was able to use the original heatbed cable cover for the enclosure and it works great!</p> <p>If you have any feedback or comments please feel free to share.</p> <h3>Print instructions</h3><p><h3><b>Print settings</b></h3></p> <p><ol></ol></p> <p><li><b>Material:</b> PETG, please do not use PLA since it can deform because of the increasing temperature inside the enclosure.</li></p> <p><li><b>Infill:</b> Gyroid %20 should suffice</li></p> <p><li><b>Layer Height:</b> 0.20mm</li></p> <p><li><b>Supports: </b> Middle part of the print is too aggresive to print with bridges, I recommend using support enforcerers for that bulging middle section. </li><br/> </ol></p> <p><h3><b>Preparation & Installation</b></h3><br/> <b> Step 1 </b><br/><br/> Determine the location where the heatbed cable buckles and mark it down using a pen.<br/> <br/><b> Step 2 </b><br/><br/> Mark down a 92mm in height, 46mm in width rectangle with a center point of your previous mark.<br/> <br/><b> Step 3 </b><br/><br/> Cut out a rectangular (92mm(h) x 46mm(w)) hole in the acrylic sheet at the back side of the printer using the marks in step 2. I used a laser cutter but you can use any tools that could work with acrylic, precision in dimensions is not critical because of the flanged design.<br/> <br/><b> Step 4 </b><br/><br/> Place the cover into the hole, with an orientation shown in the pictures and mark down the hole locations using a pen.<br/> <br/><b> Step 5 </b><br/><br/> Drill out the holes that you marked down using a 5mm drill bit. Using a sharp drill bit is critical at this point, since acrylic is a pre-stressed material using a dull drill bit may cause cracks.<br/> <br/><b> Step 6 </b><br/><br/> Place 4 M4 nuts in the designated places in the cover and place the cover on the acrylic sheet.<br/> <br/><b> Step 7 </b><br/><br/> Screw in the M4 screws and you are done!</p>
With this file you will be able to print Prusa Enclosure Heatbed Cable Cover with your 3D printer. Click on the button and save the file on your computer to work, edit or customize your design. You can also find more 3D designs for printers on Prusa Enclosure Heatbed Cable Cover.