Prusa Enclosure Enhancement - Concrete Slab integrated in LACK table
prusaprinters
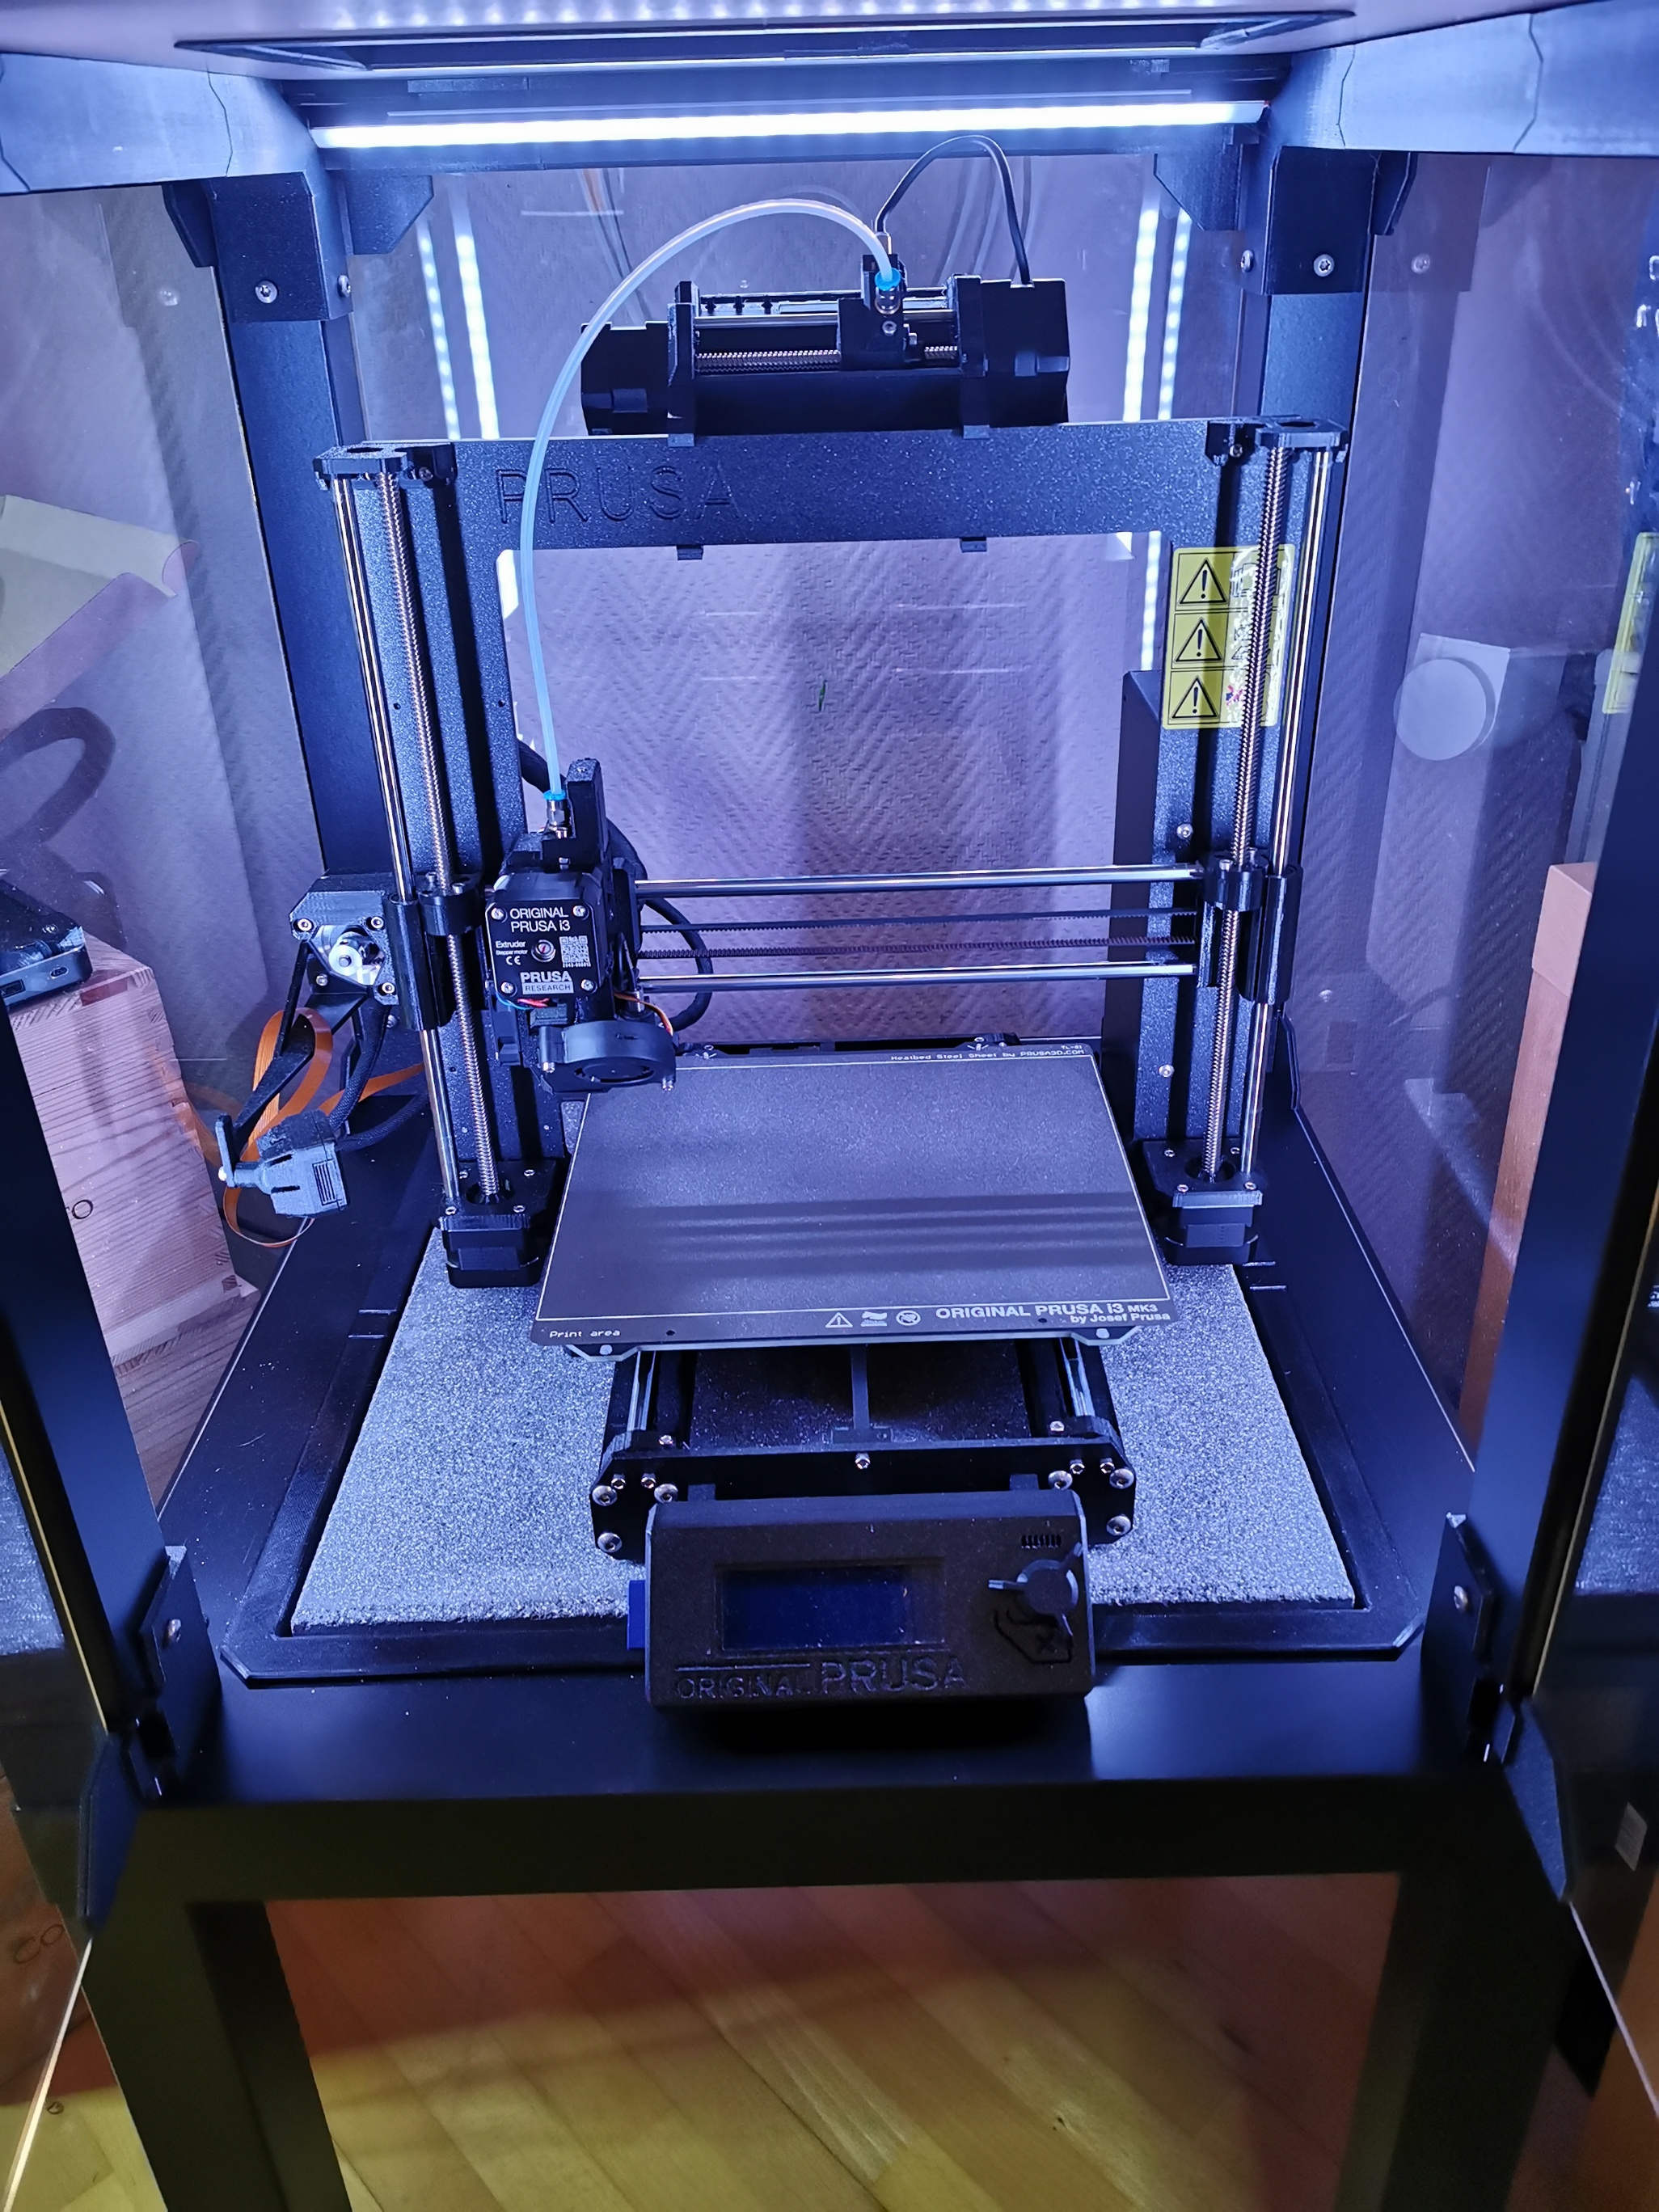
<p><strong>General idea</strong><br>Placing a 40x40x4 concrete slab under your 3D-printer significantly reduces noise/vibration transferred to the enclosure.</p><p>Placing the slab on top of the LACK table causes reduced height needed for the printer PRUSA MK3S+ with MMU2S.<br><br>In this upgrade a concrete slab is integrated into the LACK table of thEnclosure V2.<br>Noise and vibrations significantly reduced by this approach.<br>The assembly also leaves the option to integreate a 140x140 fan (PWM) under the table for controlled enclosure ventilation.</p><p><strong>Materials:</strong><br> 1x concrete slab 40cm x 40cm x 4cm<br> 8x round felt pads, glueable face, diameter ~25mm, height ~5mm<br> 1x LACK table (or bottom LACK table of LACK enclosure V2)<br> 4x M3x12 hexagon socket head screws<br> 1x Multi purpose glue (e.g. UHU Allzweckkleber)</p><p><strong>Tools:</strong><br> 1x cardboard cutter<br> 1x straight cutting guide <br> 1x hexagon spanner<br> 1x 8mm wood drill + portable electric drill</p><p><strong>Steps of Assembly:</strong><br><br><strong> 1) Print parts:</strong><br> 4x FixingCorner_v00 (PETG as recommended material)<br> 4x Clamp_v00 (PETG as recommended material)<br> 1x FanFixation_top_v00<br> 1x FanFixation_center_v00<br> 1x FanFixation_bottom_v00 (modify center part as grid in slicer)<br> 1x FanInletCuttingTool_v01<br><br><strong>2) Concrete-slab-holder assembly</strong><br> - assemble the parts 4xFixingCorner_v00 and 4xClamp_v00 <br> (slide in a Clamp_v00 in between two FixingCorner_v00 to connect the parts)</p><figure class="image image-style-align-center image_resized" style="width:50%;"><img src="https://media.prusaprinters.org/media/prints/117372/rich_content/af0ace6e-899c-43f1-b173-aba6ad100a9d/img_20220108_221333_resized_20220112_020323743.jpg#%7B%22uuid%22%3A%22934a57fa-0a2c-4410-a02f-2e01ed2b70ee%22%2C%22w%22%3A2736%2C%22h%22%3A2052%7D"></figure><p> </p><p><strong>3) Tabletop upper cardboard cutout for concrete-slab holder</strong><br><strong> </strong> - on the upper cardboard of the tabletop (table surface) make a centered 415mm x 415mm <br> square cut out.<br> Use the cardboard cutter and the straight cutting guide for precise cutting.<br> - after removing the upper tabletop cardboard (square) cutout,<br> cut the vertical support structure along the edges of the new cutout<br> - remove the vertical thin honecomb cardboard support structure from the <br> cutout region.<br> - do not remove the support structure under the remaining upper cardboard<br><br><strong>4) Tabletop lower cardboard cutout for fan fixation</strong><br> - mark the center of the lower tabletop cardboard<br> - drill a 8mm hole in the center<br> - put the pin of the tool FanInletCuttingTool_v01 through the hole<br> - turning the tool and guiding the cardboard cutter blade with the slot in the tool, <br> you can make a clean circular cutout in the lower cardboard of the tabletop<br> - after comleting the circular cutout, place part FanFixation_center_v00 over<br> the cutout, properly align the circular center and orientation and then<br> <strong>mark the 4 holes for the fan fixation screw domes with a pen</strong> on the cardboard<br> - drill 4 holes for the screw domes at the markings<br> - fit the part FanFixation_top_v00 into the prepared cutout, screw domes facing down<br><br><strong>5) Assembly of FanFixation_top_v00 </strong><br> - fit the part FanFixation_top_v00 into the prepared cutout, screw domes facing down<br> - apply glue to the surface of FanFixation_top_v00 that touches the cardboard<br> - glue FanFixation_top_v00 into the prepared cutout<br> - wait for the glue to build up good adhesion<br> </p><figure class="image image-style-align-center image_resized" style="width:50%;"><img src="https://media.prusaprinters.org/media/prints/117372/rich_content/7e194d7a-a4e6-4471-8546-eedf4b889b4a/img_20220108_221602_resized_20220112_020323005.jpg#%7B%22uuid%22%3A%226a08c90a-51b0-4f60-a8a3-67bcb73d658a%22%2C%22w%22%3A2736%2C%22h%22%3A2052%7D"></figure><p><br><strong>6) Assembly of concrete-slab-holder</strong><br> - push the pre-assembled concrete-slab-holder into the cutout from the top<br> </p><figure class="image image-style-align-center image_resized" style="width:50%;"><img src="https://media.prusaprinters.org/media/prints/117372/rich_content/b55cc781-5a06-4c1d-8e15-22876d9b3b13/img_20220108_221737_resized_20220112_015432355.jpg#%7B%22uuid%22%3A%22839ec69b-1833-4caf-b577-c6fc28c6eeb1%22%2C%22w%22%3A2736%2C%22h%22%3A2052%7D"></figure><p><br><strong>7) Preparation of the concrete-slab</strong><br> - turn the concrete slab upside down<br> - place (glue) two stacked felt pads in each corner of the concrete-slab (bottom side)</p><figure class="image image-style-align-center image_resized" style="width:50%;"><img src="https://media.prusaprinters.org/media/prints/117372/rich_content/f2149540-0cb7-4793-90b5-27f0dfe9d19d/img_20220108_222325_resized_20220112_015430921.jpg#%7B%22uuid%22%3A%22533a326f-46a5-4eb5-8996-f39191e88ac3%22%2C%22w%22%3A3840%2C%22h%22%3A2880%7D"></figure><figure class="image image-style-align-center image_resized" style="width:50%;"><img src="https://media.prusaprinters.org/media/prints/117372/rich_content/42d725db-d404-44b8-ab48-fad1776bd9bb/img_20220108_221842_resized_20220112_015431578.jpg#%7B%22uuid%22%3A%229289b49a-3782-4fc5-9d33-54d374a2d7f6%22%2C%22w%22%3A2736%2C%22h%22%3A2052%7D"></figure><p><br> - place the felt pads ~25mm from the edges</p><figure class="image image-style-align-center image_resized" style="width:50%;"><img src="https://media.prusaprinters.org/media/prints/117372/rich_content/1d43b218-12ce-44d3-b2a5-41c039e2892f/img_20220108_222052_resized_20220112_015429885.jpg#%7B%22uuid%22%3A%22274b8298-2249-4254-a74f-307f57004492%22%2C%22w%22%3A3840%2C%22h%22%3A2880%7D"></figure><p> - turn back the slab into normal position</p><figure class="image image-style-align-center image_resized" style="width:50%;"><img src="https://media.prusaprinters.org/media/prints/117372/rich_content/bb7025da-92c0-45cd-ba10-e8858c428b87/img_20220108_221806_resized_20220112_015431942.jpg#%7B%22uuid%22%3A%2227cc9777-04c6-44fc-8842-b191595c6610%22%2C%22w%22%3A2736%2C%22h%22%3A2052%7D"></figure><p><br><strong>8) Concrete-slab placement</strong><br> - place the concrete-slab rotated by 45° on the tabletop</p><figure class="image image-style-align-center image_resized" style="width:50%;"><img src="https://media.prusaprinters.org/media/prints/117372/rich_content/e831b00f-a8a2-44a2-b981-3505286d89d7/img_20220108_222513_resized_20220112_015430527.jpg#%7B%22uuid%22%3A%22c618cb94-c002-48ca-9f00-fb4f29bf95d4%22%2C%22w%22%3A2736%2C%22h%22%3A2052%7D"></figure><p><br> - put your hand through the FanFixation cutout on the bottom of the tabletop and<br> slightly lift up the slab<br> - rotate the slab by 45° + keep supporting from below<br> - carefully lower the slab into the slab-holder until the felt-pads touch the bottom<br> (the slab needs to be supported from underneath the table, as the sides will almost<br> completely be hidden in the slab-holder and you will not be able to hold it this way)</p><figure class="image image-style-align-center image_resized" style="width:50%;"><img src="https://media.prusaprinters.org/media/prints/117372/rich_content/de8dd18f-6310-4906-b2ea-349d89059c50/img_20220108_222604_resized_20220112_015427896.jpg#%7B%22uuid%22%3A%228105682e-0494-4fbe-9e78-0658fba6f377%22%2C%22w%22%3A2736%2C%22h%22%3A2052%7D"></figure><p><br> - adjust the spacing of the slab to the side walls<br> (the slab <strong>must not touch the slab-holder side walls</strong> as to avoid unwanted direct<br> noise transmission)<br> </p><figure class="image image-style-align-center image_resized" style="width:50%;"><img src="https://media.prusaprinters.org/media/prints/117372/rich_content/736a94d6-51fe-49f1-a0d7-84f98db923e1/img_20220108_222900_resized_20220112_015427449.jpg#%7B%22uuid%22%3A%223435974f-191a-4efc-b777-59c195e4fe94%22%2C%22w%22%3A2052%2C%22h%22%3A2736%7D"></figure><p><strong>9) Assembly of the FanFixation</strong><br> - place FanFixation_center_v00 and FanFixation_bottom_v00 under the tabletop<br> and secure the parts with the four M3x12 hexagon socket head screws</p><figure class="image image-style-align-center image_resized" style="width:50%;"><img src="https://media.prusaprinters.org/media/prints/117372/rich_content/28df740b-1431-48ae-97c5-b80034bba2b0/img_20220108_222727_resized_20220112_015428289.jpg#%7B%22uuid%22%3A%2237d08b57-ee70-4041-a3a4-e15c1f59795e%22%2C%22w%22%3A2736%2C%22h%22%3A2052%7D"></figure><p><br> -<strong> Option Fan: </strong>Using M3x35 screws; a 140x140 fan (PWM controlled) can be mounted<br> between the parts FanFixation_center_v00 and FanFixation_bottom_v00 to allow <br> controlled ventilation of the enclosure.<br> (The control electronics is not covered in this documentation and might follow later.)<br><br><strong>10) (Re-)assembly of LACK enclosure V2 </strong><br> - (re-)assemble your LACK enclosure V2<br> </p><figure class="image image-style-align-center image_resized" style="width:50%;"><img src="https://media.prusaprinters.org/media/prints/117372/rich_content/2d0b4261-005a-4e29-b5f5-450a88137e6c/img_20220108_231417_resized_20220112_015429072.jpg#%7B%22uuid%22%3A%225c816e42-4a8f-40e4-8522-3aa7a55a6904%22%2C%22w%22%3A2736%2C%22h%22%3A2052%7D"></figure><p><br> - place 3D-printer on concrete slab<br> - <strong>enjoy the silence ;-)</strong></p><figure class="image image-style-align-center image_resized" style="width:50%;"><img src="https://media.prusaprinters.org/media/prints/117372/rich_content/7783bc78-2af9-4374-86d7-a776277c5275/img_20220109_005211_resized_20220112_015428691.jpg#%7B%22uuid%22%3A%22f26024f8-2a0d-4001-8e0a-9896dba6fd94%22%2C%22w%22%3A2052%2C%22h%22%3A2736%7D"></figure><p> </p>
With this file you will be able to print Prusa Enclosure Enhancement - Concrete Slab integrated in LACK table with your 3D printer. Click on the button and save the file on your computer to work, edit or customize your design. You can also find more 3D designs for printers on Prusa Enclosure Enhancement - Concrete Slab integrated in LACK table.