Prusa Enclosure - Detachable magnetic side panels
prusaprinters
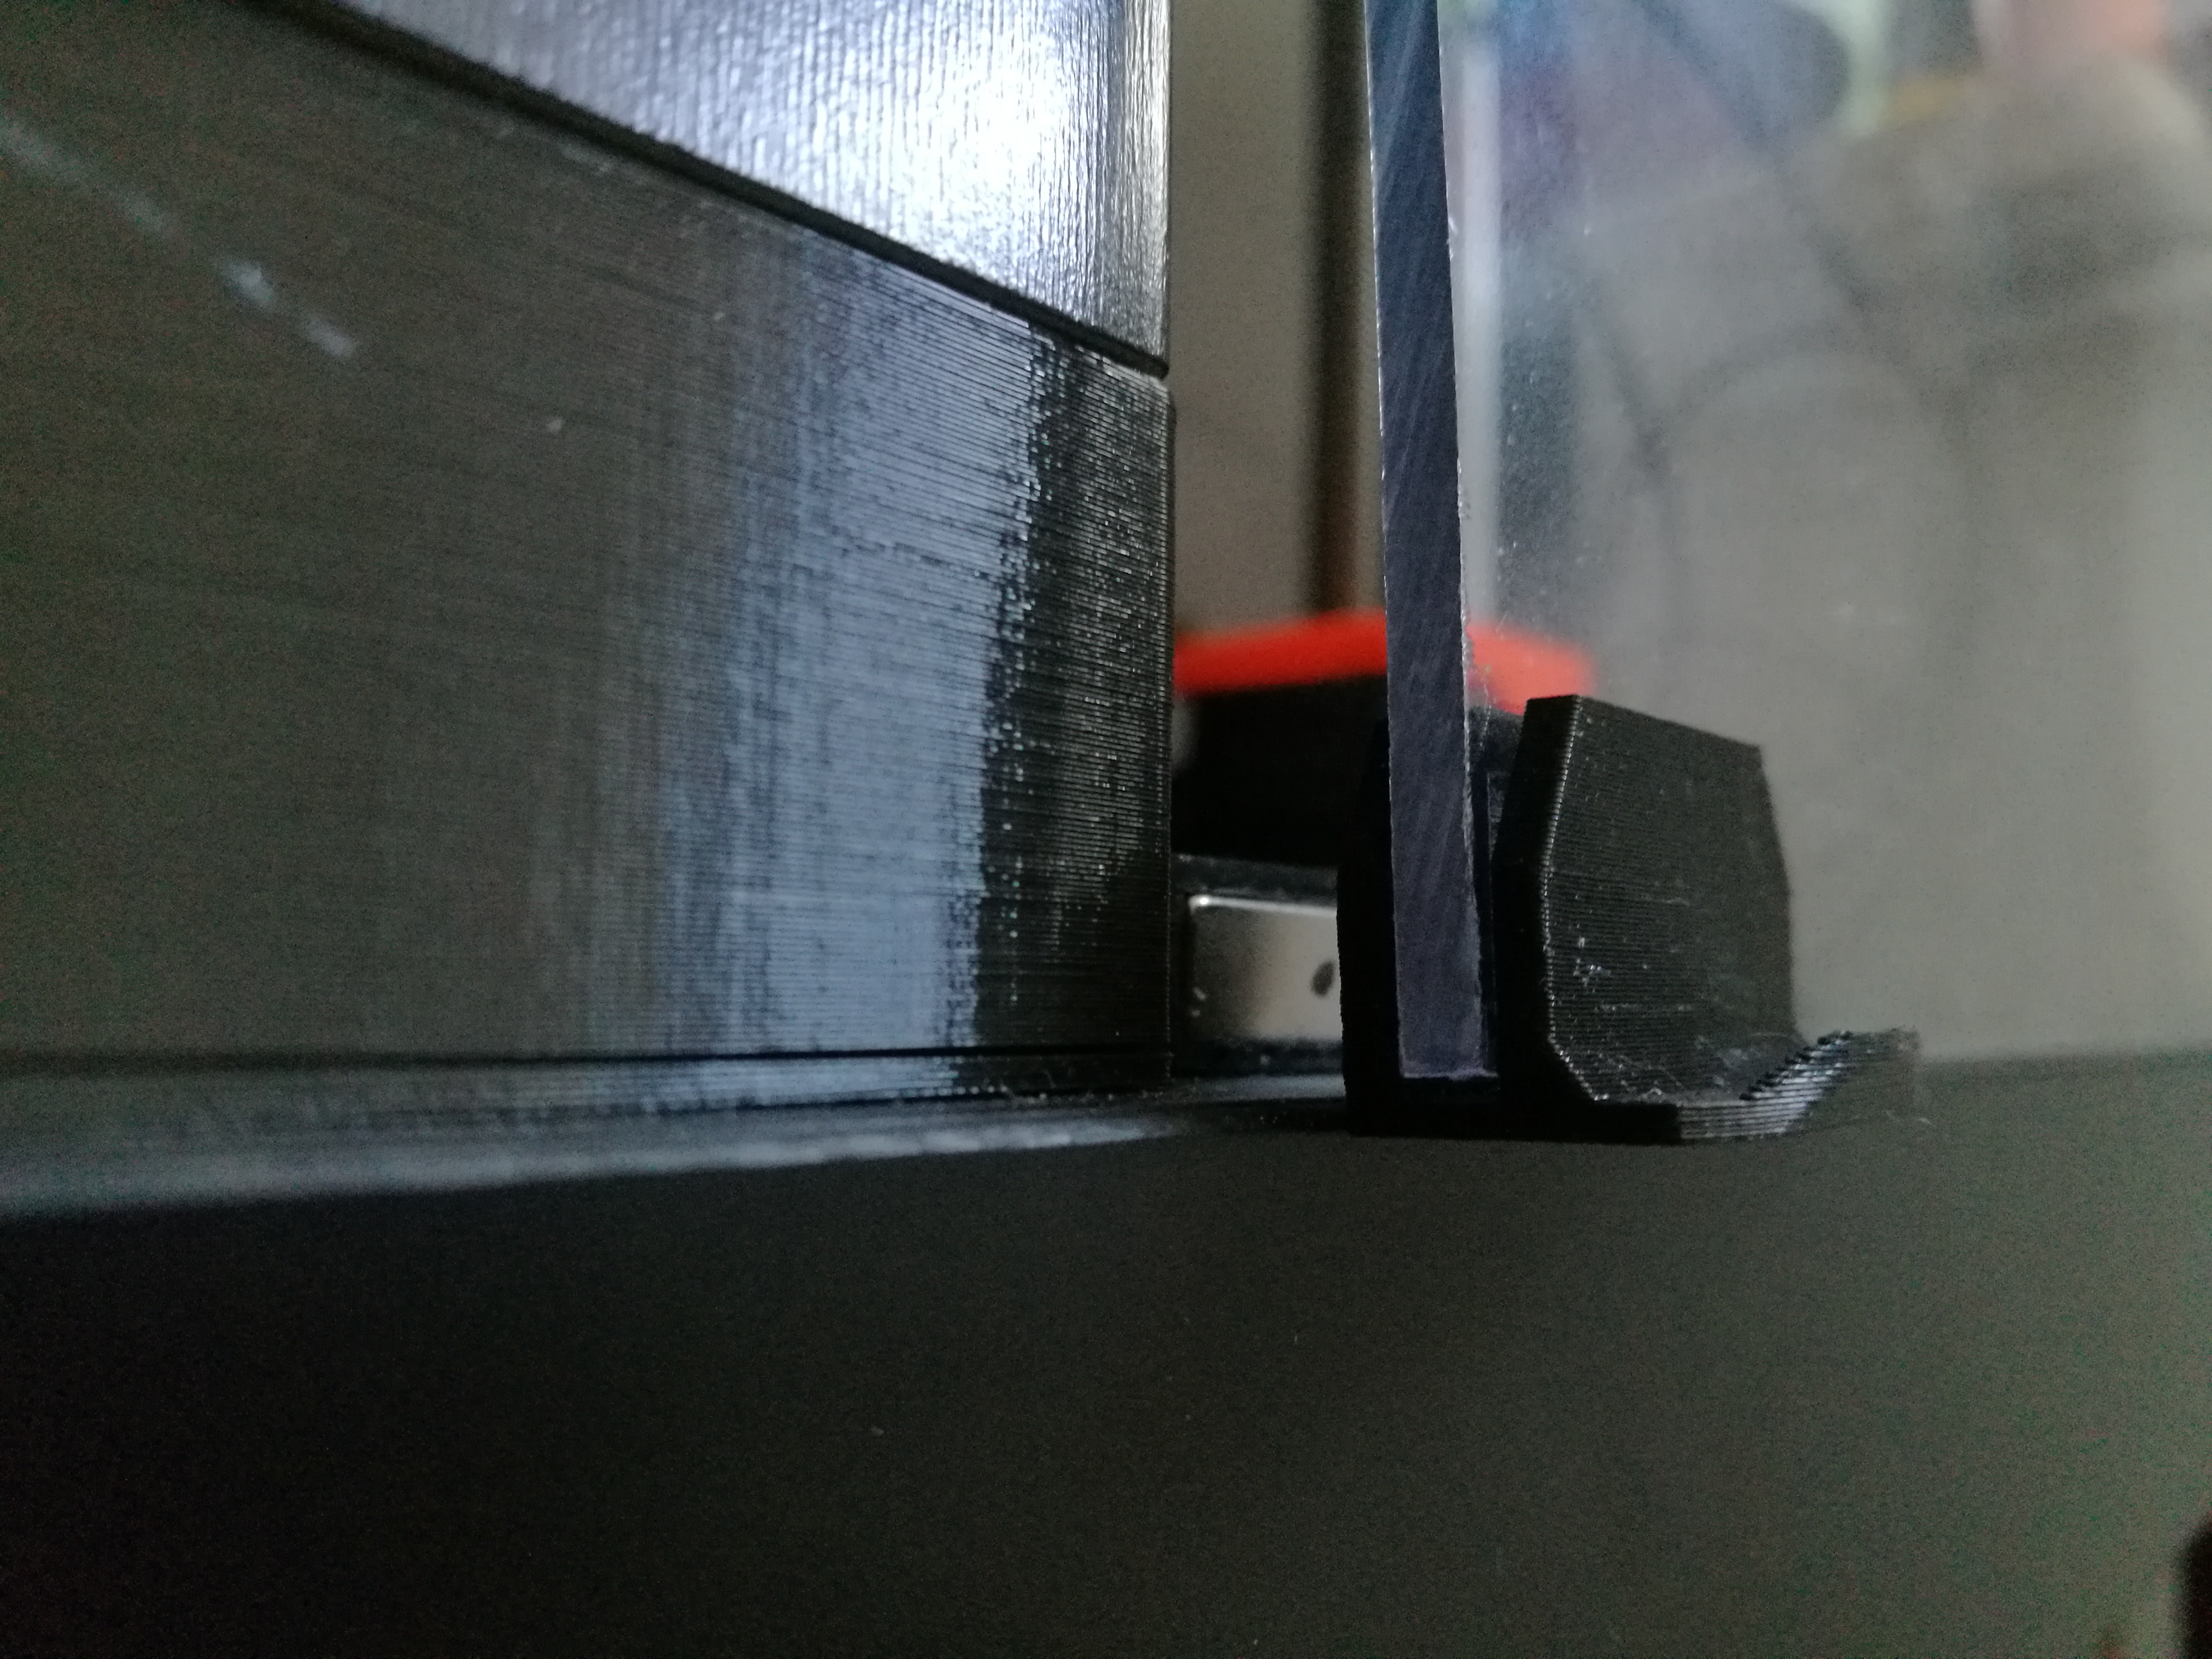
<p>Next upgrade for my Ikea Lack table enclosure for Prusa 3D Printer.<br>Now I can easily remove the side panels.<br>Video here:<br> </p><figure class="media"><oembed url="https://youtu.be/wPDDAKRXscM"></oembed></figure><p> </p><p>You need 12 pieces of 20x6x2 magnets (same as in Prusa extruder):<br><a href="https://s.click.aliexpress.com/e/_AAtslR">https://s.click.aliexpress.com/e/_AAtslR</a><br>(affiliate link)<br>and 12 small wood screws.</p><p>Print six of HolderA and HolderB. Positioning tool included so you can easier attach the holder to the Ikea Lack table.<br>If your bridging settings aren't perfect then use supports otherwise inserting magnets can be painful (I had to clean the sockets).</p><p>Be sure to orient the magnets correctly.</p><p>First you need to take of your upper table and remove the pieces holding the plexi panels of the bottom corners.</p><p>Share the love and 3D print everything.</p><p>Many thanks to the whole 3D printing community.</p><h3>Print instructions</h3><p>Rafts:<br>No</p><p>Supports:<br>Yes</p><p>Resolution:<br>0.2</p><p>Infill:<br>30-40</p><p>Notes:<br>Use 3 perimeters and grid infill, just like for printing the parts for the printer itself.<br>If your bridging settings aren't perfect then use supports otherwise inserting magnets can be painful (I had to clean the sockets).</p>
With this file you will be able to print Prusa Enclosure - Detachable magnetic side panels with your 3D printer. Click on the button and save the file on your computer to work, edit or customize your design. You can also find more 3D designs for printers on Prusa Enclosure - Detachable magnetic side panels.