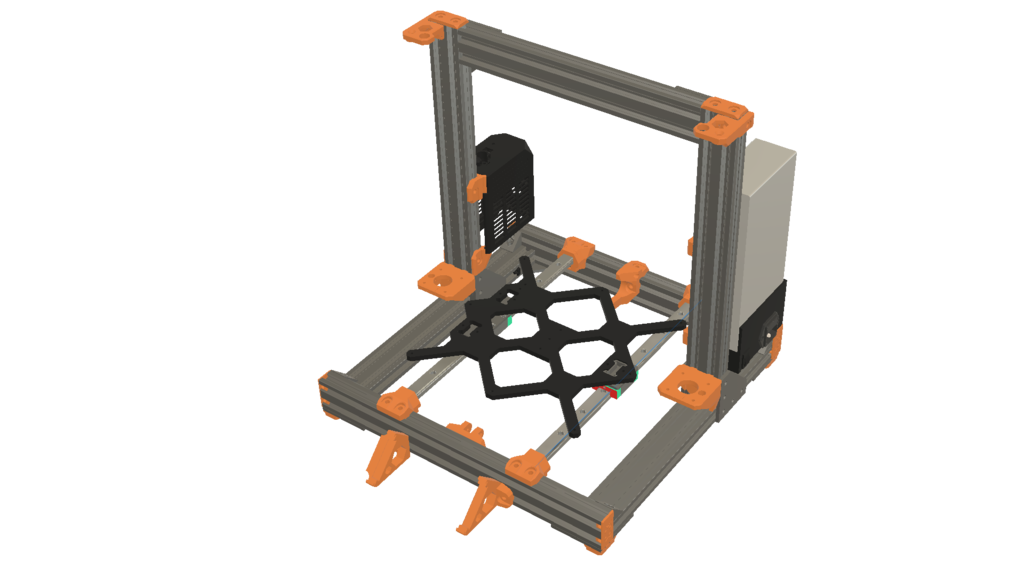
Prusa Bear MK3 / MK2S / MK2.5 Y-Axis Linear Rails upgrade
thingiverse
As I wasn't completely satisfied with the existing Y-axis rods, I decided to switch over to MGN15(C) linear rails. This upgrade should be compatible with all Bear upgrade printers but I've only tested it on my MK3S and now I'm really happy. This upgrade is fairly straightforward and intended as a complete drop-in; the bed is at the same height as the original and the end stops are also as the original, using the existing holes in the bed frame. I modified the original Bear rod holders designed by pekcitron, keeping the internal structure the same, so the printing instructions and orientation remain the same as the original. As for the material, I successfully used PETG. My original concern was the temperature of the two plates that interface with the bed frame but after doing some measurements this turned out not to be a problem. I measured the temperature of the bottom of the frame for one hour with a bed temperature of 100C and the bottom never went above 50C. You could use some material with a higher Tg such as nylon or ABS but in practice PETG works fine. I included two versions of the rails holder: with and without an option to clamp the rails with an M5 bolt and nyloc nut to make sure it will never move. I personally used the version without the bolt option as my rails were the right length and if your printer tolerances are right, the rails will sit pretty snug in the holder. Don't use too much force (or a hammer) to insert the rods; better to use tools to remove blocking stuff as the part can crack. The length of the MGN rails is 331 mm and the block is a MGN15C. You'll also need a few nuts and bolts for this modification: + 4 hex bolts M3 x 14mm + 4 countersunk bolts M3 x 10 mm + 8 countersunk bolts M3 x 4 mm + 4 nyloc nuts M3 + 2 nuts M3 + 1 hex bolt M5 x 12 (optional) + 1 nyloc nut M5 (optional) As the two M3 bolts to fix the right plate to the rails are not reachable when mounted on the MGN block, I used normal M3 nuts instead of nyloc ones. You could try to glue the two M3x10 bolts to the plate first so they cannot rotate but I don't think that's necessary, really. I included the Fusion 360 files so you can do with them whatever you wish. Happy printing!
With this file you will be able to print Prusa Bear MK3 / MK2S / MK2.5 Y-Axis Linear Rails upgrade with your 3D printer. Click on the button and save the file on your computer to work, edit or customize your design. You can also find more 3D designs for printers on Prusa Bear MK3 / MK2S / MK2.5 Y-Axis Linear Rails upgrade.
