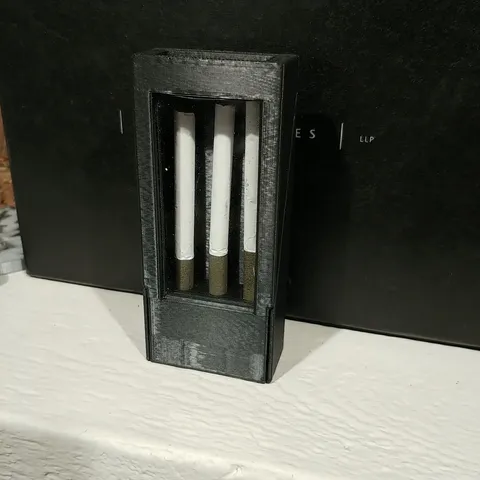
Protective cigarette case with print in place magnet, magnet metal, and hinge pin
prusaprinters
This is a case with a door that holds 3 cigarettes and protects them from any damage. There are four different print-in-place parts, and they can all be printed at once with no supports needed. The four print-in-place parts include, the hinge pin, a magnet, an acrylic window, and some magnetic material. It is a 3mm x 6.3mm neodymium magnet. I just used a random piece of metal for the magnetic material in the back.Print instructionsMATERIALS NEEDED-I used EcoTough PLA-67.5mm x 34mm x 1/16" piece of acrylic-6.3mm x 3.0mm neodymium magnet-0.5mm x ~20mm x 8.3mm piece of magnetic material.INSTRUCTIONSIf you want to print this in one go you are going to need to sequentially print the hinge pin first, pause the print when it is done, and remove it from the print bed before resuming the print. Prints can be paused by inserting a M0 (M601 for Prusa) at the line in the gcode file.No special setting have to be set in the slicer, and it was designed to use no supports.ADDING PARTS TO THE SLICER SOFTWAREYou need to add the back part to the slicer first, and then add the door part by adding it as an additional part to the back, not as its own part. Add the pin as a completely separate part.PRINTING AND INSERTING THE HINGE PINIf printing at a layer height of 0.3mm (with 0.2mm first layer) an M0 (M601 for Prusa) needs to be inserted at the end of the 104th layer(Z31.10mm) to remove the pin from the print bed. At the end of the 27th layer (Z8.00mm) a Z30 (to raise the z-axis to make room to insert the pin), M0 (M601 for Prusa) needs to be in the program to insert the pin into the bodies of the other objects.The pin needs to be printed on its end so that it is a smooth cylinder. You can see this in my slicer screenshot. Print the pin at 100% infill to increase strength. The infill doesn't really matter for the rest of the model.INSERTING THE ACRYLIC MATERIALThe acrylic window is the next part that need to be inserted. At the end of layer 306 (Z91.70mm) a Z180, M0 (M601 for Prusa) needs to be inserted. Be cautious not to bend the bridge in the front when putting the window in.INSERTING THE MAGNETPause the print at the end of layer 328 (Z98.30) with Z120, M0 (M601 for Prusa) to insert the magnet. The magnet might hop out of the hole when the printer head moves above it if your print head has magnetic parts. Keep an eye on it.INSERTING THE MAGNETIC MATERIALThe final pause needs to be put in at layer 330 (Z98.9mm) with Z130, M0 (M601 for Prusa) to raise the head to a level the material can be inserted.FINAL PRODUCTThe "door" and the "back" parts stuck together a little bit during the printing process at the top. The reason this happened was because I only gave 0.2mm clearance between the two parts. I was able to get it separated and it ended up being a perfect fit. I did increase the clearance to 0.3mm though to avoid any sticking.ADDITIONAL INFORMATIONI do have a video of the printing process that I made from an animation in Solidworks, but unfortunately I am not able to upload a video file format here.I do have a 4 cigarette holder version that I haven't had a chance to print yet.Working on a version to use thicker layersI have uploaded images of the pause points in the slicer software.
With this file you will be able to print Protective cigarette case with print in place magnet, magnet metal, and hinge pin with your 3D printer. Click on the button and save the file on your computer to work, edit or customize your design. You can also find more 3D designs for printers on Protective cigarette case with print in place magnet, magnet metal, and hinge pin.
