 Thingiverse
Simple Sound-Proof Printer Enclosure
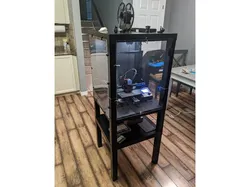
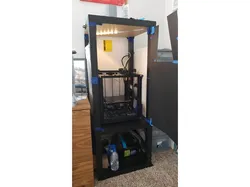
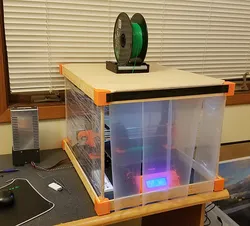
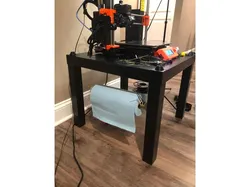
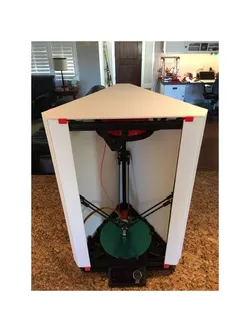
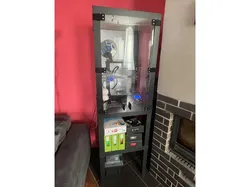
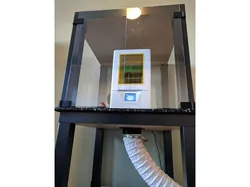
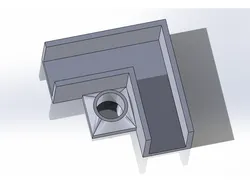
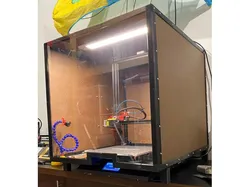
What Is This:This is a noise-reducing, protective, living-room-aesthetic-friendly enclosure for a 3D printer, or in my case, an Ender 3 Pro. As such, I've included parts and steps for a direct drive conversion, filament guide, and spool rollers.The goal of this design (versus the numerous other high quality Lack enclosures that can be found) was simplicity: specifically in this design the acrylic does not need to be cut at all, the layers can easily be moved on and off with self-locating pin, and the door swings easily and locks with 4 latches.Disclaimer: The noise reduction works best if there is flat, continuous contact all around the acrylic; be careful with part locating, dowel holes, cuts, etc. to preserve this functionality. Also because the power supply is mounted outside the cabinet, its fan is still ~loud when it periodically turns on.Things Needed:Purchased parts3x IKEA Lack tables3x 0.08" x 24" x 18" clear acrylic sheets (I used these)1x 24" x 18" MIN. foam sheet (like this)Small cabinet screws (I used these)Direct drive conversion kit (or the equivalent for your printer)6x 608 roller bearings (for the filament guide & spool rollers)4x M5x12 bolts4x M5 nutsPrinted parts20 x "clip_v-.stl"8 x "cone_v-.stl"8 x "cup_v-.stl"16 x "dowel_v-.stl"2 x "hinge_v-.stl"5 x "backClip_v-.stl"1 x "holeDrillingJig_v-.stl"Outsourced partsPSU mounting brackets: 3349588Filament guide: 25800514 door latches: 38439032 TUSHs: 2047554ToolsDrillSawScrewdriverOptional:"cuttingJig_v-.stl" - Use if you don't have a saw that can cut straightLights; would strongly recommend theseA spool cover which I also designed to go with this enclosureInstructions:Note: for clarity, the lacks will be called A, B, and C, from bottom to top.Install the direct drive conversion (and save some PTFE tubing for the filament guide).Assemble 2 Lacks (A & C) following the instructions.For the third Lack (B), cut the legs 17cm up from the flat/ground side. Note the cut should be perfectly flat; sand if necessary.Using the "holeDrillingJig", drill dowel holes in the flat/ground faces of each of Lack B & Lack C's legs.Assemble the combined legs by inserting the "dowels" into the dowel holes, and pressing each leg tightly together.Press all 8 "cup"s into all 8 open legs.Locate and install a "cone" onto each corner of the table on Lack A & B. Note these should be located such that all exterior surfaces are flush.Fully assemble the frame and move the printer into position.Move the printer's power supply to the underside of Lack B. For my Ender 3 Pro, this meant cutting a clearance groove (which I then covered with the "slotCover")Drill a hole and install the filament guide in line with your printer's X-axis/extruder input.Using the acrylic sheets for location, install all the "clip"s, "backClip"s, "hinge"s (will need to drill holes in the acrylic), and door latches. That's it!Also: If you have any feedback on the design, instructions, etc. please let me know in the comments. I will (hopefully) periodically update the page as needed.
Direct link to the original creator's page
More from BarackitShip
Similar Models
 Thingiverse
 Thingiverse
 Thingiverse
 Thingiverse
 Thingiverse
 Thingiverse
 Thingiverse
 Thingiverse
Model Specifications
Frequently Asked Questions
How do I download Simple Sound-Proof Printer Enclosure?
Click the "View on Thingiverse" button above to visit the original model page on Thingiverse. You can download the STL file directly from the creator's page for free.
What 3D printer can I use for this model?
This model is compatible with most FDM 3D printers (Creality Ender 3, Prusa MK3S+, Bambu Lab, etc.) and resin printers (Elegoo, Anycubic). Check the original page for recommended print settings and materials.
Is this 3D model free to download?
Yes, this model is available as a free download on Thingiverse. Some creators accept tips or donations.
Can I modify this file?
Check the license (see original page) on the original Thingiverse page. Most STL files can be modified using free software like Blender, TinkerCAD, or Meshmixer.