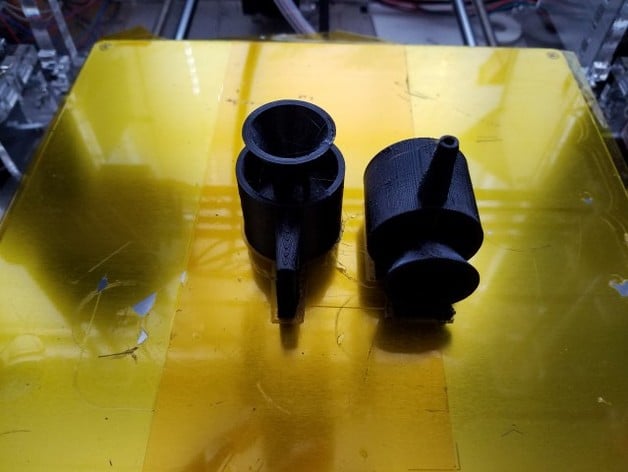
Project: Venturi Water Nozzle
thingiverse
The Venturi Water Nozzle Project: A Hands-On Physics Experiment Bring the wonders of physics to life with this engaging project that demonstrates the Venturi effect. By harnessing the power of high-speed air, students will learn how to create low-pressure suction, mixing water with air to produce a remarkable outcome. Watch as a video demonstration showcases the nozzle in action: https://www.youtube.com/watch?v=vrLS9ymRUuw Print Settings: Printer: Generic Prusa i3 Rafts: No Supports: Yes Resolution: 0.2mm Infill: 100% Notes: To ensure optimal results, print the nozzle in several orientations to determine the best configuration for your printer. Utilize supports to help with the floating pieces before they are printed together. Project Overview & Background Venturi nozzles are a vital device used to increase airflow or create a vacuum using high-speed air sources. Their applications span various industries, including aviation, jet engines, and water pumps. Students will gain hands-on experience with a small-scale 3D-printed nozzle, learning the physics behind the Venturi effect. Accessories The following materials are necessary for this project: * Compressed air source (air compressor, bicycle pump with surge tank, or other equivalent) * Air hose with quick-release ends * Pocket Blow Gun with Industrial Coupler (example: http://www.harborfreight.com/Pocket-Blow-Gun-with-Industrial-Coupler-68262.html) * Water and open vessel * Graduated cylinder to measure water * Straw from fast food or your pantry * Optional - 10' length of 1/4" vinyl tubing (check plumbing section of DIY store) * Calipers, rule, or tape to measure dimensions * Stopwatch Objectives: * Calculate the air flow through the nozzle * Calculate the water flow through the nozzle * Determine the most efficient air pressure for this nozzle Procedure: Step 1: Measure and Record Initial Air Speed Measure the initial air speed using a stopwatch and record the data. Step 2: Add Water to the Vessel Add a measured amount of water to the vessel. Step 3: Operate the Nozzle at Different Pressures Operate the nozzle at different pressures (30 psi, 40 psi, 50 psi, etc.) and measure the air speed and time the duration of operation. Step 4: Calculate Air Flow and Water Flow Calculate the air flow through the nozzle using the measured data. Determine the water flow gained or lost at different operating pressures by the Venturi nozzle. Rubric: * What is the velocity of the air for each nozzle? * What is the diameter of the outlet? * What is the volume air flow through the venturi nozzle without water? * What is the volume air flow through the venturi nozzle with water? * Did the air flow change? Why do you think it did or did not? * What is the suction pressure? Tips & Tricks: * The nozzle works efficiently and can suck water quite well! * Other fluids, such as granular material like sand, can also be used. * Fast food straws were used for the demo video. The tapered inlet may need attention to smooth it out depending on how you print it. Assets: * I have included the water_nozzle_v3.f3d Fusion 360 design file in the thing files. Modifications for other pipe sizes, nozzle sizes, blow guns, air sources, etc., can be made. * water_nozzle_v3.f3d * water_nozzle.stl * water_nozzle_section.stl References: https://en.wikipedia.org/wiki/Venturi_effect https://en.wikipedia.org/wiki/Bernoulli%27s_principle https://www.washingtonpost.com/local/a-lip-smacking-look-at-the-day-that-drinking-straws-got-bigger/2013/07/07/f3fd8b8e-e584-11e2-aef3-339619eab080_story.html
With this file you will be able to print Project: Venturi Water Nozzle with your 3D printer. Click on the button and save the file on your computer to work, edit or customize your design. You can also find more 3D designs for printers on Project: Venturi Water Nozzle.
