Project Venturi
thingiverse
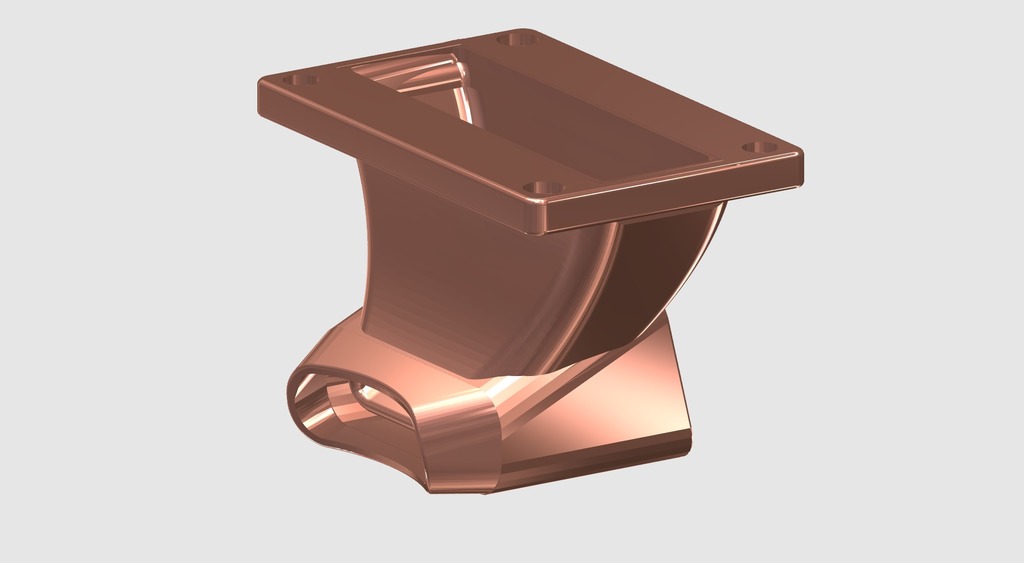
Project Venturi (Primarily Focused on the Anycubic Kossel Linear Plus) Don't get too excited about some printed plastic parts for attaching to your printer, but stick with me. First off, apologies are in order: Exhaust_Duct.stl is amazing, while testing suggests Cannon.stl and Dual_Cannon.stl didn't quite live up to expectations. Moreover, Dual_Cannon.stl was a real pain to screw into place. I've thus reworked them both and replaced the old versions with new and hopefully improved designs. I'll post updates once thorough testing is complete. You might have noticed your printer could use better part cooling and spotted some alternative air ducts on Thingiverse (a serious understatement). You may also be familiar with Bernoulli's Principle and how it can be applied to create a Venturi. Take a quick look it up, but here's the gist: faster-moving air has lower pressure. This is why flying objects larger than insects can fly. You can also use this principle to increase airflow by speeding or lowering intake pressure. I've posted two intake designs that should improve airflow through your printer: Blower_Duct.stl and Cut_Blower_Duct.stl. The former can be glued onto the face of any blower intake where possible, possibly requiring size adjustments in your slicer depending on the application. The latter is specifically designed for an Anycubic Kossel Linear Plus printer, ideally one with my Better Blower upgrade (which I've updated to match this design). The goal is to get as much air flowing as possible through a smooth and short exhaust duct path. It also helps if the cross-section of the duct is both as large as practical and narrows slightly to increase air speed past the print you're trying to cool - more flow means greater potential heat removal, as long as narrowing doesn't obstruct overall flow too much. This setup utilizes Bernoulli's Principle again: a lower exhaust pressure can be used to 'suck' in more air that might then be added to the overall exhaust flow, improving cooling efficiency. This is the Venturi effect at work. The included cooling duct design does only work with a Kossel Linear Plus printer, but the concept can be modified for other machines. Still unconvinced? Try this experiment: - Print out Exhaust_Duct.stl and carefully clean off support material - Place its intake near your mouth so that the outlet is pointing at your neck and block the passive intake with your thumb - Blow through the duct, noting how hard you're blowing and how the stream of air feels on your neck - Do it again with your thumb covering the passive intake Did you notice a difference? Feel free to try it a few times until convinced. If still wondering: - Try partially blocking the passive intake with your thumb as you blow
With this file you will be able to print Project Venturi with your 3D printer. Click on the button and save the file on your computer to work, edit or customize your design. You can also find more 3D designs for printers on Project Venturi .