Project Saturn (Daphnis) Feet for Ikea TJUSIG
thingiverse
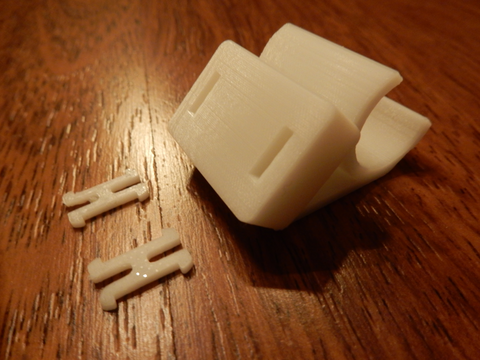
In the long-held Maker tradition of [Ikea Hacking](https://ikeahackers.net/) there is no hack more original or inspiring than the [LACKRACK](http://wiki.eth-0.nl/index.php/LackRack). But not all projects are 19" rack-mount ready, so which Ikea product do you use when you want to build a custom scale-out storage array in a frame that is strong, stackable and shelf-like - with the ability to "lock in" components so that they can't "fall out"? The [TJUSIG](https://www.ikea.com/au/en/p/tjusig-shoe-rack-black-90160956/), a shoe rack for all of your data storage needs! The feet are sturdy and provide a robust connection to the TJUSIG. To assemble: - Attach all feet to the part first (i.e. on your bench/floor). Noting that for each foot that you print you will need to print two clips ([thing:5373761](https://www.thingiverse.com/thing:5373761)) to attach it. - For parts that have one foot, such as the Project Saturn (Daphnis) TFT-Mini Display board, once the feet are attached, simply snap the feet into place on the metal rod with a firm push. - For parts that span two metal rods, such as the Project Saturn (Daphnis) Controller board and/or Drive Enclosure, once the feet are attached, place the part diagonally between the two metal rods and, by firmly holding the feet _only_, sliding the part into place. I have also provided the 3MF file to simplify orientation on the print bed. Note that the pictures here show the older clips but the linked clips will work fine.
With this file you will be able to print Project Saturn (Daphnis) Feet for Ikea TJUSIG with your 3D printer. Click on the button and save the file on your computer to work, edit or customize your design. You can also find more 3D designs for printers on Project Saturn (Daphnis) Feet for Ikea TJUSIG.
