Project: Rumble Bot Legs and Locomotion
thingiverse
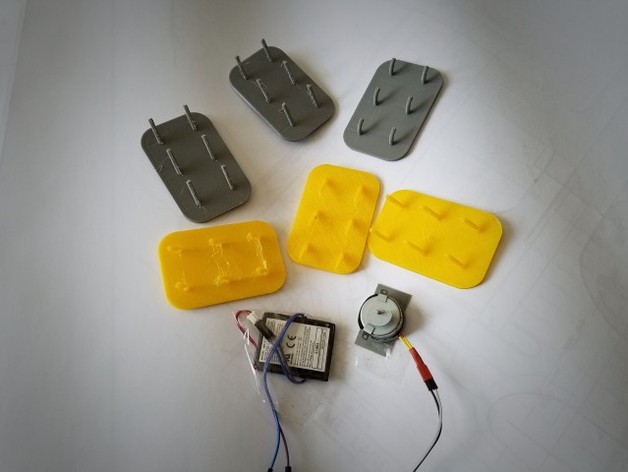
I'm designing a project to explore the best legs for locomotion, inspired by brush bots and an article in Make Magazine Vol 52 - Rumblebots Raceway by Douglas Stith. These bots should be compatible with his raceway and power source, instead of using a rumble motor like I did in the video. Print Settings Printer: Generic prusa i3 style Rafts: No Supports: No Resolution: 0.2mm Infill: 100% Notes: I had to use TPE to get the bots to run around with the rumble motor on top. The PLA bots might work if you're using a rumbling track. I came up with a bot size, sketched the body, and extruded it. Then I rotated up the plane and sketched 1 leg, extruding it as a new body. Finally, I made an array to replicate the leg 5 more times. I picked 6 legs for an insect-like design; you can choose anything for yours. Fusion 360 - Showing bot body with 1 leg extruded and my plan for the other 5 legs. Overview and Background Brush bots! I've built them with children for years, and they love them. For a while, I thought, what if you could design your own legs? What type of legs are best? Well, I haven't figured it out yet. Locomotion is the idea we're trying to grasp with this project. How do you move from one place to another? How do these bots do it without having legs that move like we normally think of legs? Lesson Plan and Activity Step 1 - Background Knowledge Pre-work: figure out a track and whether you intend to use motors or track vibration. Print a bot as a visual aid. Discuss locomotion. Discuss vibration. Define bot size parameters (to fit on the track). Have students do a creative thinking sketch on a bot idea with no joints, but can utilize vibration to move. **Note: Consider not explaining too much about the way the legs work as to not hamper creativity in design.** Step 2 - Design / Build Have students design their bot creation in modeling software. Have students 3D print their design. Optional: Let students use non-3D printed legs if they have proper static connections. Assemble bots, if assembly is required. Step 3 - Practical Testing Hold a bot race or time trial. Remember to race bots fairly in both lanes if you have a 2-lane track. Have students observe what happens and take some notes about each heat. Step 4 - Review Hold a class discussion about what leg design worked best. Why do those legs work the best? Would there be a way to improve the design further? What applications could this knowledge be useful for? Tips & Tricks TPE (thermoplastic elastomer) worked best for me when using an onboard rumble motor. Extruding the circle leg along a path is how I made hooked legs. That's the method I used for all the legs. A couple of fridge pack boxes cut down carefully and taped together could be all you need for a track, with the addition of a rumble creator. Materials Needed Accessories The following materials and items can be helpful with this project. Optional - Motor Optional - Battery Optional - Vibrating track instead of motor and battery above (see references) Optional - Tape Optional - Motor holder Track Measuring devices Stopwatch for time trials Skills Learned Locomotion Design Vibration Rubric and Assessment What is locomotion? How does vibration create kinetic movement? What designs work better, why? What factors tend to work against the designs? References Make Magazine Volume 52 page 84-85 http://makezine.com/go/rumblebot-races http://makezine.com/go/rumblebots-explainer https://en.wikipedia.org/wiki/Robot_locomotion https://en.wikipedia.org/wiki/Vibration
With this file you will be able to print Project: Rumble Bot Legs and Locomotion with your 3D printer. Click on the button and save the file on your computer to work, edit or customize your design. You can also find more 3D designs for printers on Project: Rumble Bot Legs and Locomotion.
