Project: Rubberband Glider
thingiverse
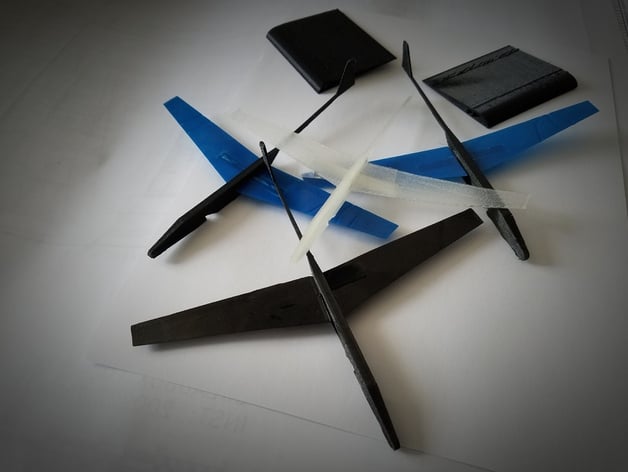
I've designed a universal body for a rubber band glider with wings that you can design yourself. You're free to use the wings I've included, but keep in mind that I focused more on designing and balancing the body than optimizing the wings. The real fun comes from creating your own unique wings! https://youtu.be/8fS0UL9DvxM Edit - 11-2018: I added a V6 model with a ~20% bigger notch for the rubber band. Print Settings: Printer: Generic Prusa i3 Rafts: No Supports: Yes Resolution: 0.2mm Infill: varies (I printed bodies with 30% and 100% infill, and found that 100% was smoother) I borrowed a MakerBot Replicator 5G and had to print the wings with rafts (it was my first time using this printer). Different materials produce different results for the wings. I experimented with PLA, ABS, and PETG, each yielding distinct outcomes. How I Designed This: I started by sketching out a Cessna-style body inspired by rubber band gliders and cheap balsa wood models. Using my engineering knowledge, I came up with rough dimensions and began modeling in Fusion 360. After printing the initial design, I measured its center of gravity and made adjustments to shave material off the tail. Through multiple revisions, I refined the design until it flew reasonably well with the wings I had created. The progression of body designs is shown below (some were discarded due to being too thin). Overview and Background: As a pilot, I've always been passionate about airplanes. I've built hundreds of model planes, some of which fly while others are purely decorative. To encourage young people's interest in aerospace, I designed this project to create a practical exploration of wing design using rubber band gliders with interchangeable wings. Objectives: * Learn about aerodynamic forces: lift, drag, weight, and thrust * Understand the principles of flight * Study wing design Skills Learned (standards): MP.4 - Model with mathematics (HS-ETS1-1), (HS-ETS1-2), (HS-ETS1-3), (HS-ETS1-4) RST.11-12.9 - Synthesize information from a range of sources into a coherent understanding of a process, phenomenon, or concept References: http://www.aeronautics.nasa.gov/pdf/wing_design_k-12.pdf http://www.4p8.com/eric.brasseur/glider_physics.html Lesson Plan and Activity: Step 1 - Background Knowledge: * Discuss aerodynamic forces * Explain how wings work * Demonstrate a paper wing (tape around a pencil, blow gently) * Discuss air resistance and friction * Introduce center of gravity and its impact on glider performance * Explore different wing styles: rectangular, elliptical, swept (forward and rear), and delta * Have students develop ideas on which wings will work better Step 2 - Design and/or Build: Option 1: Have students design a set of wings and print them. The wing root has a 2.4mm square design ~18mm long; the wing needs an inside 3mm square ~20mm long to slip onto the root. Option 2: Print one or all the wings I've included in the thing files. Option 3: Design a consensus set of wings as a class and print it (maybe as an addon to Option 2). Option 4: Let students modify or design their own body and wings. Step 3 - Practical Testing: Option 1: Assemble the glider. Left wing slipped onto the root & Right wing slipped onto the root. Photos below Left Wing -> Body
With this file you will be able to print Project: Rubberband Glider with your 3D printer. Click on the button and save the file on your computer to work, edit or customize your design. You can also find more 3D designs for printers on Project: Rubberband Glider.
