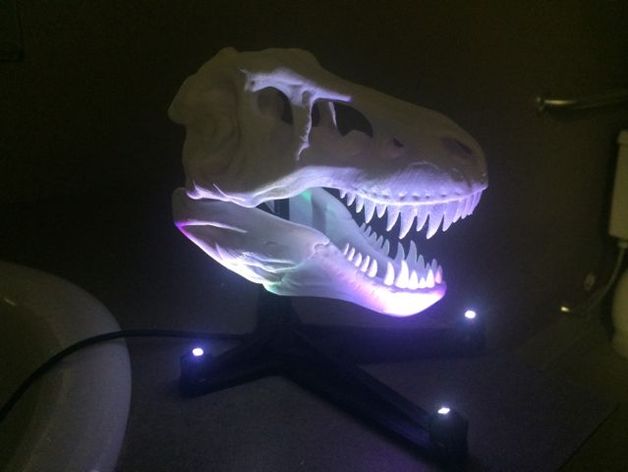
Programmable Lighted T-Rex base.
thingiverse
This is a brightly lit foundation for the Makerbot curriculum T-Rex skull : http://www.thingiverse.com/thing:308335 The lights are Adafruit neoPixles : http://www.adafruit.com/product/1612 They're housed in my customized neoPixel balls : http://www.thingiverse.com/thing:999732 In the base, there's a room prepared to attach an Adafruit proTinket processor to control the lights : http://www.adafruit.com/product/2000 Since the lights are set into balls and the processor manages color and brightness, you can design anything your imagination conceives. Perform a color fade, respond to sensors, and so on. Instructions The base is configured for printing with 15% infill and two shells with no supports using a Replicator 2. Inside the processor compartment, the print will result in some statures that you'll detach using flat faced wire cutters: http://www.adafruit.com/product/152 We used these, and they performed admirably. Yes, I frequently express admiration for Adafruit; their products impress me, and I wish them well. To assemble this setup, you will require three tiny screws to secure the processor: https://www.boltdepot.com/Product-Details.aspx?product=6358 Those are the fasteners we prefer using. Print the skull, jaw, and post from http://www.thingiverse.com/thing:308335 , and also print enough ball fragments for four balls from this location : Print the base by itself once. Solder power, ground, data-in, and data-out onto each neoPixel, as specified on the packaging of your product. This process calls for inserting wires closely to the center of each neoPixel unit; make sure to position the solder joints exactly at the middle of these components, allowing the connections to lie precisely along a very narrow band. Your aim is to create as tight a circular loop around the base unit as possible with minimal wasted wire space. Check that all LEDs are working properly before inserting them into the spheres (We employed hot glue) . When you've completed cleaning up your foundation model, insert the processor with the three tiny screws, securing it firmly in place. Lastly, connect all devices by hooking up power supply wires directly to LED components and using GND to link the lights collectively for uniform color change effects across different zones of display areas as programmed. Code your program accordingly & evaluate how successful this was through direct experimentation with multiple combinations until perfect execution becomes possible via various permutations implemented within desired sequences based on given criteria!
With this file you will be able to print Programmable Lighted T-Rex base. with your 3D printer. Click on the button and save the file on your computer to work, edit or customize your design. You can also find more 3D designs for printers on Programmable Lighted T-Rex base..
