PrinterBot Simple anchor/Control Panel w/LEDs or switches!
thingiverse
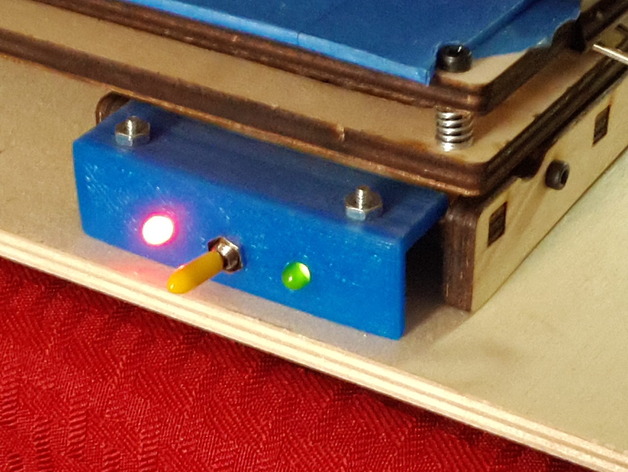
Secure your Printrbot Simple with anchors that have optional 5mm LED holes. Anchor brackets ensure a stable print with minimal layer lines visible. For installation, use a plywood board and 4-40x1 1/4" screws. Print the anchor plate and place it on the lowest baseboard, marking and drilling the screw holes. Attach the anchor to the printer by inserting the screws from below and tightening the nuts. For the rear anchoring, drill 2 holes in the anchor board and secure with zip-ties if you don't have the tower upgrade. Place a protective material like felt, foam or neoprene under the board to protect surfaces. Ensure all parts move freely before running the printer and test custom electronics thoroughly before plugging them in. Happy printing!
With this file you will be able to print PrinterBot Simple anchor/Control Panel w/LEDs or switches! with your 3D printer. Click on the button and save the file on your computer to work, edit or customize your design. You can also find more 3D designs for printers on PrinterBot Simple anchor/Control Panel w/LEDs or switches!.