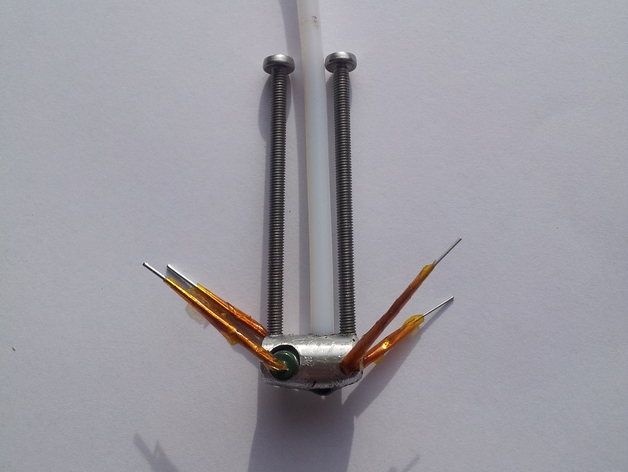
Printed Template Hotend, MkIII
thingiverse
I made a drill-friendly heat end that can be drilled directly from a template. Simply print out the template, wrap it around a metal rod, and start drilling where you see the holes appear. The design cleverly uses a Bowden cable as an isolator, meaning only the metal part needs drilling. Check the details in this guide to make sure everything fits perfectly together. Various mounting options are available with their respective adapters, designed with optional fan mounts whenever possible - these are highly recommended! An all-metal version is also available - find more info within the instructions provided. **Update: Version 3 of the Heat End has a renewed focus on monolithic design, going back to the basics like Version 1. Version 2's upgrades made manufacturing easier but had an unforeseen impact - I found nozzles began failing earlier than expected!** With the latest version, we're seeing smaller components overall which brings some great advantages: aluminum rods are more affordable and simpler to machine; smaller screws transfer less heat, minimizing the chance of plastic damage. With this reduction in size comes a faster warm-up time and smaller melt zone. Now, let's move on to assembly instructions! **Tools Needed** 3/8" Aluminum Rod M3 or M2 (4-40) threaded rod / machine screw (preferably long) Teflon Bowden Cable (2mm ID x 4mm OD) Honeywell 100K Thermistor 5.6 ohms Vitreous Resistor **Assemble** 1. Download "heatblock.stl" and print the design onto an object with 3/8" metal rod dimensions. Wrap it around the metal rod; it's a good idea to smooth out any imperfections beforehand - though this isn't crucial. Aluminum rods are your best bet, considering cost efficiency and great heat conductivity! **Drill the Heatblock** Simply place your drill bits over any of the marked holes, and follow through with each mark on the diagram until complete. Key: M3 guideholes followed by finishing off with an M5 hole size. **Assemble the Heat Block Components** Cut out threads in your designated slots using a tap, ensuring to check the recommended table sizes for accuracy. Remove excess parts and set them aside; your hacksaw is waiting for you! Next, drill tiny holes at 0.1mm up until 1 mm through the tip of the nozzle for maximum effectiveness; for large nozzles use Dremel, but small ones may require more precision from a jeweler's drill! Assemble by screwing in the Teflon Bowden Cable.
With this file you will be able to print Printed Template Hotend, MkIII with your 3D printer. Click on the button and save the file on your computer to work, edit or customize your design. You can also find more 3D designs for printers on Printed Template Hotend, MkIII.
