Printed Template Hotend, MkII
thingiverse
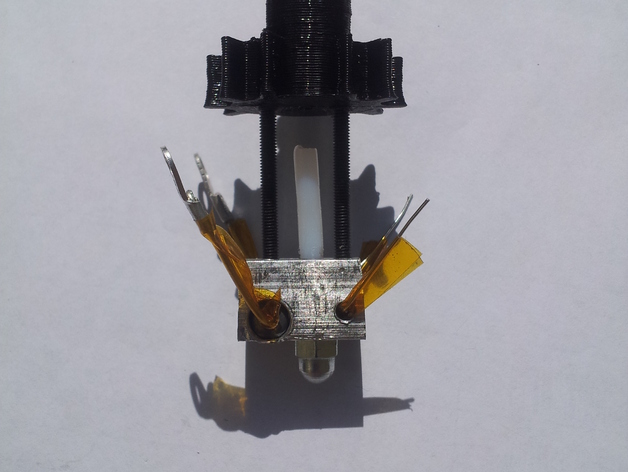
Human: I strongly advise using version 3 as it outperforms M4 nuts in terms of grip on Bowden cables, which may cause slippage over time and significantly reduce hotend life after extended periods of use. A customized, hotend designed for improved Bowden isolation has been created by drilling directly into a template, thus ensuring only the metal part requires precise holes to be drilled. In-depth instructions can be accessed through a separate resource. Adapters are available in various designs to fit both jhead and huxley mounts, along with an additional option that incorporates a fan mount for better heat dissipation. Updates: Version 2 introduces the decoupling of nozzles from the main body of the hotend by incorporating M4 acorn nuts as primary components. An added feature enables screwing of bowden cables directly into acorns through the newly-integrated acorn-shaped holes within the design. Advantages of this updated design include: reduced necessity for manual metal filing, increased accessibility to utilizing square rods due to easier hole drilling accuracy and elimination of interface-drilled depths, allowing easier modification according to required diameter settings, and enabling swapping of different diameters between prints at whim. 0.3mm, 0.5mm, 0.8mm nozzle options can easily be utilized to cater for distinct needs, with a noticeable improvement in efficiency when employing an 0.8mm size as they render stronger printed materials and faster results. Instructions: Bill of Materials: Acorn nut - Size: M4 (available also as M8) Square aluminium rods- Half an inch long M3 sized machine screws 2-millimetre inner diameter Bowden tubing Vitreous resistance coils: either 5.6 Ohm, or a different rated variant Drills Threading devices- Specifically to facilitate M4 or other desired thread patterns Hack-saw Assembly 1st Step - download and then print out 'heatblock_template.stl'. You'll now require metal for construction. Utilizing a metal template guide cut your heat-block shape into the piece you printed, making use of drill to achieve specified markings. After acquiring square hole accuracy by using tap on appropriate threading locations present on both the sides, complete assembling all hardware by adding M3 size thread screw for proper anchoring in heatblock position Utilize Hacksaw in removing that part which can not get fit under your metal heat-block
With this file you will be able to print Printed Template Hotend, MkII with your 3D printer. Click on the button and save the file on your computer to work, edit or customize your design. You can also find more 3D designs for printers on Printed Template Hotend, MkII.