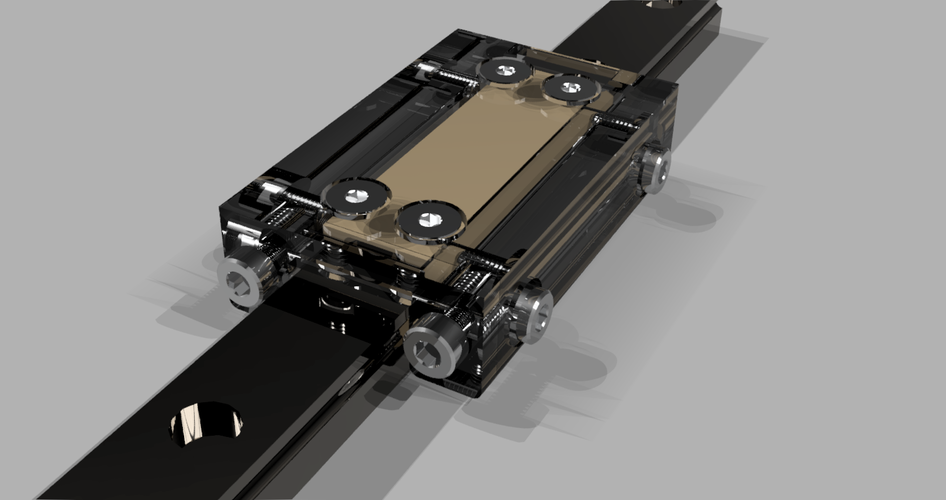
Printed Adjustable Clearance 12mm Linear Rail Glide Carriage
pinshape
UPDATE 3/1/16 - 8/25/2017 After a week or two of using the new 3D printed carriage, I move the other two to 3D printed carriages as well. I'm happy to report that after over a year of ~1350 hours of printing, the 3D printed carriages have printed very well. So one of my carriages for my MR12 rails started to bind up on me, doing some research on commercial linear rail glide options, I discovered http://www.igus.com They have a DryLin T - profile rail guides (http://www.igus.com/wpck/3555/drylin_t), line that looked perfect for my application. However, with quite the price tag. Looking over some options, I found iglide tribo-filament for 3D printers. Using this, I was able to create a fully 3D printed adjustable clearance rail carriage. You will need to print out of iglide 1 TopSlide.stl 2 SideSlide.stl I found that printing at around 230°C hotend and 80°C bedtemp, 20mm/s works best. Also, print one at a time! Helps to press some kapton tape down to help sticking. It's a pain to get just right, but once you do, you will get some very good slides. For the Carage.stl, SlideLock.stl, DeltaCarage.stl; print at 2mm, 30% infill, using PET+ (http://shop.madesolid.com/pages/pet-filament) Some hardware is needed 6 Socket Head Cap Screw M3 Thread, 6mm Length 4 Flat-Head Socket Cap Screw, M3 Thread, 4mm Long I sourced my iglide tribo-filament from Amazon. http://www.amazon.com/gp/product/B00M92IDT2 NOTE!!! The DeltaCarage.stl is just the Carage.stl with added delta arm mounts for Kolossal Pro (40mm from edge to edge), belt lock, and end stop screw mount howl.
With this file you will be able to print Printed Adjustable Clearance 12mm Linear Rail Glide Carriage with your 3D printer. Click on the button and save the file on your computer to work, edit or customize your design. You can also find more 3D designs for printers on Printed Adjustable Clearance 12mm Linear Rail Glide Carriage.
