Printable wheel for rc cars with rim and mold for the rubber
pinshape
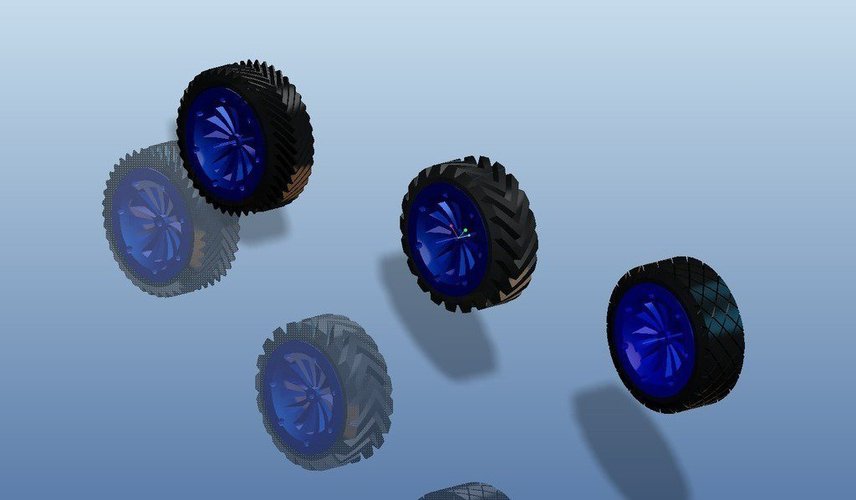
Summary A printable rim needs rubber to work. For more sizes, just ask. Instructions Print Instructions: To make the best print, set the rim layer height to 0.20mm. If it's bigger, there might be some problems with the particular geometry of the rim. Set 70% or more infill for this piece because it will support a lot of stress during a race. For other pieces, use 0.24 or more layer height and 40% or less infill. Once you have printed the four parts needed for the mold and one or more rims, remove any clogs from the pattern for the rubber. They will come off with your hands and/or a cutter. Now check if the pieces fit together. If not, maybe you need to sand them a bit. When you get a good result, verify the internal diameter with a meter to make sure it's a circle and not elliptical. All set? Great! You're ready for the next step. How to Mold the Rubber: You'll need some materials: 1) Acetic silicone (the color you like) 2) Cornstarch or other starch 3) Colorant in powder (optional if your silicone is transparent or white) 4) Carbon powder or toner (also optional if you want more friction resistance. Be careful with the toner.) 5) An old container for mixing Procedure: First, put some cornstarch in the container. Then add a certain amount of silicone. Start adding the rest of the starch slowly while mixing it all with a baton. Continue until the mixture is well combined. Then disassemble your mold and take out the rim. Mold the silicone mixture onto the rim using your hands. You can use gloves for safety. Put about 1cm of excess material around the diameter of the rim. Add some starch to the mold parts to avoid sticking. Now support the patterns for the rubber onto the compost you've deposited on the rim and press it a bit to make them fit. Install the downside of the mold and fit it together tightly. Then install the upside of the mold and press all together with a little strength. The excess material will come out through the holes in the upside. Now wait about one hour before disassembling. If everything goes smoothly, you've made your first wheel! Repeat this process for each wheel. If you chose a rim with a diameter greater than 3mm, you'll need to use the adapters. For more details, check here: http://www.instructables.com/id/How-To-Make-Your-Own-Sugru-Substitute/ For photos, check here: http://www.facebook.com/media/set/?set=a.3711205070303.146298.1580924138&type=1&l=3367fdc765 Update: You'll need to modify the base of your mold. It's better to make a hole in the center and use a shaft to center the rim. I'll upload the new piece soon. If you've already printed it, remove the plastic shaft and make a hole with a Dremel. The hole position needs to be changed from top to sides so that clamps can press the material firmly in place.
With this file you will be able to print Printable wheel for rc cars with rim and mold for the rubber with your 3D printer. Click on the button and save the file on your computer to work, edit or customize your design. You can also find more 3D designs for printers on Printable wheel for rc cars with rim and mold for the rubber.