Print-Rite DIY 3D - Y-Belt Spacer
thingiverse
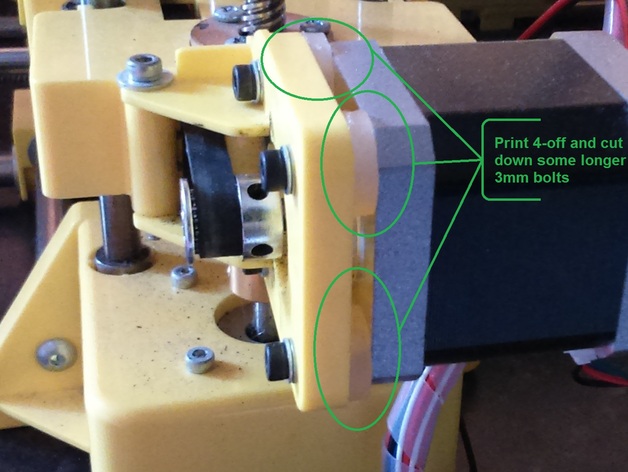
My trusty PrintRite DIY 3D printer arrived with a Y-Belt drive motor mount that was woefully misaligned, causing the belt to wear down alarmingly fast - just six months of use and it was on its last legs! I considered printing an entirely new mount from scratch, but it's a complex design that requires pinpoint accuracy. Instead, I opted for a more practical solution: grabbing some longer 3mm bolts, cutting them down to the perfect length, and printing custom spacers to do the trick. The Solution Works Printer Details Printer: PrintRite DIY 3D Raft Settings Rafts: None Required Supports Needed No Supports Necessary Resolution Layer Height: 200 Microns Infill Percentage Solid Infill Only Printing Notes Material Used: PLA Filament Bed Temperature: Cold Bed Setup Adhesion Method: Blue Tape Adhesive Special Printing Instructions: Print a 2mm Brim to Ensure Easy Removal Post-Printing Process Brim Removal Made Simple No need for complicated brim removal techniques - just trim the excess and you're good to go. Design Process The custom spacers were designed using OpenSCAD software.
With this file you will be able to print Print-Rite DIY 3D - Y-Belt Spacer with your 3D printer. Click on the button and save the file on your computer to work, edit or customize your design. You can also find more 3D designs for printers on Print-Rite DIY 3D - Y-Belt Spacer.