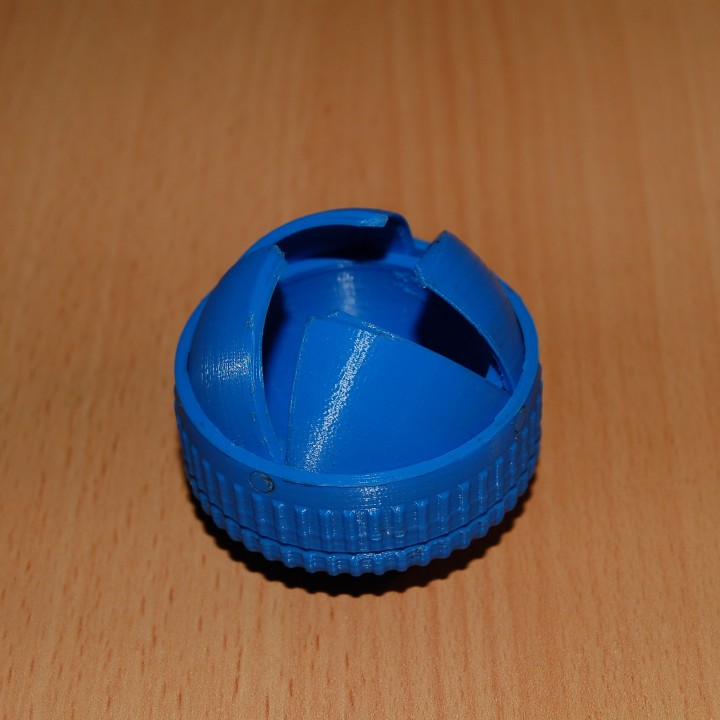
Print in place Iris "Orb-box"
myminifactory
This is a compact, self-contained iris box that prints without supports. You can find more of my iris box designs on my profile page. This design is similar to the well-known models from Emmett and Lobo CNC in that it's a print-in-place iris box with a spherical shape and four "petals." However, unlike these designs, this one prints upside down, with its base facing upwards, and has a unique opening shape that covers almost an entire hemisphere, earning it the name Orb-box. Printing this design can be challenging, likely more so than other designs. That's why I've included a test file called "Orb-box test," which includes all the print-in-place features that make it tricky to print. If you're able to successfully print the test file and free up its three parts, you should be able to print this box design with ease. The default tolerances on this design are 0.3mm (sometimes 0.2mm), so if your prints are fusing, try scaling up the test file by that amount, as well as the actual box itself, until it works smoothly. Additionally, consider reducing your extrusion multiplier slightly to prevent underextrusion. A high-resolution print with a layer height of 0.1mm will also help achieve higher dimensional accuracy. For best results, use a material with low friction, such as PLA, which worked perfectly for me. To get this box working after printing it, follow these steps carefully: Break away the four built-in hinge supports around the perimeter and trim any brim around the base using a sharp implement like a craft knife. Be extremely cautious when doing this, as it can be tricky. Use a craft knife to separate the "petals" from the outer and inner box walls on the first layer of the box, but avoid cutting through the four hinge pins on the outer side of the doors. Next, use a thin implement to lever the corners of the "petals" through the four holes in the base of the box as shown. You should hear a click as the print-in-place pins break away from the body of the box. The steep overhangs on this part may also cause some fusing with the body, so you'll need to loosen them as well if that happens. To separate the opening collar from the rest of the box, slide a craft knife through the notch around the perimeter as shown. There's an intentional 0.2mm gap between these parts during printing, which should make them come apart relatively easily. If they won't budge, use a saw to lightly cut along this notch until you can separate them with a craft knife. Now, start turning the collar back and forth to loosen it up. The box closes by twisting the upper collar anti-clockwise (or clockwise if you've mirrored the object in your slicer) while holding the base stationary. To initially loosen it up, twist on the box firmly, then pull each of the doors upwards out of the body slightly. Repeat this process until the box is mostly closed, and then try working it in the opposite direction. It may take some time – about 5-10 minutes for me – but with a bit of effort, your box should start working smoothly. If you need any help with this design, feel free to let me know!
With this file you will be able to print Print in place Iris "Orb-box" with your 3D printer. Click on the button and save the file on your computer to work, edit or customize your design. You can also find more 3D designs for printers on Print in place Iris "Orb-box".
