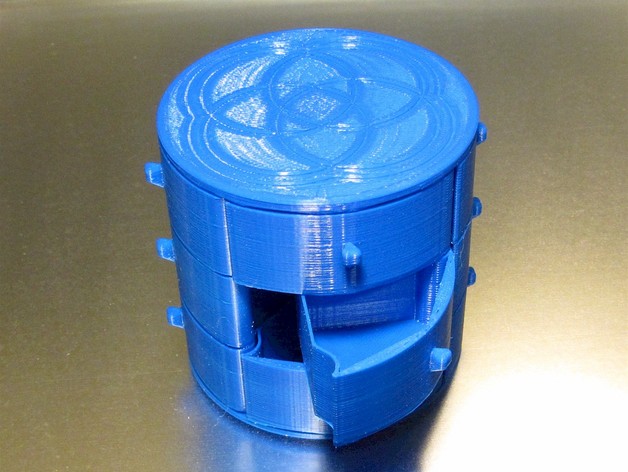
Print-In-Place 12 Drawer Jewelry Box
thingiverse
This custom jewelry box is an exercise in advanced bridging techniques. The built-in truss system under the drawers and on top of them allows for print-in-place capability without supports. It also employs proven print-in-place strategies to make it easy to separate the drawers after printing. For those who prefer a more traditional approach, I've included separate drawer, base, and top parts that can be printed and assembled independently. However, keep in mind that this version will forfeit the bragging rights associated with print-in-place technology. Printer Settings: Printer Brand: MakerGear Printer Model: M2 Rafts: None Supports: None Resolution: 0.2mm Infill: 20% Notes: This design is optimized for 0.2mm layer printing and can be printed more efficiently with two perimeter shells and a 0.4mm line width. If the print-in-place version (round12.stl) presents difficulties, you can instead print twelve individual drawers (drawer12.stl), one base (base12.stl), and one top (top.stl). Post-Printing Instructions: To release the drawers, use a single-edged razor blade to cut through the gap at the top and bottom of each drawer stack. You may need to gently manipulate the drawers to free them completely. Depending on your slicer's performance, you might encounter loose strands on the bottoms of the drawers that require trimming. With the non-print-in-place version, simply slide three drawers over each post and then fit the top onto the posts. If necessary, apply a drop of superglue to each post for a secure press fit.
With this file you will be able to print Print-In-Place 12 Drawer Jewelry Box with your 3D printer. Click on the button and save the file on your computer to work, edit or customize your design. You can also find more 3D designs for printers on Print-In-Place 12 Drawer Jewelry Box.
