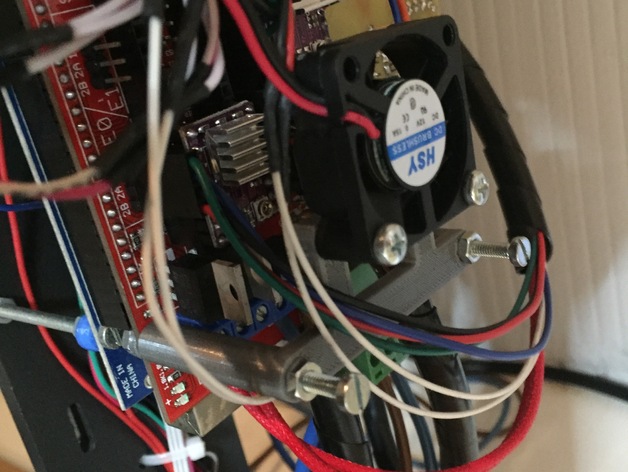
Print cooler bracket for Ramps 1.4
thingiverse
When using a direct drive extruder with a small nozzle (0.3 or less), the stepper motor must deliver a high torque to ensure constant material flow. In my case, the DRV 8825 stepper driver's standard Vref setting of around 0.7 to 0.8 Volt was not enough to provide sufficient power to my NEMA 17 extruder motor (type 42BYGHW609, with 4.08 kg/cm holding torque). To achieve stable RPM independent of extrusion speed, I had to increase Vref up to 1.1 Volt. However, at this setting, the DRV8825 driver generates significant heat, although it is rated for temperatures up to 150°C before shutdown. Running an IC at high junction temperature reduces its lifespan and affects performance. This bracket is designed for a 30mm 12V DC cooler. To mount it on the Ramps, use two 40 mm M3 screws in the holes: one above the MOSFET connector and another just in front of the two fuses. Apply 3mm plastic washers to prevent damage or short circuits on the Ramps PCB by the M3 nuts. The 30mm fan mounts on top of the extensions and blows an effective airflow at the extruder driver position area. Print Settings: Printer Brand: RepRap Printer: Prusa i3 Rafts: No Supports: No Resolution: 200um Infill: 40%, linear Notes: Part printed in PLA 1.75mm, with an extruder temperature of 210°C, heated bed at 69°C, print speed of 40 mm/s, and a nozzle diameter of 0.3 mm. Design Method: I designed this part using SolidWorks, employing parametric design software from scratch. I based the design on actual available mounting holes and ensured a minimum bracket height on Ramps of 1.4mm to provide space for the fuses. The cooler airflow was tested at the designed height of the cooler. No temperature measurements were taken; instead, effectiveness was assessed by sensing with a finger tip to ensure only mild heat-up of the heatsink. Design Steps: I created two 4mm circles at a center-center distance of 48 mm and offset both by 1.5 mm. I then extruded up to 33mm and sketched a rectangle covering 50% of both holes, extruding it up to 3mm without merging. Next, I split the parts on the inner surface of the 4mm hole and subtracted two "half moons" in each hole. I also sketched cooler extensions with 4mm holes and extruded them up to 3 mm. Finally, I filleted all inner corners on R1 to make the part more resilient.
With this file you will be able to print Print cooler bracket for Ramps 1.4 with your 3D printer. Click on the button and save the file on your computer to work, edit or customize your design. You can also find more 3D designs for printers on Print cooler bracket for Ramps 1.4.
