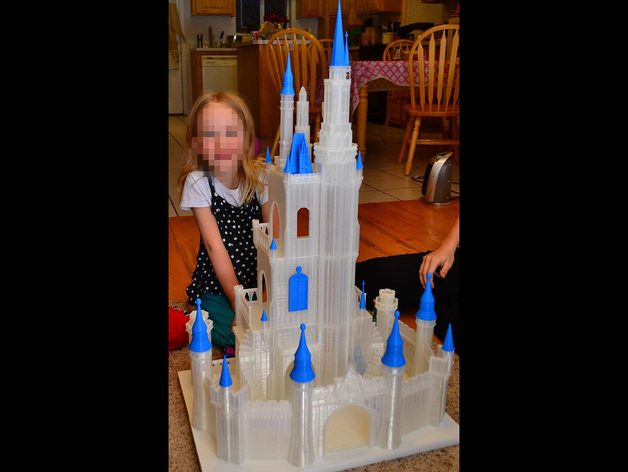
Princess Castle Remix
thingiverse
About 105 hours of printing time and 1486 grams of PLA were used. Mostly printed at a fill rate of 10% down to 0%. The design was modified to include three levels, making it more fun. Each piece was scaled down slightly to fit the printer. The final dimensions are approximately 20"x13" with a height of 30". The door openings are large enough for Disney dolls measuring 4 inches in diameter, except for the front gate which is a little short. A Blender file has been included that shows the modified design - it was created in a rush and isn't perfect, but my daughter loved it! If I were to do this again, I would model it so that the pieces can be snapped together easily. Glueing was the hardest part, as I only tried Loctite super glue and hot glue. The super glue had to be held firmly for 10 or more minutes before being left alone for hours, resulting in a weak bond. Printed on a heated glass bed using Clear PLA, which gives it an icy appearance. Printing at speeds higher than 40 lost much of the gloss - mostly printed at speed 30. Walls with a fill rate of 10% are strong enough so far. The printer used is my first and only, which seems to work well after a few new screws for the steppers and a lot of mineral oil: http://www.amazon.com/HICTOP-Aluminum-Structure-Tridimensional-270x200x190cm/dp/B00YA8VHI2/ref=sr_1_8?ie=UTF8&qid=1459809486&sr=8-8&keywords=hictop. I recommend downloading Blender and exporting into STL's from there, allowing you to see how the design fits together and make necessary adjustments. Print Settings: Printer: Hictop Prusa i3
With this file you will be able to print Princess Castle Remix with your 3D printer. Click on the button and save the file on your computer to work, edit or customize your design. You can also find more 3D designs for printers on Princess Castle Remix.
