Precise Live-Z test
prusaprinters
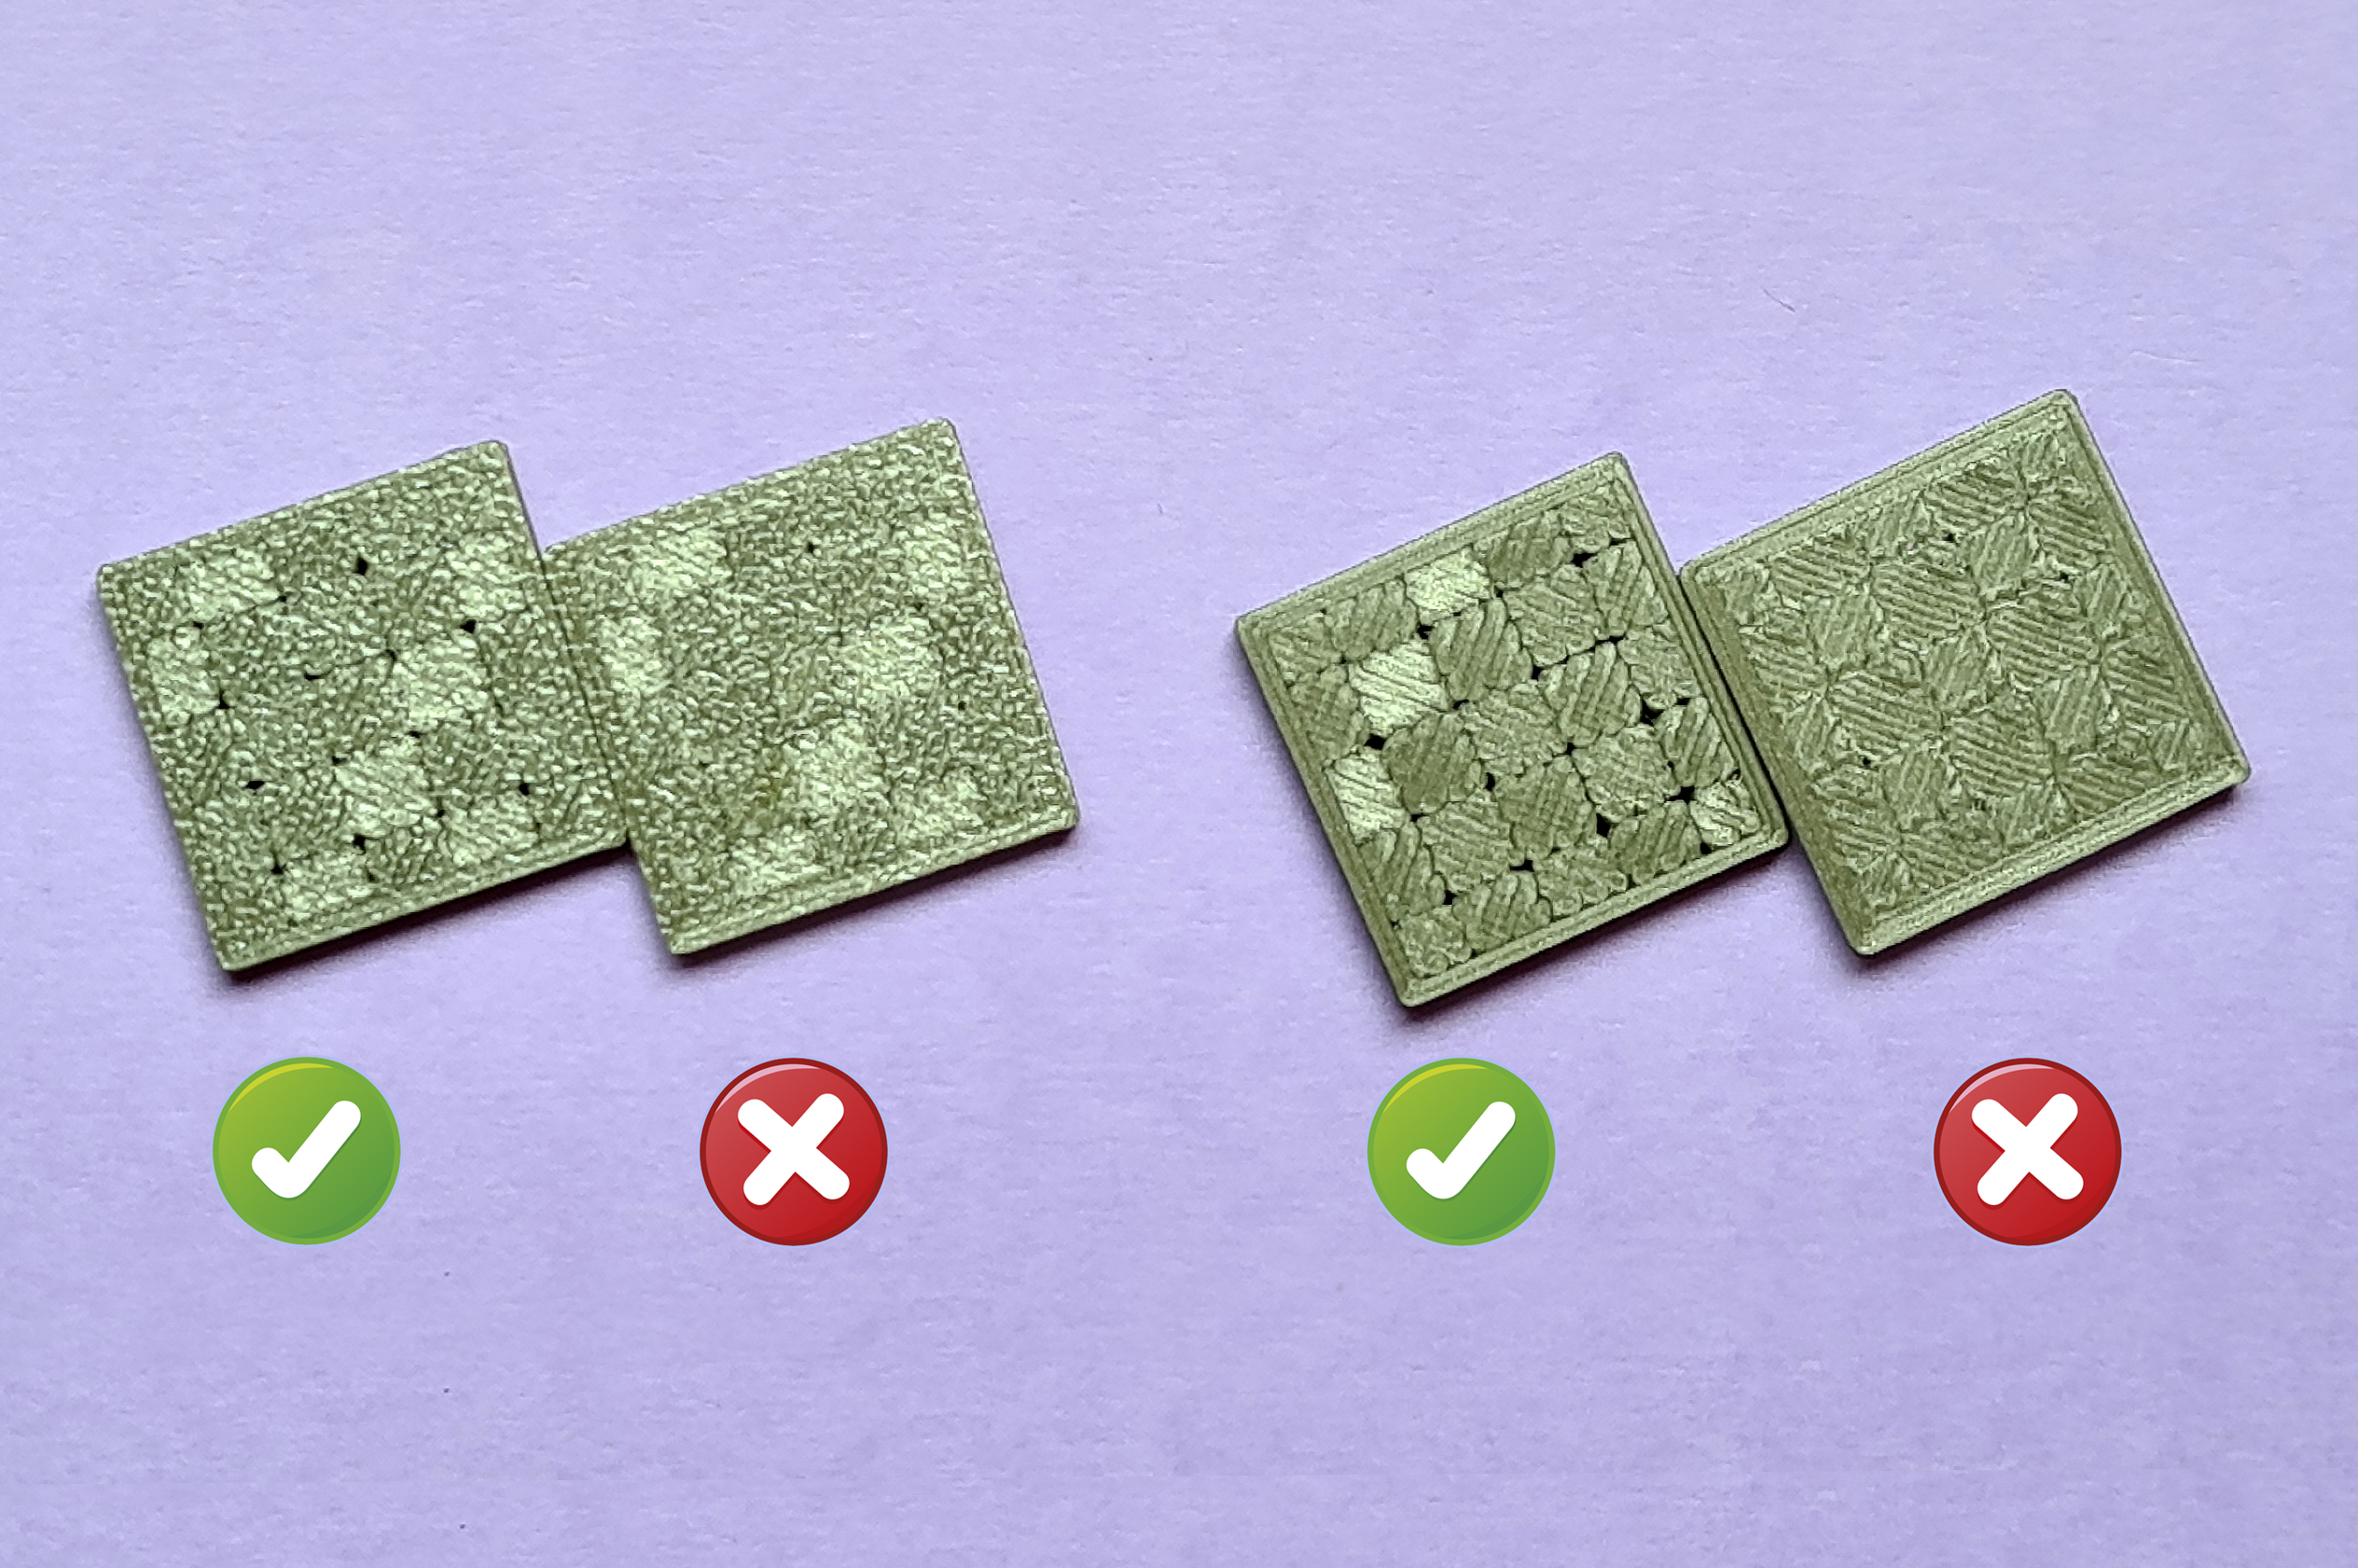
<p>The test is simple to use. You should try different values until all the squares are of the same size; i.e., there is no overlap from one another, and there are some small holes at the vertices where the squares meet (not the squares with the main perimeters). If there is overlapping, raise your live-z (make it more positive). If there isn't, keep lowering in small increments until there is, and then revert to the last good value.</p><p>As always, keep your bed clean, and preferably clean it after each test print, so the conditions are the same.</p><p>To better see the effect, use a "metallic-looking" filament, such as Prusament Pearl Mouse Gray, silver-like-ish, or glitters/galaxy/vertigoes. Use silky filaments only if you can print them without an interposition layer; "toothpaste" or two-color filaments (MatterHackers Quantum, 3DJake MagicPLA, Prima Chameleon, etc.) work also fine. Usually you won't need any special equipment like loupes, precision calipers and so on; maybe just a magnifying glass, or a close-up picture with your phone, in any case.</p><p>The test can also double as a bed correction test. In the provided 3mf file, just move the box to the bed side you want to tune, and slice. The Gcode is prepared for PLA, 0.6 nozzle; change the print settings to your own setup. (Note that there is no .STL, as the model is just a box using slicer modifiers.)</p><h5><br>How this came to be<br> </h5><p>I am now perfectioning a method to add patterns to tops and bases of 3D printed parts, to give them a bit of bling and shine. This was one of the first tests. I had used to the fullest the usual methods of adjusting Live-Z, with precision micrometer, USB microscope and whatnot, and I thought I had a perfect adjustment, as everything looked best. Boy, was I wrong.</p><p>By chance, it turned out that these first tests could be an extremely accurate display of how well the Live-Z was tuned. (If you play around with the modifier settings, you will see that the effect is much less visible with other values -like 0/90 angles or concentric infill.) Actually, I wasn't off by more than 0.045mm, or 45 microns —less than the tiniest feasible layer height with the nozzles I use, 0.4 and 0.6 diameter. It also required much less gear than other tests —with the right filament, I could see the results with the naked eye.</p><p>So, I thought I <strong>had</strong> to share it!</p><h5>Yet more calibration!</h5><p>You might also be interested in my collection of other calibration models. All of them are parametric and can be suited to your needs and include a recycling symbol with the Recymbol library, as this one:</p><ol><li>The <a href="https://www.printables.com/model/159178-parametric-calibration-cube">extruder multiplier/flow/walls calibration cube</a> </li><li>The <a href="https://www.printables.com/model/159286-parametric-simple-temp-tower-with-g-code-generator">simple temperature tower, with G-Code generator</a>) </li><li>The <a href="https://www.printables.com/model/159590-parametric-temperature-bridging-tower-g-code-gener">advanced temperature tower</a>, with G-Code generator and tests for bridges and two overhangs</li><li>The <a href="https://www.printables.com/model/159645-parametric-e-cor-tower-g-code-generator-for-extrud">E-Cor tower (waveform for the TMC stepper drivers)</a>, with G-Code generator. </li><li>The <a href="https://www.printables.com/model/200405-parametric-overhang-test">parametric overhang test</a>, with support enforcer generator.</li><li>The <a href="https://www.printables.com/model/175221-parametric-ironing-calibration-test-matrix">parametric ironing calibration matrix</a>, to fine-tune your ironing settings.</li></ol><p>Once you're done testing and calibrating, sample your filaments with the <a href="https://www.printables.com/model/268434-swatch-modifiers-filamentinfill-customizable-opens">parametric swatches</a>!</p><p>Happy printing!</p><p> </p>
With this file you will be able to print Precise Live-Z test with your 3D printer. Click on the button and save the file on your computer to work, edit or customize your design. You can also find more 3D designs for printers on Precise Live-Z test.
