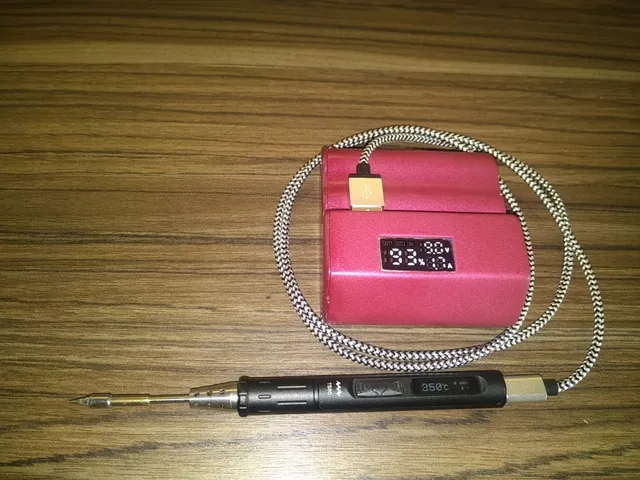
Powerful QC3.0 powerbank with protected connectors
prusaprinters
A big-capacity power bank with a special design to protect the USB connectors when carried in a bag or pocket. Powerful enough to use as a power source for a TS80 soldering iron. With info for the electronics module and build instructions.Warning! This can burn your house down if done incorrectly!Do not attempt to build this unless you are familiar with:SolderingLiIon battery safetyBasic electrical engineeringNow with added STEP file for remixing.Print SettingsPrinter:Modded CraftbotRafts: NoSupports:YesResolution: 0,25 mmInfill:33%Filament:Any brand fire retardant filamentNotes:If you aren't familiar with the subject, google "fire retardant filament" first. Select a filament that is impact resistant as well as fire retardant. Both qualities are important for fire prevention when building any electric device that can produce high currents.Orient the body upright with hole on top, the cover with the rounded edges on the bottom and the insert flat. Use thicker walls for strength (~1,5mm), but infill is not that important. Some supports are necessary for the connector and display holes.Post-PrintingBuy the electronics moduleGoogle "QC3.0 USB 3.7V Lithium Li-ion 18650 Battery Quick Charging Module DIY Power Bank" and buy the module that looks exactly like the picture below.Buy four 18650 LiIon cellsGoogle "18650" and buy four cells with the capacity you want (final capacity is four times that). No integrated protection is needed, the electronics module takes care of that.Important: Buy a reputable brand or you could have a fire hazard on your hands!Clean up the printRemove supports and clean up the printOptional: Get that professional look - sanding, filler and paintIf you want a more professional look:Roughly sand the body and cover.Apply some car body filler (important, covers up the porosity to get a good surface for painting), wait until it dries.Sand again with medium-grit sandpaper.Apply some spray filler/plastic primer, wait until it dries.Sand using water and fine grain sandpaper.Paint using the colour of your choice, 2 layers minimum, let it dry thoroughly.WiringUse 0,75 mm2 (21 AWG) minimum wires, the current on the battery side can be up to 6A!Solder the wires or weld the nickel strips to the four cells in parallel. You can use the body as a holder to keep them aligned while welding.Solder the wires to the B+ and B- terminals on the electronics module. Each 10 cm long. Do not connect the battery yet.Insert the electronics module in the holes for connectors and display. It is a snug fit.Now for the B+ wire:Lay down the body with inserted electronics module next to the batteries.Cut the B+ wire as short as possible while still being able to solder it to the positive side of the batteries.Solder the B+ wire to the batteries.Insert the batteries in the body with the positive side first.Put in the insert.Cut the B- wire to the necessary length and solder to the negative side of the batteries.Press the button on the module to check if it works. The display should light up.GlueFix the batteries and the insert using glue, they must not be able to move.Glue on the cover.You are done!Custom SectionNotes on useIf you will be using the TS80 soldering iron, limit the power to 18W in the iron settings. If you don't, the protection will kick in and turn off the power bank. This is a problem with the TS80, it lets you cheat a bit, the QC3.0 is only rated to 18 W. A quick overview of QC3.0Charge using a regular or QC charger via the micro USB connector.For QC-charging, use the red USB socket, blue one is limited to 5V, 2A.If any protection is triggered, the powerbank will appear dead. Check the reason for the protection triggering! Unplug everything and connect again.Do not use covered up or otherwise insulated, so it doesn't overheat.You can't charge the powerbank while it charges a device.
With this file you will be able to print Powerful QC3.0 powerbank with protected connectors with your 3D printer. Click on the button and save the file on your computer to work, edit or customize your design. You can also find more 3D designs for printers on Powerful QC3.0 powerbank with protected connectors.
