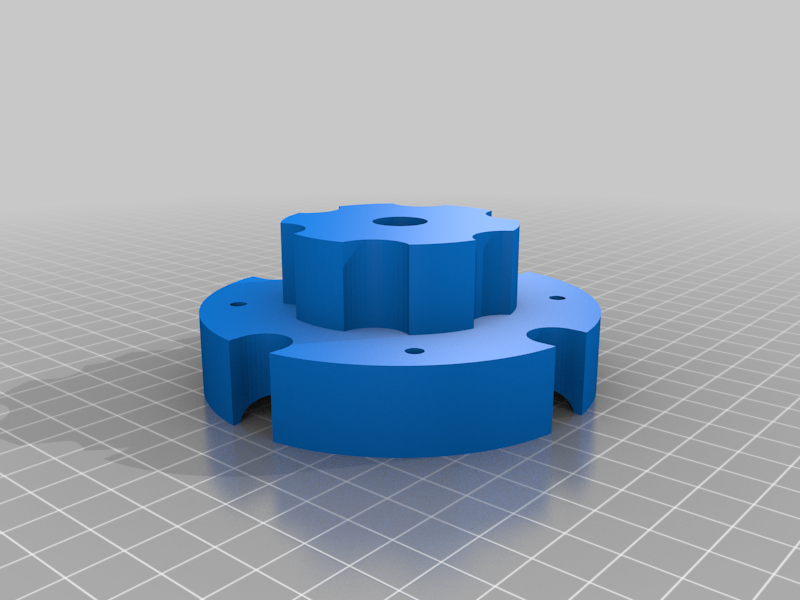
Powered Cart Hub 13inch
prusaprinters
<p>This wheel hub is redesigned to fit a 13 inch wheel lawn or garden dump cart. It is so you can power your own Gorilla Cart if your older like myself and live on a bit of a hill side. It uses toy car Gear hub and motors that you can buy on Aili Express or Amazon. It will require some metal work and welding on the steering part of the frame.</p><p>The switch box goes into the handle with a double pole double throw switch for forward and reverse. It uses two R/C planetary gear heads mounted to the 550 motor that cut the speed by 1/3 to walking speeds and increase the torque. Also used was as a 30amp pulse width modulated speed controller. If your battery packs are above 24volts to 48 volts you'll need a 30 amp DC to DC converter so that batteries above 24 volts up to 48 volts could be used to run the 24 volt motors. All parts are purchased on Amazon or one of the slow boat from China sights.</p><h3>Print Settings</h3><p><strong>Printer Brand:</strong></p><p>Creality</p><p><strong>Printer: </strong></p><p>Ender 3</p><p><strong>Rafts:</strong></p><p>No</p><p><strong>Supports: </strong></p><p>Yes</p><p><strong>Resolution:</strong></p><p>2mm</p><p><strong>Infill: </strong></p><p>80·%</p><p><strong>Filament:</strong> E-Sun PLA+ Gray</p><p><br> </p><p><strong>Notes:</strong></p><p> </p><p>This hub is meant to fit on a 13 inch pneumatic wheel. It is designed to fit the contour and use a 1/2inch shaft to a line. Then smeared the bottom of the hup with RTV silicone and let Dry 24 hours. Drill 1/8 inch holes into the hub, through the holes in the hub after it has dried. Then insert and apply 3/4 by 1/8 inch pop rivets into the holes.<br>Note:</p><p>You will have to apply a 5/8 to 1/2 insert into the wheel to go from a 5/8 inch shaft 1/2 inch shaft. These can be purchased through a motor supply store. In my case I simply turned them on my lath. This way I could make them a bit longer with a shoulder so the wheels could be flipped over to disengage from the drive gear box in order to free wheel to still be pulled by a tractor.</p><p>The switch box fits the handle its for a forward and reversing switch AKA double pole double throw switch that can be ordered off Amazon.</p><p>Wiring:</p><p>Pay close attention to polarity. The battery wires directly to the PWM speed controller input Plus to Plus Minus to minus. Then use the switch to control the polarity of the motors. Plus and minus of the speed controller go to the center commons of the switch and two jumpers in an X configuration go to the four legs then two end legs to the motors. If the DC to DC step down converter is used it would go between the output of battery to the input of the speed controller then the switch. You may want to have an on off switch for the battery as there is quintessence voltage draw from this set up. The motors of course are wired in parallel but because of direction plus will go to minus between motors. This way both motors pull or push in the same direction.</p><p>I mounted the rheostat so a finger ring and a printed spring loaded pulley knob could be used to control the speed after the F/R positions were set by the switch. The aluminum case was used for the speed controller and the rheostat was rewired with 3 wire cable 20 gauge up through the handle. The Heat sink slides on to the motor for cooling.</p><p>Have fun with this project and don't be afraid to innovate and incorporate. Its also nice to tip the designer if you like their art an innovation.</p><p>Sincerely;</p><p>Rocky Prattistic </p><p> </p><p> </p><p> </p><p> </p><p>Category: Outdoor & Garden</p>
With this file you will be able to print Powered Cart Hub 13inch with your 3D printer. Click on the button and save the file on your computer to work, edit or customize your design. You can also find more 3D designs for printers on Powered Cart Hub 13inch.
