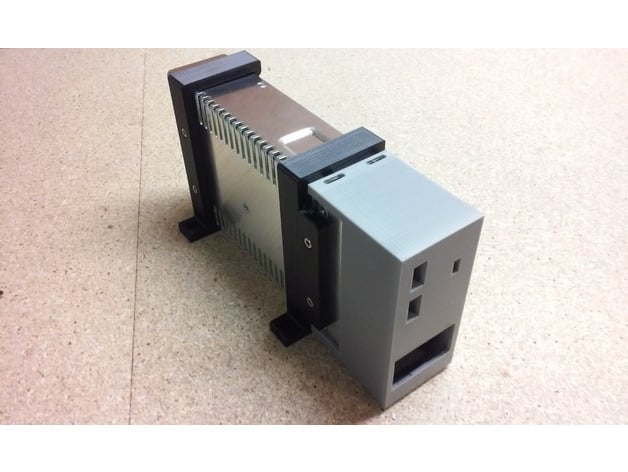
Power Supply (PSU) Bracket Customizations
thingiverse
This project kicked off with a complete overhaul of my MaxNC-15 CNC Milling Machine's electronics. I replaced the old system with a Protoneer RPi-CNC and Raspberry Pi to drive it, along with new stepper motors and a more powerful power supply. To house these components, I created a custom mount from a 1x8 piece of plywood that bolts directly to the back of the CNC machine in place of the original electronics box. I needed a way to attach my 36V power supply to the plywood securely, which led me to design these brackets. The original power supply bracket was too narrow by about 1mm and used clips for mounting, but I wanted to add more stability with M4 screws. So, I remixed the design to increase the internal distance by 1mm and added screw holes that could attach directly to the power supply. I also needed to accommodate a terminal cover that I had already printed for the power supply. To achieve this, I created an OpenSCAD project that imported the original STL file and allowed me to easily modify features as needed. After printing the bracket successfully, I decided to rotate the power supply 90 degrees on my wood panel to save space. To accommodate this change, I added customizations to the OpenSCAD code to rotate the base and move the mounting holes accordingly. As a result, there are now multiple directly renderable configurations available in the OpenSCAD code. By changing the 'RenderType' variable (0, 1, 2, or 3), you can switch between different designs. You can also modify the 'RemoveClips' boolean to remove the clips on the normal base configuration if desired. Additionally, you can adjust the 'OffsetInside' boolean to change the offset side from inside to outside for the side-mount configuration. The 'ExtraClipDist' variable allows you to add or remove extra distance between the clips, and the 'ExtraThickness' variable enables you to modify the base thickness for counter-boring of the mounting holes. However, I have not added customizations for clip height or countersunk screws yet, but it is easy to tweak the OpenSCAD code to include these features. The terminal cover used in the pictures is an unmodified print from https://www.thingiverse.com/thing:526278, and the 36V 10A (360W) power supply was obtained from stepperonline on eBay. For printing these brackets, I used ABS at 35% infill (there's minimal difference between 25%, 30%, and 35% infill). Supports were added inside the holes to improve their quality, which can be removed by pushing a screw through them after printing. However, it is possible to print without supports. Note that I didn't enable the online 'Customizer' app for this project because it doesn't work correctly with importing and modifying an existing STL file in OpenSCAD code. To customize this design, you'll need to download the files and run them on a locally installed copy of OpenSCAD. UPDATE (13 Nov 2017): I added V2 of PSU Bracket OpenSCAD that allows for easy modification of clip length via the new 'ExtraClipLength' variable. See the discussion in the comments tab for more information. Print Settings: Printer: FlashForge Creator Pro Rafts: No Supports: Yes Resolution: 0.2 Infill: 35%
With this file you will be able to print Power Supply (PSU) Bracket Customizations with your 3D printer. Click on the button and save the file on your computer to work, edit or customize your design. You can also find more 3D designs for printers on Power Supply (PSU) Bracket Customizations.
