Power-Handle
prusaprinters
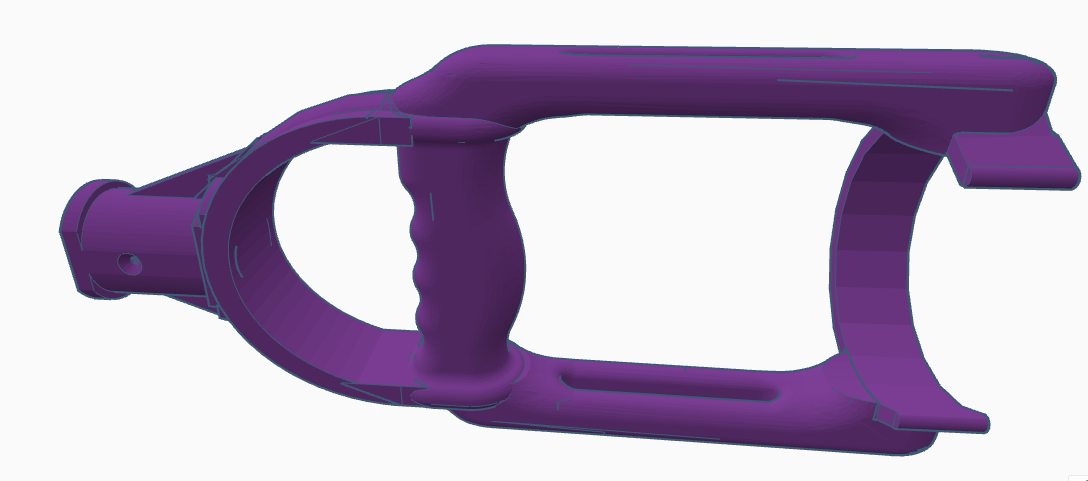
<p>My 1st remix. I call it the POWER-HANDLE. For when a little extra leverage is required. <br><br><strong>Dimensions </strong><br>Length- 280.53mm<br>Width- 190.11mm<br>Height- 131.86mm<br><br>Snuggly fits my average sized hands. For use with large hands may want to scale up a tad. <br><br><br><strong>My Print Settings (Ender5+)</strong><br>Printer: Stock Ender 5 plus<br>Slicer: Cura 4.13<br>Layer Height: .2mm<br>Wall Thickness: 2mm<br>Top/Bottom Layers: 1mm<br>Infill: 33%<br>Infill Pattern: Gyroid<br>Material: PLA<br>Material Brand: COEX<br>Nozzle Temp: 222c<br>Support: Required<br>Build Plate Adhesion: Brim<br>Print Time: 1 day 9 hours<br><br><strong>Other Notes</strong><br><br>Could be printed lighter, thinner, with less infill, But I didn't want to take any chances. I want this to be semi-functional. Layer height could be thicker, but I like the finish my printer makes at .2mm.<br>You will need to align the one arm bracket with the build plate. Even tho they look the same I discovered only one arm bracket has a true flat surface that will give you good bed adhesion. I liked using a nice sized brim to insure good adhesion and stability. <br>One small problem I had that only really occurs with in the first cm or two of the print is curling. Enough so that the nozzle would grab and drag the build tray, causing massive layer shift. You can baby sit the print and trim some of that curling plastic while it's printing, or by using printer settings to avoid the nozzle from traveling over the print, or by using a Z hop setting to give the nozzle clearance while traveling.</p>
With this file you will be able to print Power-Handle with your 3D printer. Click on the button and save the file on your computer to work, edit or customize your design. You can also find more 3D designs for printers on Power-Handle.